Articles

How to transform your images into a Halloween party atmosphere. | 🎃 Halloween 2024

How to transform your images into a Halloween party atmosphere. | 🎃 Halloween 2024

INSTRUCTIONS:This is a very simple workflow, just upload your image and press RUN.PROMPT basically does not need to be modified, but you can still add more Halloween elements to make the theme richer.Hope you all have a good time.PROMPT:(masterpiece), ((halloween elements)),a person, halloween striped thighhighs, witch hat, grin, (ghost), sweets, candy, candy cane, cookie, string of flags, halloween costume, jack-o'-lantern bucket, halloween, pumpkins,black cat,halloween,little ghost,magic robe,autumn leaves,candle,skull, 3d cg.Negative PROMPT:None.Below is the workflow link:https://tensor.art/workflows/786144487641608308Below is the AI-tool link:https://tensor.art/template/786150277257599620model used:CKPThttps://tensor.art/models/757279507095956705/FLUX.1-dev-fp8
124
45
halloween2024 Alien Pumpkin

halloween2024 Alien Pumpkin

PROMPT:photography of Alien incubator, seen from above,lots Halloween pumpkin With facial features, A close-up shot of a Halloween pumpkin With facial features, (An top open Halloween pumpkin,There's a real brain inside, bloody, a chestburster Out of the pumpkin, facehugger jump Out of the pumpkin),The word "halloween" scrawled in blood on floor,Cold interior lighting,direct sunlight on Halloween pumpkin,dramatic light and shadow, Horrifying movie scenes,Negative PROMPT:low quality, low resolution, unrealistic, semi-realistic, animation, drawing, 2D, painting, lack detail, flat background, bad lighting, bad composition,Below is the workflow link:https://tensor.art/workflow/editor/786104965352589871Below is the AI-tool link:https://tensor.art/template/786112649048914425model used:CKPThttps://tensor.art/models/757279507095956705/FLUX.1-dev-fp8LORAhttps://tensor.art/models/768181864964856710/FLUX-Cinematic-V1https://tensor.art/models/782762523020600332https://tensor.art/models/783607553541144419
92
38
Hunyuan-DiT: Recommendations

Hunyuan-DiT: Recommendations

ReviewHello everyone; I want to share some of my impressions about the Chinese model, Hunyuan-DiT from tencent. First of all let’s start with some mandatory data to know so we (westerns) can figure out what is meant for:Hunyuan-DiT works well as multi-modal dialogue with users (mainly Chinese and English language), the better explained your prompt the better your generation will be, is not necessary to introduce only keywords, despite it understands them quite well. In terms of rating HYDiT 1.2 is located between SDXL and SD3; is not as powerful than SD3, defeats SDXL almost in everything; for me is how SDXL should’ve be in first place; one of the best parts is that Hunyuan-DiT is compatible with almost all SDXL node suit.Hunyuan-DiT-v1.2, was trained with 1.5B parameters.mT5, was trained with 1.6B parameters.Recommeded VAE: sdxl-vae-fp16-fixRecommended Sampler: ddpm, ddim, or dpmmsPrompt as you’d like to do in SD1.5, don’t be shy and go further in term of length; HunyuanDiT combines two text encoders, a bilingual CLIP and a multilingual T5 encoder to improve language understanding and increase the context length; they divide your prompt on meaningful IDs and then process your entire prompt, their limit is 100 IDs or to 256 tokens. T5 works well on a variety of tasks out-of-the-box by prepending a different prefix to the input corresponding to each task.To improve your prompt, place your resumed prompt in the CLIP:TextEncoder node box (if you disabled t5), or place your extended prompt in the T5:TextEncoder node box (if you enabled t5).You can use the "simple" text encode node to only use one prompt, or you can use the regular one to pass different text to CLIP/T5.The worst is the model only benefits from moderated (high for TensorArt) step values: 40 steps are the basis in most cases.Comfyui (Comfyflow) (Example)TensorArt added all the elements to build a good flow for us; you should try it too.AdditionalWhat can we do in the Open-Source plan? (link)Official info for LoRA training (link)ReferencesAnalysis of HunYuan-DiT | https://arxiv.org/html/2405.08748v1Learn more of T5 | https://huggingface.co/docs/transformers/en/model_doc/t5How CLIP and T5 work together | https://arxiv.org/pdf/2205.11487
66
14
ComfyUI-AnimateDiff -DW Pose-Face Swap- ReActor  -Face Restore-Upscayl- Video Generation Workflows

ComfyUI-AnimateDiff -DW Pose-Face Swap- ReActor -Face Restore-Upscayl- Video Generation Workflows

Video Generation Workflows 30 nodesDownloda Workflows.json 👈👈My video Gallery link 🎥🎬👉 ffmpeg path👈WAS Node Suite: `ffmpeg_bin_path` is set to: C:fmpeg.exeLocationComfyUI\custom_nodes\was-node-suite-comfyui.jsonOpen was-node-suite-comfyui.json 👈Set "ffmpeg_bin_path": "C:\ffmpeg.exe"if your ffmpeg.exe in C:\Download https://ffmpeg.org/ffmpeg-release-full.7z 👈
63
9
The Trials and Tribulations of a Halloween2024 Face Swap through Facepaint work in FLUX1D

The Trials and Tribulations of a Halloween2024 Face Swap through Facepaint work in FLUX1D

So I set out with what I thought was a simple idea:“Start with an image of someone’s face and turn that into a spooky Halloween character, with costume, makeup and full Facepaint with a spooky background.”BUT it had to look enough like them at the end - that they would be pleased with the result…The starting point was easy - I wanted to train a Halloween LoRA on lots of images of people wearing Halloween Facepaint - so I did that…A couple of the 48 images i used to train with:So I had a Flux LoRA - now I tested that in Tensor.Art with simple “Man in Halloween Facepaint”, “Woman in Halloween Facepaint”So far so good, I thought ok, this is going to be easy peasy!At this point (End of September 2024) there were limited options in TA for Flux Face swap… (No Pulid available then) so I started trying with Facedetailer…I built out the workflow - made a separate flow for the background - and was all excited…But no matter what i tried (and I tried a lot!) the facedetailer would wipe out the Facepaint from the Lora - restoring the face back to the original person, nice and clean, or with a half hearted smear of greasepaint.Or it would look nothing at all like the person and the makeup would look like it was a badly stuck on mask…So i went back to my Discord buddies and we talked about the options - and decided to try Reactor nodes with insightface…It would generate a Florence description of the original reference face (cropped) - build a dummy Halloween Image with a lookielikie from the description and with Facepaint - and then reactor the ref face back over the top (or so i thought)But the Reactor’d one cleaned up the face and removed 90% of the makeup and it didn’t want to do the costume or background at all the way I had envisaged… as soon as I gave it enough freedom to be creative, the reference person was lost completely…I think by now people in all my discord groups were sick of me asking for ideas on how to do this - I tried every setting and balance on reactor nodes.Could I use an llm to rewrite the visual description of the face to include the Halloween description first, and so on.I looked at IPAdapter and using Depth maps - but although they captured the shape of the face - they couldn’t preserve the familiar features through costume stylemakeup.At this point - I pretty much gave up in disgust… I put out a final round of help requests on various discord’s and went onto another projectA few days later my good friend told me “ hey - finally they released Pulid for Flux on TA!” - and I already had built Flux Pulid workflows for face swapping the previous week on my MimicPC Cloud version of Comfyui (where you can load any kind of node and model you want and really design and play with freedom) so I started to regain my enthusiasm…I managed to merge some of the earlier ideas for generating the Halloween style with LLM’s and a Joycaption of the cropped reference face - and the Flux Pulid face swaps - and experimented with the positioning of the LoRA to get maximum effect - and was finally able to release a workflow and AI Tool that did what i had seen in my head those few weeks back when I started… https://tensor.art/template/785795972520313546And the workflow - https://tensor.art/workflows/785793305345589081And the LoRA - https://tensor.art/models/785804669831296337If you have enjoyed my article - please like and use my AI Tools and Models…I welcome comments and constructive feedback.
55
16
🎃 Halloween2024 | Optimizing Sampling Schedules in Diffusion Models

🎃 Halloween2024 | Optimizing Sampling Schedules in Diffusion Models

You migh have seen this kind of images in the past if you've girly tastes when navigate on pinterest, well guess what? I'll teach you about some parammeters to enhance your Pony SDXL future generations. It's been a while since my last post, today I'll teach you about a cool feature launched by NVIDIA on July 22, 2024. For this task I'll provide an alternative workflow (Diffusion Workflow) for SDXL. Now lets go with the content.ModelsFor my research (AI Tool) I decided to use the next models:Checklpoint model: https://tensor.art/models/757869889005411012/Anime-Confetti-Comrade-Mix-v30.60 LoRA: https://tensor.art/models/7025156632998356040.80 LoRA: https://tensor.art/models/757240925404735859/Sailor-Moon-Vixon's-Anime-Style-Freckledvixon-1.00.75 LoRA: https://tensor.art/models/685518158427095353NodesThe Diffusion Workflow has many nodes I've merged in single nodes I'll explain them below, remember you can group nodes and edit their values to enhance your experience.👑 Super Prompt Styler // Advanced Manager (CLIP G) text_positive_g: positive prompt, subject of the scene (all the elements the scene is meant for, LoRA Keyword activators).(CLIP L) text_positive_l: positive prompt, all the scene itself is meant (composition, lighting, style, scores, ratings).text:negative: negative prompt.◀Style▶: artistic styler, select the direction for your prompt, select 'misc Gothic' for halloween direction.◀Negative Prompt▶: prepares the negative prompt splitting it in two (CLIP G and CLIP L) for the encoder.◀Log Prompt▶: add information to metadata, produces error 1406 when enabled, so turn it off.◀Resolution▶: select the resolution of your generation.👑 Super KSampler // NVIDIA Aligned Stepsbase_seed: similar to esnd (know more here).similarity: this parameter influences base_seed noise to be similar to noise_seed value.noise_seed: the exact same noise seed you know.control after generate: dictates the behavior of noise_seed.cfg: guidance for the prompt, read about <DynamicThresholdingFull> to know the correct value. I recomend 12sampler_name: sampling method.model_type: NVIDIA sampler for SDXL and SD models.steps: the exact same steps you know, dictates how much the sampling denoises the noise injected.denoise: the exact same denoise you know, dictates the strong the sampling denoises the noise injected.latent_offset: select between {-1.00 Darker to 1.00 Brighter} to modify the input latent, any value different than 0 adds information to enhance final result.factor_positive: upscale factor for the conditioning.factor_negative: upscale factor for the conditioning.vae_name: the exact same vae you know, dictates how the noise injected is denoised by the sampler.👑 Super Iterative Upscale // Latent/on Pixel Spacemodel_type: NVIDIA sampler for SDXL and SD models.steps: number of steps the UPSCALER (Pixel KSampler) will use to correct the latent on pixel space while upscaling it.denoise: dictates the strenght of the correction on the latent on pixel space.cfg: guidance for the prompt, read about <DynamicThresholdingFull> to know the correct value. I recomend 12upscale_factor: number of times the upscaler will upscale the latent (must match factor_positive and factor_positive) upscale_steps: dictates the number of steps the UPSCALER (Pixel KSampler) will use to upscale the latent.MiscellaneousDynamicThresholdingFullmimic_scale: 4.5 (Important value. go to learn more)threshold_percentile: 0.98mimic_mode: half cosine downmimic_scale_min: 3.00cfg_mode: half cosine downcfg_scale_min: 0.00sched_val: 3.00separate_feature_channels: enablescaling_starpoint: meanvariability_measure: ADinterpolate_phi: 0.85Learn more: https://www.youtube.com/watch?v=_l0WHqKEKk8Latent OffsetLearn more: https://github.com/spacepxl/ComfyUI-Image-Filters?tab=readme-ov-file#offset-latent-imageAlign Your StepsLearn more: https://research.nvidia.com/labs/toronto-ai/AlignYourSteps/LayerColor: Levelsset black_point = 0 (base level of black)set white_point = 255 (base level of white)Set output_black_point = 20 (makes blacks less blacks)Set output_white_point = 220 (makes whites less whites)Learn more: https://docs.getsalt.ai/md/ComfyUI_LayerStyle/Nodes/LayerColor%3A%20Levels/LayerFilter:Filmcenter_x: 0.50center_y: 0.50saturation: 1.75vignete_intensity: 0.20grain_power: 0.50grain_scale: 1.00grain_sat: 0.00grain_shadows: 0.05grain_highs: 0.00blur_strenght: 0.00blur_focus_spread: 0.1 focal_depth: 1.00Learn more: https://docs.getsalt.ai/md/ComfyUI_LayerStyle/Nodes/LayerFilter%3A%20Film/?h=filmResultAi Tool: https://tensor.art/template/785834262153721417DownloadsPony Diffusion Workflow: https://tensor.art/workflows/785821634949973948
39
12
ControlNet Dw_openpose ComfyUi

ControlNet Dw_openpose ComfyUi

Installationwas-node-suite-comfyuiNavigate to your /ComfyUI/custom_nodes/ folderRun powershell git clone https://github.com/WASasquatch/was-node-suite-comfyui/安裝步驟👉 ffmpeg path👈WAS Node Suite: `ffmpeg_bin_path` is set to: C:fmpeg.exeLocationComfyUI\custom_nodes\was-node-suite-comfyui.jsonpathif your ffmpeg.exe in C:\Open was-node-suite-comfyui.json 👈"ffmpeg_bin_path": "C:\ffmpeg.exe" 👈 Change blue textDownloadhttps://ffmpeg.org/ffmpeg-release-full.7z 👈FFMPEG 安裝(windows)FFmpeg 是開放原始碼的自由軟體,可以錄影、轉檔、串流安裝步驟1Download .進入FFMPEG官網2.點選Download3.選擇windows4.點選第一個連結,到新網站後,找到release builds,並下載其中的ffmpeg-release-full.7z點選第一個連結到新網站後找到release builds並下載其中的ffmpeg-release-full.7z5.下載後為壓縮檔,在C槽Program Files裡建立新資料夾,取名為FFMPEG6.將以下檔案解壓縮至剛才創立的FFMPEG資料夾7.點開bin資料夾8.複製此資料夾的位置路徑9.用左下的搜尋工具搜尋,找到"編輯系統環境變數"10.按下"環境變數"11.找到"系統變數(S)"欄 的 "PATH" ,並按下"編輯"12.點選"新增"13.將先前複製的資料夾路徑位置貼上14.接著都按確定接著我們來確認有沒有安裝成功1.一樣用左下角的搜尋工具搜尋CMD2.輸入ffmpeg -version後按ENTERCMD fmpeg -version(注意ffmpeg -version,g跟-中間有空一格。)3.如果有出現以下畫面就是有成功
24
1
ComfyUI  Illustrious Workflow & Tutorial for Beginners

ComfyUI Illustrious Workflow & Tutorial for Beginners

Hi~I'm ConndyThis is a comfyUI workflow and tutorial for beginners,I have simplified all the settings and processes so that you can use them directly after putting them in.Workflow Download LinkThis is the overall interface diagram.It looks exaggerated, but if you have generated images on tensor and read the following introduction, you will understand that it is not difficult.About Batch size,Here, this is the number of images generated at a time.If the batch size is 1 and the number of generations is 2, it means "generate 1 image at a time, repeat 2 times."If the batch size is 2 and the number of generations is 1, it means "generate 2 images at a time, repeat 1 time."Number of generations is thisOK,next!Once you understand the functions of each part, it will be easy to use it.You understand, right?!Reference Workflow,Thanks for sharing!💖https://civitai.com/models/1386234/comfyui-image-workflowshttps://civitai.com/models/1756458/very-awa-text2img-workflownoobai-vpredillustrioushttps://civitai.com/models/1583542/wai-nsfw-v13-workflow
22
4
  ComfyUI - FreeU:您需要這個!升級任何模型  ComfyUI - FreeU: You NEED This! Upgrade any model

ComfyUI - FreeU:您需要這個!升級任何模型 ComfyUI - FreeU: You NEED This! Upgrade any model

FreeU WORKFLOWSComfyUI-FreeU (YouTube)說明
22
1
Comprehensive Prompt Collection for Beginners

Comprehensive Prompt Collection for Beginners

Comprehensive Prompt Collection for BeginnersIntroductionWelcome to the world of prompt engineering! This guide is designed for beginners eager to explore how well-crafted prompts can elevate the quality of AI-generated content, whether it’s art, writing, or interactive experiences. With a solid understanding of prompts, you can shape your results to reflect your unique vision and style.Chapter 1: Basics of Prompt CraftingWhat is a Prompt?In AI generation, a prompt is the initial input or instruction you give to guide the output. Think of it as a creative command that sets the stage for what the AI will produce.Types of PromptsSimple vs. Complex Prompts: Simple prompts use straightforward phrases, while complex prompts contain detailed descriptions and specific instructions.Descriptive vs. Instructional Prompts: Descriptive prompts focus on imagery or emotions, while instructional prompts give step-by-step directions to the AI.Chapter 2: Building Blocks of Effective PromptsKey ElementsTo craft an effective prompt, focus on clarity, detail, and specificity. The more descriptive you are, the closer the AI output will align with your vision. Include keywords, adjectives, and context to set the scene.Common PitfallsBeginners often make prompts too vague or overly complex. Aim for balance—too little detail leaves the AI with too much freedom, while too much detail can lead to confusing results. Try to avoid ambiguous language and keep your instructions clear.Chapter 3: Style and Tone ControlAdapting StylePrompts can be tweaked to create specific styles. For example, adding words like "realistic," "abstract," or "surreal" helps guide the AI toward the desired aesthetic.Tone and MoodSet the mood through descriptive words. For instance, using "bright and cheerful" creates a different feel than "dark and moody." Adjusting the tone allows you to shape the emotional atmosphere of the result.Chapter 4: Introduction to Negative PromptsPurpose of Negative PromptsNegative prompts instruct the AI on what to avoid, helping prevent unwanted elements in your output. They’re especially useful for removing artifacts or controlling minor details that don’t fit your vision.How to Use Negative PromptsAdd specific words you wish to exclude. For example, if you don’t want "blurry" or "overexposed" images, including these as negative prompts can refine your results by telling the AI what not to include.Chapter 5: Advanced Techniques and WeightingUsing Parentheses and BracketsUse parentheses to emphasize certain parts of your prompt. For instance, "A (highly detailed) landscape" gives priority to detail in the final output. Brackets can de-emphasize certain elements, helping you refine the result’s focus.Experimenting with Prompt VariationsTest different versions of prompts to see how small changes impact the outcome. This experimentation will deepen your understanding and help you gain better control over the AI’s responses.ConclusionFinal TipsRemember, prompt crafting is an art that improves with practice. Keep your prompts balanced, experiment with different techniques, and avoid common pitfalls by being clear and specific.Next StepsNow that you have the basics, start practicing! As you become comfortable, explore more advanced prompt engineering techniques and challenge yourself to push the boundaries of AI creativity. Happy prompting!
13
3
Halloween2024 - ComfyUI experiences

Halloween2024 - ComfyUI experiences

Hello everyone.I have been working more intensively with various AI tools in the last few days and weeks. In this article I would like to briefly share my opinion on the "workflows" that you can create with ComfyUI.First of all, my computer is not the "more expensive, faster, better" type. It is a Ryzen 5 with a GForce 3060 Ti. So it is not bad, but by far not the best for training LoRAs, checkpoints or other AI things. It simply takes longer than with a Ryzen 9 and a GForce 4090 ;)But back to ComfyUI and the workflows.Since I have only been working with it for a few days, before that I used A1111 (Stable Diffusion), I am of course far from someone who can give you tips if you have problems. But one thing is certain: ComfyUI is definitely extremely faster than A1111 when creating images.With my current setup, I need over 2 minutes per XL image and almost 5 minutes for FLUX-based images with A1111. Anyone who can do a bit of math knows that this is really incredibly slow...ComfyUI, on the other hand, even with my setup, needs less than 20 seconds for an XL image and almost 60 seconds for a FLUX-based image. Of course, that depends on the workflow.The problem with ComfyUI, in my opinion, is that it is not at all beginner-friendly. There is a "standard" workflow, but that is not enough. After all, we want to integrate or test various checkpoints, LoRAs or other things.So you start and look at the different options... and then... then you don't know what to do next. So without looking at various documentation or examples, you will have an extremely difficult time understanding this tool.If we take the "fresh" installation of ComfyUI, after a long browse you will find that the things you actually want are "not" there. This includes things like using placeholders or a "better" way to save the files you create.This brings us to the possible extensions. Like in so many other communities, there are a huge number here. Unfortunately, this also makes things very confusing. Again, you have to look closely at what you want, need or expect, but even then it doesn't mean that the extension does what you want.The worst thing about ComfyUI in my opinion is the confusing menu and it gets worse with every extension. If you just look at the "Workflow" tool here in Tensort.Art, you immediately understand what I mean.Still. ComfyUI is a very good and powerful tool. Most importantly, it is much faster than the other tools I have tried so far. I also really like the flexibility of the tool. However, it could have a "better" menu to make it more user-friendly.If you haven't done it before: It's worth to check it out.
13
6
Controlnet with SD3

Controlnet with SD3

Today, I noticed that I can add ControlNet to the SD3 model.The Tiled function works very well, so I incorporated it into my workflow and created a group for generating artistic images based on a given photo or a previously generated image. In the main part of the workflow, I simply set a very short prompt, like "grass, flowers," and I get an image that blends grass and flowers in an arrangement resembling the base photo.https://youtu.be/sv35wKNiFGsControlnet with SD3 | ComfyUI Workflow | Tensor.Art
13
How It Started

How It Started

Just curious. I'm sure most people have a similar thought process. Where you start a prompt project to get something out, and by the end it's not even close to what you started with. Not because it isn't what you wanted but you started making so many changes, it's almost like it's a completely different prompt. Thoughts?
12
13
ComfyUI, Workflows and AI Tools - Christmas Walkthrough Article: AI Tool

ComfyUI, Workflows and AI Tools - Christmas Walkthrough Article: AI Tool

ComfyUI, Workflows and AI ToolsWhat is ComfyUI?ComfyUI is an open source user interface specifically designed for creating, customizing and managing workflows in AI-assisted media generation. The platform provides a modular environment in which you can link different steps of image or video creation together, similar to a visual programming tool. The intuitive drag-and-drop function makes it easy to visualize and customize complex processes.Application areas of ComfyUI workflowsImage generation and style transfersComfyUI enables users to create images of the highest quality, be it through stable diffusion, GANs or other AI models. Workflows can be configured to automate specific styles, colors or compositions. This is especially useful for artists, designers or content creators who want to achieve consistent results in their work.Video generation and editingComfyUI workflows also support the generation of video content. Using frame-by-frame style transfers or AI models for motion prediction, seamless animations or visual effects can be created. These tools open up new possibilities in film production, advertising or even video game creation.Personalized contentCompanies use ComfyUI to create personalized visual content, be it for marketing campaigns or interactive media. The ability to individually train AI models and optimize workflows ensures unique and engaging results.Benefits of ComfyUI-based toolsFlexibility: Workflows can be adapted to specific needs, from simple image editing to complex video projects.Modularity: Each element of a workflow is individually customizable, which allows iterations to be implemented quickly.Open source: As an open source project, ComfyUI allows the integration of other AI models and provides a platform for innovation and community contributions.Cost efficiency: Access to ComfyUI is free, which also enables smaller companies and individuals to generate high-quality media content.Challenges and development perspectivesDespite the many advantages, there are also challenges: Getting started with configuring workflows can be very complex for newbies. Furthermore, working with powerful AI models requires a certain amount of hardware power, which is still a hurdle for many users. This is where AI tools come into play. Here at Tensort.art, we can not only create these workflows, but also "convert" them into "user-friendly AI tools". The tool works with the created workflow and the user himself only has to enter the "necessary" inputs for the respective workflow to be able to use this workflow. Thanks to these AI tools, a user neither needs to be able to create nor understand a workflow.Conclusion: A tool for the creativity of the futureAI tools based on ComfyUI workflows are changing the way images and videos are created. They combine technical precision with creative freedom and offer both professional users and hobbyists new ways to implement their ideas. As the technology becomes more refined, ComfyUI will play a central role in creative media production.
5
7
Instagram model beautiful girls

Instagram model beautiful girls

A realistic face full-body portrait of a 20-year-old fair-complexioned Indian woman with a dramatic hourglass physique, standing outdoors against a scenic background of greenery and soft sunlight. She’s dressed casually in a fitted t-shirt and comfortable, flowing palazzo pants. Her long black curvy hair falls freely around her shoulders as she smiles softly. Her heart-shaped face features light freckles, a sharp jawline, and a dimpled chin. Her bright blue eyes sparkle as she looks off to the side, standing in a relaxed, confident pose that highlights her natural beauty and effortless charm.SamplerEulerSteps25CFG Scale7Seed390034
3
About my thanks to everyone~

About my thanks to everyone~

https://tensor.art/images/878532592842875096?post_id=878532592842875097This work has amassed over 1,000 likes. Thank you to everyone who liked it. Thank you all so much.
6
4
Halloween2024🎃 my tips on how to make your halloween art more appealing. a little instruction. 🎃

Halloween2024🎃 my tips on how to make your halloween art more appealing. a little instruction. 🎃

1. Clearly Describe the Main Object of the SceneSpecify who or what is the focus. It could be a classic Halloween character: a witch, ghost, vampire, or a carved pumpkin (Jack-o'-lantern).Make the description of the object’s appearance detailed: “a witch in a black cloak with a pointed hat, long silver hair, and a broomstick in her hand.”If the character is doing something, mention it: “a skeleton dancing against a graveyard backdrop.”2. Detail the BackgroundThe background can include classic Halloween elements: a dark graveyard, haunted house, foggy forest, or full moon.You can add stylistic elements: gothic style, dark and mystical atmosphere.3. Use SpecificityThe more details, the better: “a pumpkin with glowing eyes and a toothy grin, sitting on an old wooden table surrounded by black candles.”4. Add Emotions and AtmosphereThe atmosphere can be spooky, mysterious, or fun: “a dark, eerie atmosphere in an old abandoned house,” or “a fun Halloween party with bright lights and costumes.”5. Specify Lighting and Color PaletteHalloween lighting is often dim and mystical: “the full moon lighting up the forest,” “flickering candlelight.”The color palette can include typical Halloween colors: black, orange, purple, and dark green.6. Style and Artistic TechniqueMention the artistic style if needed: “cartoon style,” “realistic dark graphics,” or “gothic art.”7. Avoid Vague DescriptionsAvoid words like “scary” or “creepy,” instead describe what makes the scene that way: “ancient graves covered in thick fog, with a lone raven perched on a cross.”8. Clarify the Number of ObjectsIf the scene includes multiple objects, clarify: “three carved pumpkins with candles inside sitting on the steps of an old house.”Example of a Good Prompt:“A Jack-o'-lantern with a sinister carved face, glowing from within, sits on a moss-covered tombstone. Around it is an old graveyard with tilted crosses, and thick fog swirls in the air. In the background, there’s a large full moon lighting up the night sky. The scene is eerie and mysterious, and in the distance, the silhouette of an old house with broken windows can be seen.”BONUSA dark-haired witch with a large, pointed black hat stands at the center, holding a glowing carved pumpkin with a classic jack-o'-lantern face. Her long, wavy black hair flows past her shoulders, partially covering a gothic-style dress with intricate lace details around the collar and sleeves. Her eyes are glowing orange, matching the glow of the pumpkin. Two small ghostly spirits float near her, one on each side of the pumpkin, their expressions eerie and playful. The background is a glowing green, with a large full moon casting an ominous light, surrounded by swirling wisps of fog. The scene has a dark, magical atmosphere with vibrant contrasts between the green background and the orange glow from the pumpkin. drkfnts style,
2
ai manga 1page...

ai manga 1page...

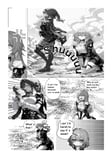
The first page of my AI manga is finished. It's been 11 days since I started, so it's a bit rough.Please comment if you think it works as a manga.I've only used nanobanana about 10 times so far. I'm always using manga apps, so it's a struggle.This is the story of the protagonist from honkai: star rail, who gets into some kind of trouble and ends up in the world of Genshin Impact, where she meets Yolan. Kafka follows her, and they end up fighting over the protagonist.I like older women characters, so this is a completely explicit depiction of my fetish.I made it a woman because I wanted to minimize the stress of creating it.I also completely underestimated the manga. It was fun, but I regret it.This is my current level of skill.I appreciate any comments you might have.Tensor people don't read the article very often, so if there's no response, I'll delete it.
2
1
ちびキャラSTYLEについて

ちびキャラSTYLEについて

小さいモデルと大きなモデルが両方出てしまうときの対処法のオススメなぜ「小さいモデル+大きいモデル」が同時に出るの?① 「chibi(チビ)」がサイズじゃなく“作風”として解釈される。生成AIはchibi = デフォルメされた可愛いキャラsmall / tiny = 物理的に小さいと別物として理解することが多い。👉 だから「チビキャラ」=頭が大きい可愛いキャラ「通常サイズの人物」この両方を同時に描こうとすることがある。② 人物指定が曖昧だと「複数人」と解釈されるプロンプトにa girlcharactermodelみたいな単数指定が弱いと、「通常キャラ1人 + chibiキャラ1人」という共存構図を作ることがある。③ 「style」と「subject」が分離されてしまう例えば👇chibi style, cute character, full bodyこの場合AIは主役:通常キャラ付加要素:chibiスタイルの別キャラと分けて解釈することがある。防ぐための超重要ポイント ✅🔹 1. 物理サイズを明示する。2. 人数を明確に。3. 通常サイズを否定する。4. 「style」じゃなく「form」として指定。安定する黄金フレーズ(例)One single chibi character only, super deformed proportions, very small body with an oversized head, no normal-sized humans, no realistic anatomy.補足:それでも出る場合モデルやLoRAによってはchibi LoRA + 通常人物ベースが同時に働くこともある。その場合はネガティブにnormal body, realistic human, adult proportionsor 「illustration, cartoon」強調が効く。
2
Java Jokes: Brewing Up Some Code and Coffee Laughs

Java Jokes: Brewing Up Some Code and Coffee Laughs

If you’ve ever spent time coding in Java or just love your morning cup of java (aka coffee), you know these two worlds share one thing: they’re serious business... but hey, that doesn’t mean they can’t be funny!Java jokes are a favorite among programmers and coffee lovers alike, combining clever wordplay, geeky references, and lots of laughs. In this post, we’ll explore why Java jokes hit the mark, how they can brighten your day, where to use them, and, of course, we’ll serve up some of the best Java jokes you can find.Why Are Java Jokes So Popular?Java jokes have carved out their own little corner in the humor world for several reasons:They Speak to Both Coders and Coffee Fans: Java is both a programming language and a slang term for coffee. This double meaning gives jokes a fun twist that appeals to a wide crowd.The Programmer Culture: Developers love a good laugh about the quirks, challenges, and inside jokes of coding. Java, being one of the most popular programming languages, naturally inspires tons of humor.Puns and Wordplay: Jokes around Java often play with coding terms, coffee culture, or both, making them clever and witty. People enjoy jokes that make them feel “in the know.”Lightens Up the Mood: Coding and early mornings with coffee can sometimes be stressful or tiring. A Java joke is like a tiny break—a shot of humor that refreshes your mind.How Java Jokes Can Improve Your DayBelieve it or not, sharing a quick Java joke can do more than just make you smile. Here’s how:Reduce Stress: Laughter lowers stress hormones and lifts your mood. A silly Java joke can give you a mental break from debugging or morning grumpiness.Create Connection: Sharing jokes with fellow programmers or coffee lovers creates bonds. It’s a way to say, “Hey, I get you!” without any complicated talk.Boost Creativity: Humor encourages creative thinking. Sometimes a joke sparks a fresh perspective or helps you think outside the box.Make Learning Fun: For new coders, jokes about Java can make learning the language more enjoyable and less intimidating.Where to Use Java Jokes for Maximum FunJava jokes are versatile and can fit in lots of places. Here are some perfect spots to drop them:At Work: Whether you’re coding, in meetings, or taking a coffee break, a well-timed Java joke can lighten the atmosphere.Online Forums & Chats: Developer communities love humor. Posting Java jokes in Slack channels, Discord servers, or forums is a sure way to brighten people’s day.Classrooms & Workshops: If you’re teaching programming or coffee appreciation, jokes help keep people engaged and make the learning process fun.Social Media: Share Java jokes on Twitter, Instagram, or Facebook. They’re perfect for relatable memes or posts that get likes and comments.Coffee Shops: Okay, maybe not out loud... but a coffee lover reading a Java joke on a napkin or sign would definitely appreciate it!Top Java Jokes to Make You LOLReady for a cup of laughter? Here are some classic Java jokes brewed just for you:Why do Java developers wear glasses?Because they don’t C#.How do you comfort a JavaScript bug?You console it.Why did the Java developer go broke?Because he used up all his cache!I told my Java program a joke...It didn't get it—it was too literal.What do you call a coffee that doesn’t run?Java static!Why don’t programmers like nature?It has too many bugs.What’s a Java developer’s favorite place to hang out?The JVM (Java Virtual Meetup)!Why did the programmer quit his job?Because he didn’t get arrays (a raise)!I tried to make a joke about Java, but...It got lost in the exception handling.Why is coffee the perfect programmer’s drink?Because it keeps you Java awake!FAQs About Java JokesQ: Do I have to know programming to get Java jokes?A: Not really! Some jokes are simple puns about coffee, while others reference programming. You can enjoy the coffee jokes even if you don’t code.Q: Can Java jokes be used professionally?A: Definitely! In the right setting, like at a tech company or coding workshop, Java jokes can be a great icebreaker or morale booster.Q: Are there jokes for other programming languages?A: For sure! Every language has its own set of jokes and memes—Python, C++, JavaScript, and more. But Java jokes remain popular because of that fun double meaning with coffee.Q: Can Java jokes help me learn programming?A: While they’re no substitute for studying, jokes can make learning more enjoyable and memorable.ConclusionJava jokes blend the best of two worlds: the rich culture of programming and the everyday love for coffee. Whether you’re a seasoned coder or just someone who can’t start the day without a cup of joe, these jokes add a little spark of joy. They ease the stress, build connections, and remind us that even the most serious tasks can use a little laughter. So go ahead, share a Java joke today, and watch your mood—and maybe someone else’s—perk right up!
You can possibly use workflowAI Tool on mobile if you turn on the desktop version

You can possibly use workflowAI Tool on mobile if you turn on the desktop version

I tried this once but it was actually too heavy for my cellphone to handle, but it didn't seem to be anything other than that
Building Advanced AI Tool with Pony Models

Building Advanced AI Tool with Pony Models

Artificial Intelligence (AI) continues to evolve, with novel models and frameworks pushing the boundaries of what machines can achieve. Among these innovations are Pony Models, a modular and flexible architecture designed to create powerful, efficient, and scalable AI tools. This article delves into the world of Pony Models, exploring their unique features, capabilities, and how they empower developers to build cutting-edge AI applications.What Are Pony Models?Pony Models represent a new approach to machine learning that emphasizes modularity, customization, and performance. Named for their versatility and adaptability, Pony Models provide a structured framework for designing AI tools across diverse domains, from natural language processing (NLP) to computer vision and beyond.The core philosophy of Pony Models is to make AI development more accessible and scalable while maintaining the high performance needed for modern applications. They are built on the foundation of advanced neural networks, optimized for efficiency, and capable of handling complex tasks with ease.Why Pony Models Stand OutPony Models bring a fresh perspective to AI tool development by combining the best practices of modular design and open-source collaboration. Here’s why they stand out:Modularity and Reusability:Pony Models are designed with a building-block approach, where components (e.g., encoders, decoders, attention mechanisms) can be reused or swapped to fit specific needs. This makes it easier for developers to experiment and innovate without starting from scratch.Ease of Integration:The architecture supports seamless integration with popular machine learning libraries like PyTorch, TensorFlow, and JAX. Developers can leverage existing ecosystems while incorporating Pony Models into their workflows.Scalability:Whether running on consumer hardware or large-scale cloud environments, Pony Models are optimized for scalability. They use efficient memory management and parallelization techniques to handle tasks ranging from small datasets to massive workloads.Interdisciplinary Applications:Pony Models excel across a wide range of fields, including:Text generation and summarizationImage recognition and synthesisPredictive analyticsAutonomous systems and roboticsCommunity and Extensibility:As an open-source initiative, Pony Models thrive on community-driven development. Developers can contribute new modules, share best practices, and collaborate on groundbreaking innovations.Building AI Tools with Pony ModelsStep 1: Define the TaskStart by identifying the problem you want to solve. Whether it's creating a chatbot, analyzing large datasets, or generating synthetic images, Pony Models provide the flexibility to adapt to your needs.Step 2: Choose the Right ModulesPony Models offer a library of prebuilt modules for tasks like:Text encoding (e.g., tokenization, embeddings)Vision processing (e.g., convolutional layers, transformers)Reinforcement learning (e.g., reward mechanisms, policy networks)Select and combine modules based on your project requirements.Step 3: Train and Fine-TuneOnce the architecture is defined, train the model using your dataset. Pony Models come with built-in support for distributed training and optimization techniques, ensuring efficient use of computational resources.Step 4: Deploy the ToolDeploy your AI tool using frameworks like Flask, FastAPI, or other deployment platforms. Pony Models are lightweight enough for edge devices yet powerful enough for cloud-based applications.Real-World ApplicationsHealthcare Diagnostics:Pony Models are used to build diagnostic tools that analyze medical images, predict patient outcomes, and provide personalized treatment recommendations.Content Generation:From generating realistic dialogue for video games to creating personalized marketing content, Pony Models excel in generating high-quality text and images.Finance and Risk Analysis:These models are leveraged to predict stock trends, assess credit risk, and detect fraudulent activities.Education and Research:Pony Models aid in creating intelligent tutoring systems, automating research workflows, and conducting large-scale data analysis.The Future of Pony ModelsThe modularity and adaptability of Pony Models make them a powerful framework for the ever-evolving AI landscape. As AI tools become more specialized, Pony Models provide a robust foundation for innovation, enabling developers to focus on solving problems rather than grappling with complex architectures.The collaborative nature of Pony Models ensures they will continue to grow, incorporating the latest advancements in AI research. With their flexibility, scalability, and ease of use, Pony Models are set to become a cornerstone of AI tool development.ConclusionPony Models are more than just a framework; they are a philosophy of modular, accessible, and powerful AI development. Whether you're an experienced developer or new to AI, Pony Models offer the tools and resources to bring your ideas to life. Dive into the world of Pony Models and unlock the full potential of AI in your projects.
AI Tool-  Harnessing the Power of AI Creativity with Stable Diffusion and ComfyUI

AI Tool- Harnessing the Power of AI Creativity with Stable Diffusion and ComfyUI

The world of artificial intelligence (AI) has seen tremendous growth in creative applications, from generating artwork to composing music. Among these, Stable Diffusion, a cutting-edge AI tool for image generation, has emerged as a game-changer. Combined with ComfyUI, an intuitive and powerful graphical user interface, this duo offers unparalleled creative potential for artists, designers, and enthusiasts alike. In this article, we’ll explore how Stable Diffusion and ComfyUI are transforming the way we think about and create digital art.What is Stable Diffusion?Stable Diffusion is an advanced deep-learning model designed to generate highly detailed and visually stunning images from textual prompts. It uses a diffusion-based approach, gradually refining noise into coherent visuals. Developed by Stability AI, it is open-source, allowing developers and researchers to adapt and expand its capabilities.Unlike earlier models, Stable Diffusion is lightweight enough to run on consumer-grade GPUs, making it accessible to a broader audience. Whether you’re crafting surreal landscapes, designing characters, or generating conceptual visuals, Stable Diffusion provides a platform for limitless imagination.The Role of ComfyUIWhile Stable Diffusion offers powerful generative capabilities, utilizing it effectively often requires technical expertise. Enter ComfyUI, a user-friendly interface that simplifies the process of working with Stable Diffusion. ComfyUI provides a visual, drag-and-drop environment where users can interact with the model's settings, prompts, and output options without needing to write code.Key Features of ComfyUI:Node-Based Workflow: ComfyUI uses a modular node system that allows users to visually construct workflows. Each node represents a specific function, such as text input, image generation, or post-processing.Customization: Users can easily tweak parameters like resolution, sampling steps, and artistic styles to fine-tune their creations.Preview and Iteration: Real-time previews help users quickly iterate and experiment with different settings.Extensibility: With a community-driven approach, ComfyUI supports plugins and extensions, enabling users to add new features and models.Why Choose Stable Diffusion with ComfyUI?Accessibility: ComfyUI removes the steep learning curve often associated with advanced AI tools. Artists and non-technical users can dive into AI-assisted creativity without extensive training.Customization: From abstract art to photorealistic imagery, the combination of Stable Diffusion and ComfyUI provides granular control over the creative process.Open Source and Community-Driven: Both Stable Diffusion and ComfyUI thrive on community contributions. Regular updates and shared resources ensure that users always have access to cutting-edge capabilities.Integration: ComfyUI supports various additional models and tools, making it a versatile hub for digital creation.Real-World ApplicationsThe versatility of Stable Diffusion and ComfyUI has sparked interest across multiple domains:Digital Art and Illustration: Artists can quickly draft ideas or generate inspiration for their next masterpiece.Game Design: Game developers use the tool to create concept art, characters, and environments.Marketing and Branding: Marketers leverage AI-generated visuals for ad campaigns, social media, and branding efforts.Education and Research: Educators and researchers employ the tool to explore generative AI and its implications.Getting StartedGetting started with Stable Diffusion and ComfyUI is straightforward:Install Stable Diffusion: Download and install the Stable Diffusion model on your system. Ensure you have the necessary hardware requirements, such as a compatible GPU.Set Up ComfyUI: Download and configure ComfyUI. The official website and community forums offer detailed guides.Start Creating: Launch ComfyUI, load Stable Diffusion, and begin experimenting with text prompts and visual styles.The Future of AI CreativityAs AI technology continues to evolve, tools like Stable Diffusion and ComfyUI exemplify the democratization of creativity. They bridge the gap between technical complexity and artistic expression, empowering individuals to bring their visions to life. The synergy between AI innovation and human ingenuity holds the promise of revolutionizing creative industries and inspiring new forms of expression.Whether you’re a seasoned artist or someone curious about the possibilities of AI, Stable Diffusion and ComfyUI offer a gateway to a world where creativity knows no bounds. Dive in, explore, and let your imagination soar