


Hello everyone! ✨ Today I will bring you a super practical tutorial: How to set up a convenient prompt word radio version for your AI Tools! 😎 Save it quickly, and you will never have to worry about how to set prompt words again! 👌
Are you ready for the course? Let's get started! 🔍
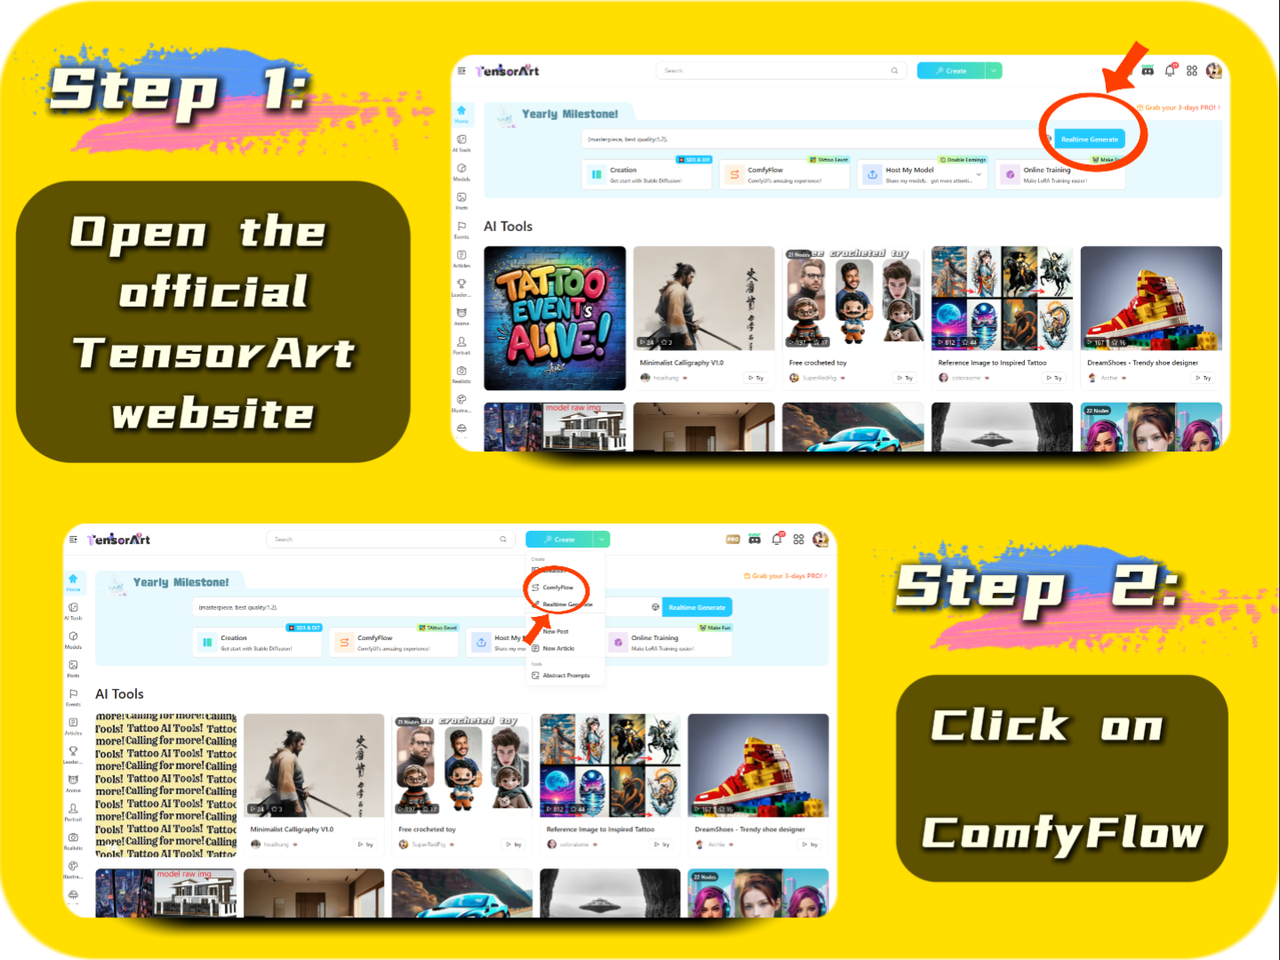
First, the first step is to open the official website of TensorArt. 📂 After opening, you will see a variety of AI tools and resources, which are very rich~ 👀
Next, open comfyflow and start making our AI Tool! 🤖 This process is simple and fun, let's explore it together! ✨

In comfyflow, we click the "New" button, which will take you to a new interface~ 🖱️💻
In this interface, we can start creating our own workflow~ 🌟
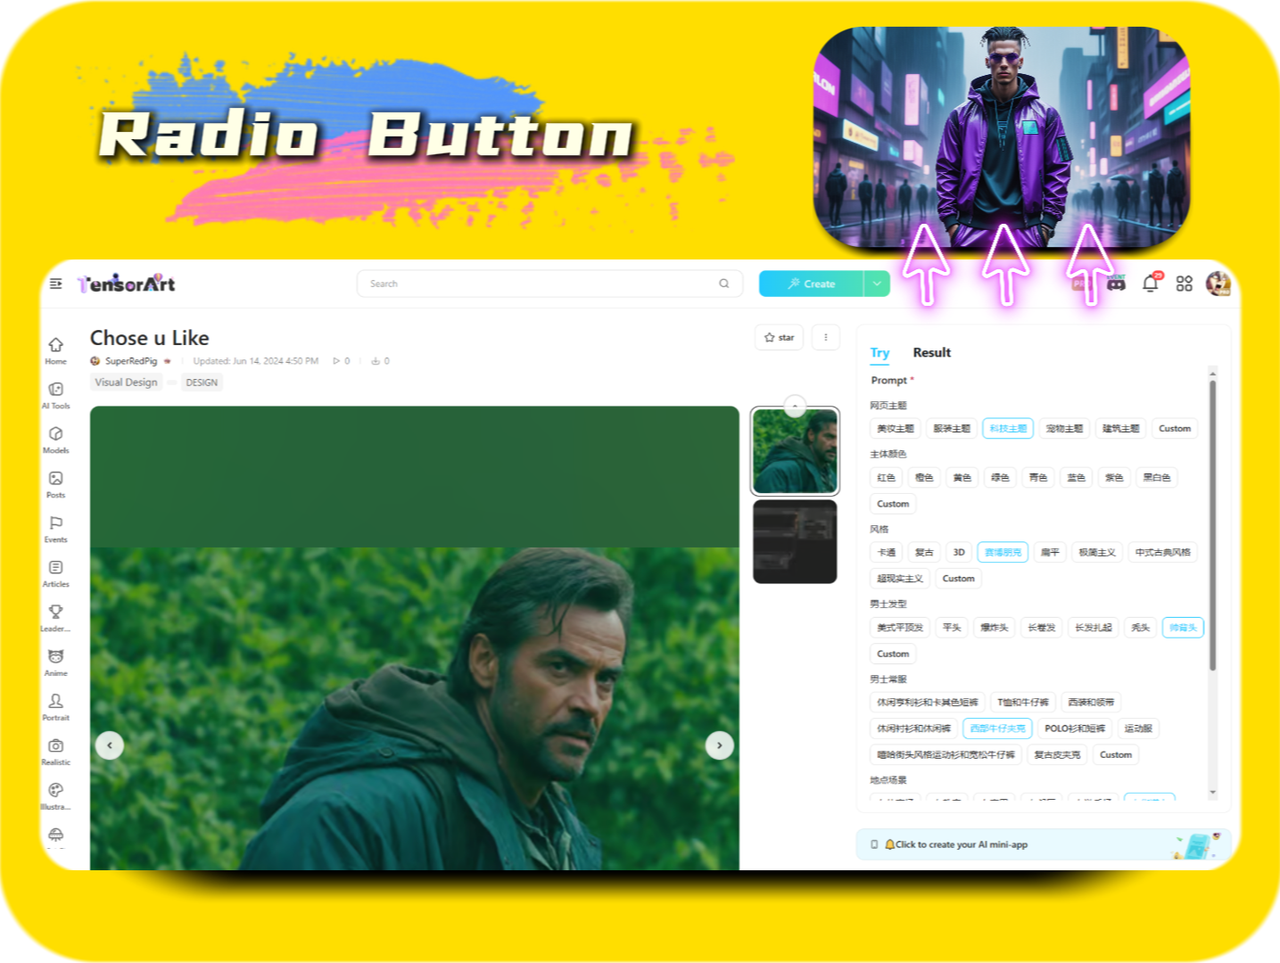
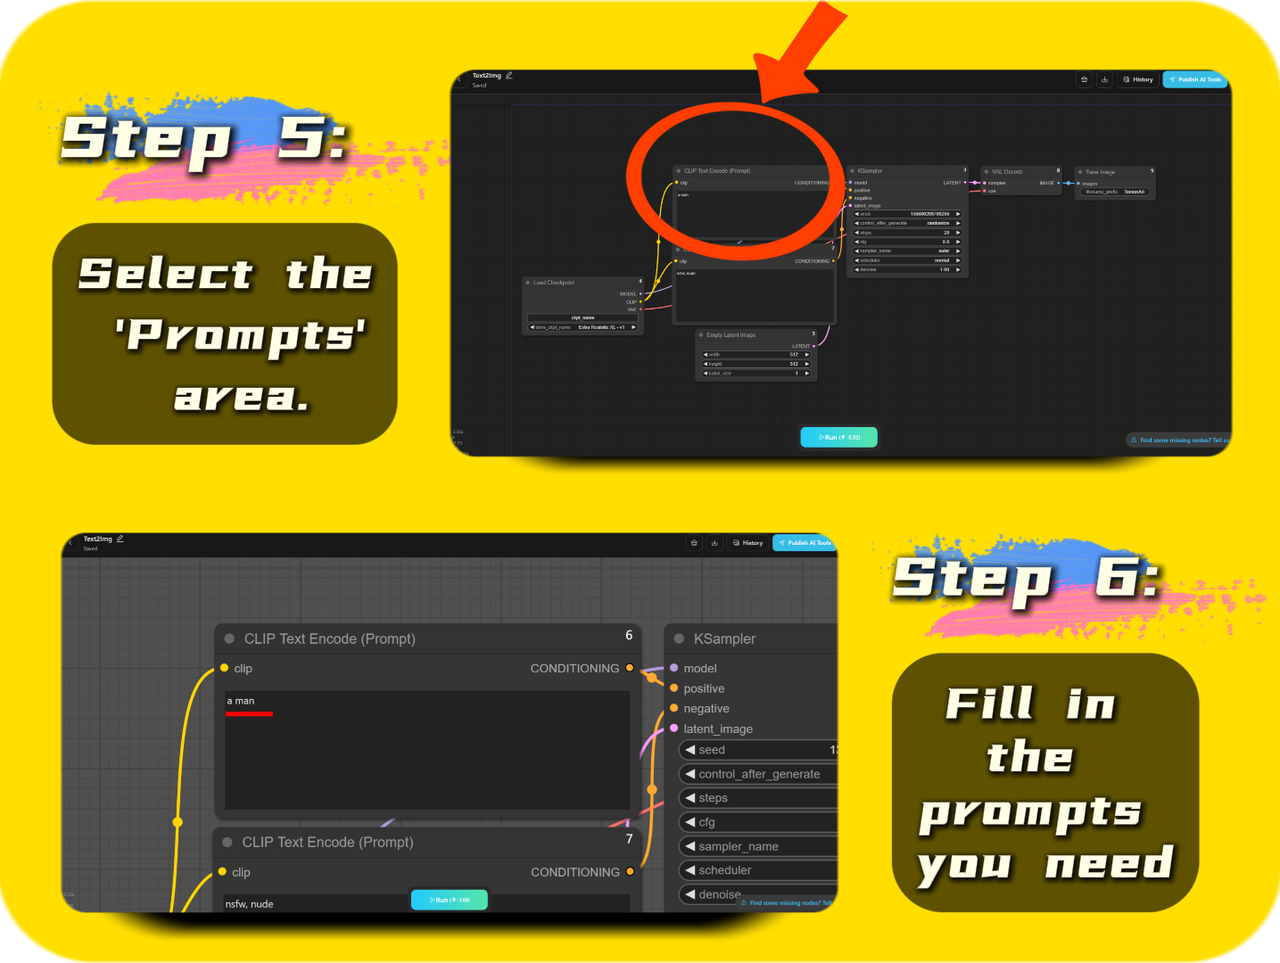
🎉 Next, we need to fill in the positive prompt words, which is a super critical step! 📝✨
In the positive prompt word area, we need to enter the content we want. 📋 Here, the editor simply wrote an example for everyone: "a man". 🤵 This example is just for the convenience of teaching, you can freely play according to your needs~ 🌈
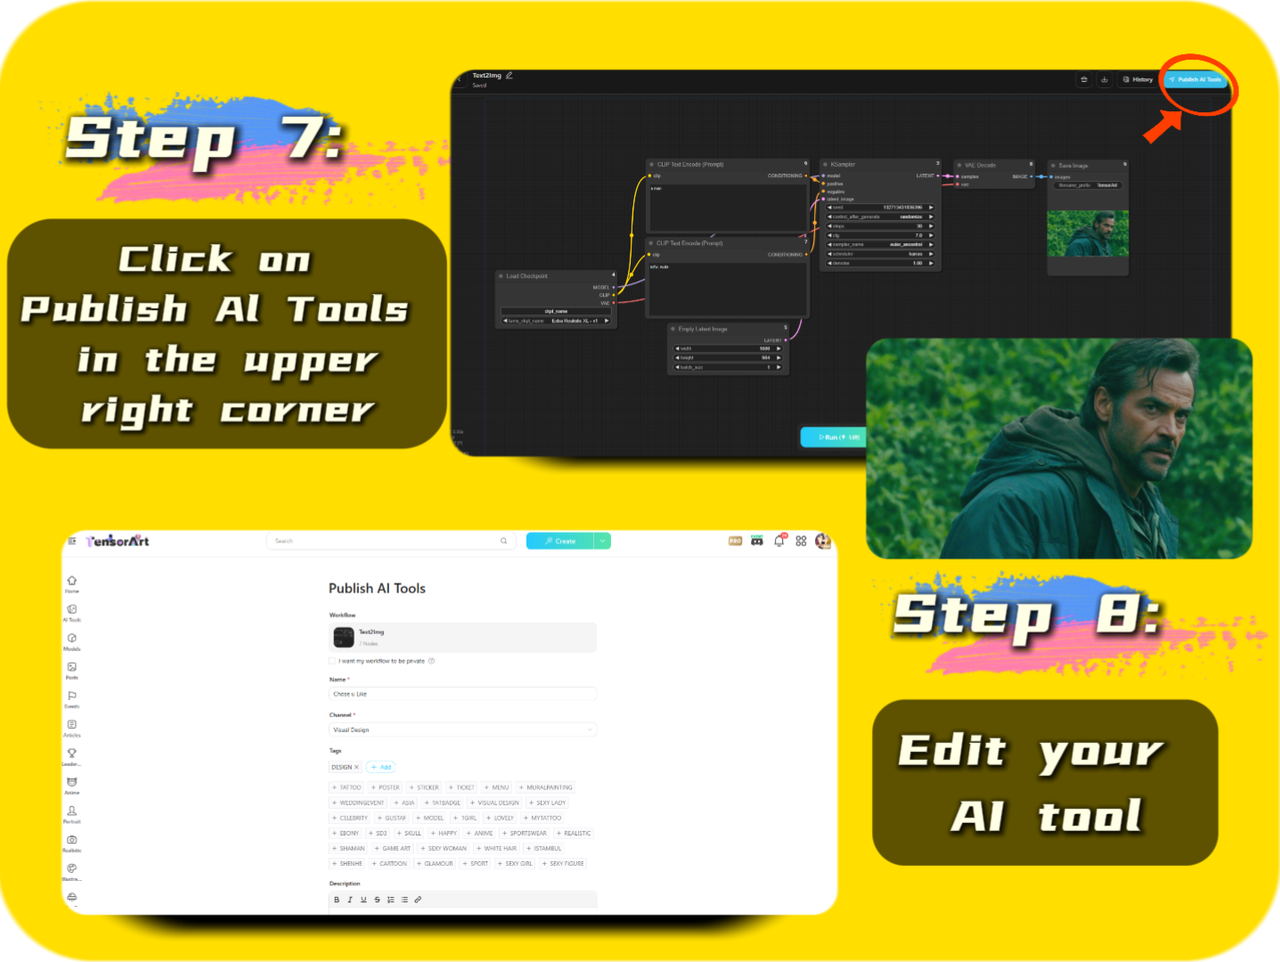
🎆🎉 When you have completed the workflow, you can click the "Publish" button in the upper right corner! 🚀✨
Don't forget to give your AI Tool an interesting name! 💡 This name will make your tool more attractive~✨ In addition, remember to divide the area correctly, so that you can see it clearly and it is also convenient for your friends to find and use it! 📂🔍
🌟 Next, let's complete the next step together! 💪
We pull down the current interface and find the user-configurable settings area. 👏 Then click the "Add" button. This step is very critical! 🖱️✨ Everyone must remember to add your positive prompt word node! 🔍✨

After adding the node, our next step is to click the "Set" button on the right to proceed to the next step. 🔧✨ This step is crucial! Don't miss it! 😉
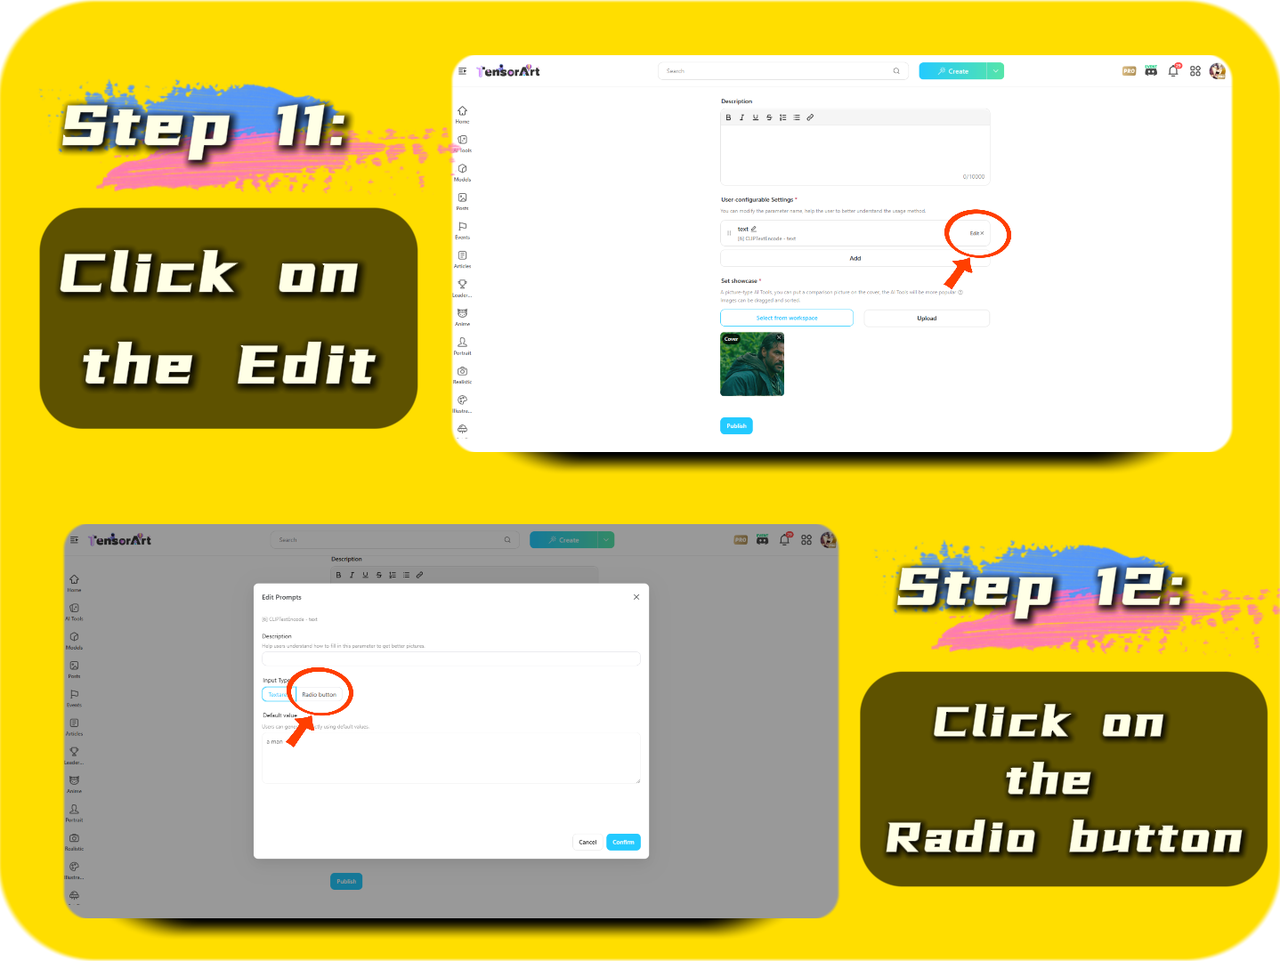
🚀✨ The next step is also very important! 😊
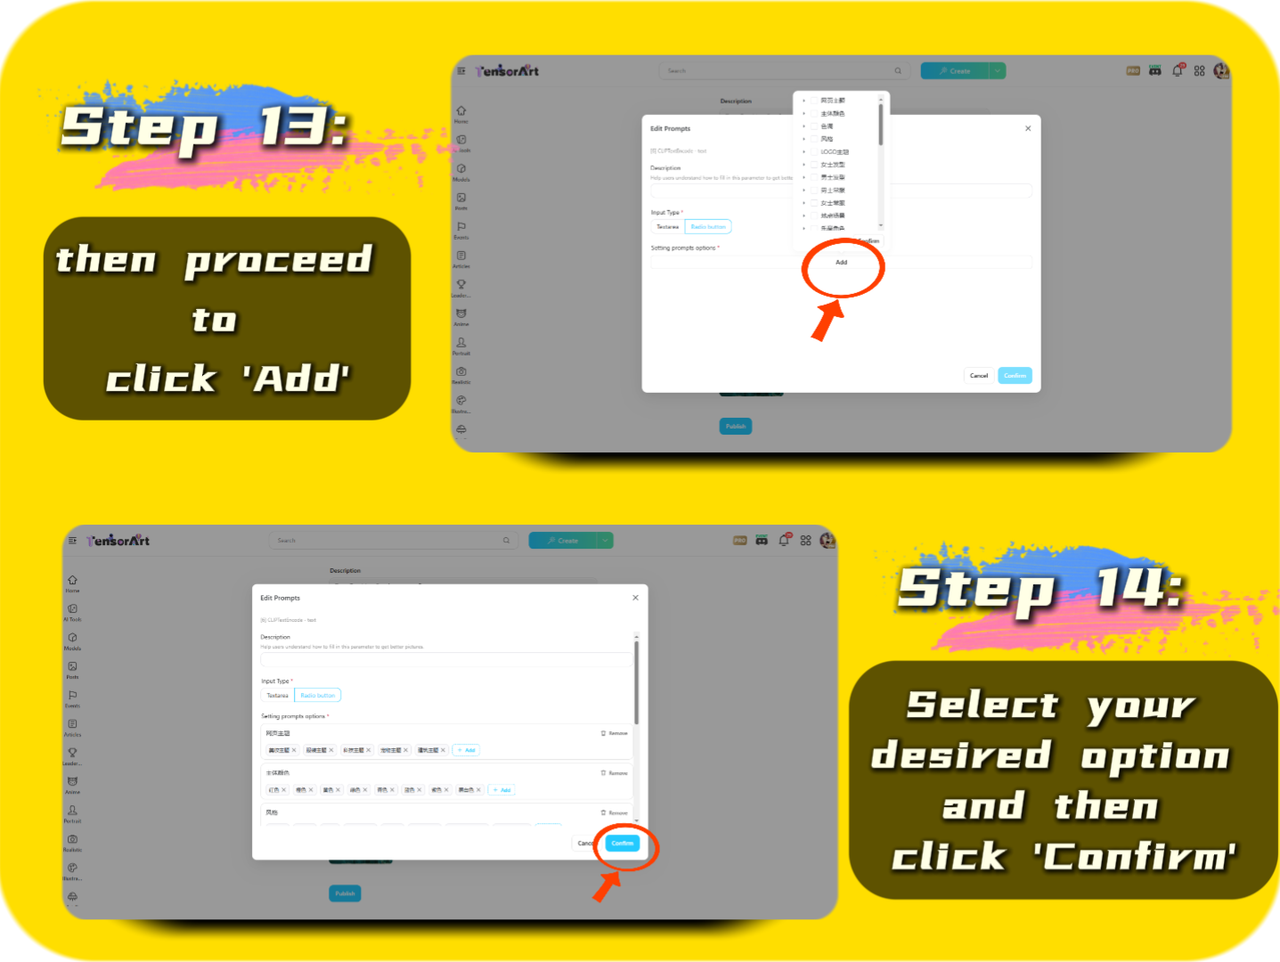
First, click the radio button, then click "Add". 🔘✨ Here, you can add the buttons you want to release to the user! 👍 After selecting, be sure to click "Confirm"! ✔️✨
Friends, we have finally reached the last step! 🎉💪 This is an exciting moment! ✨
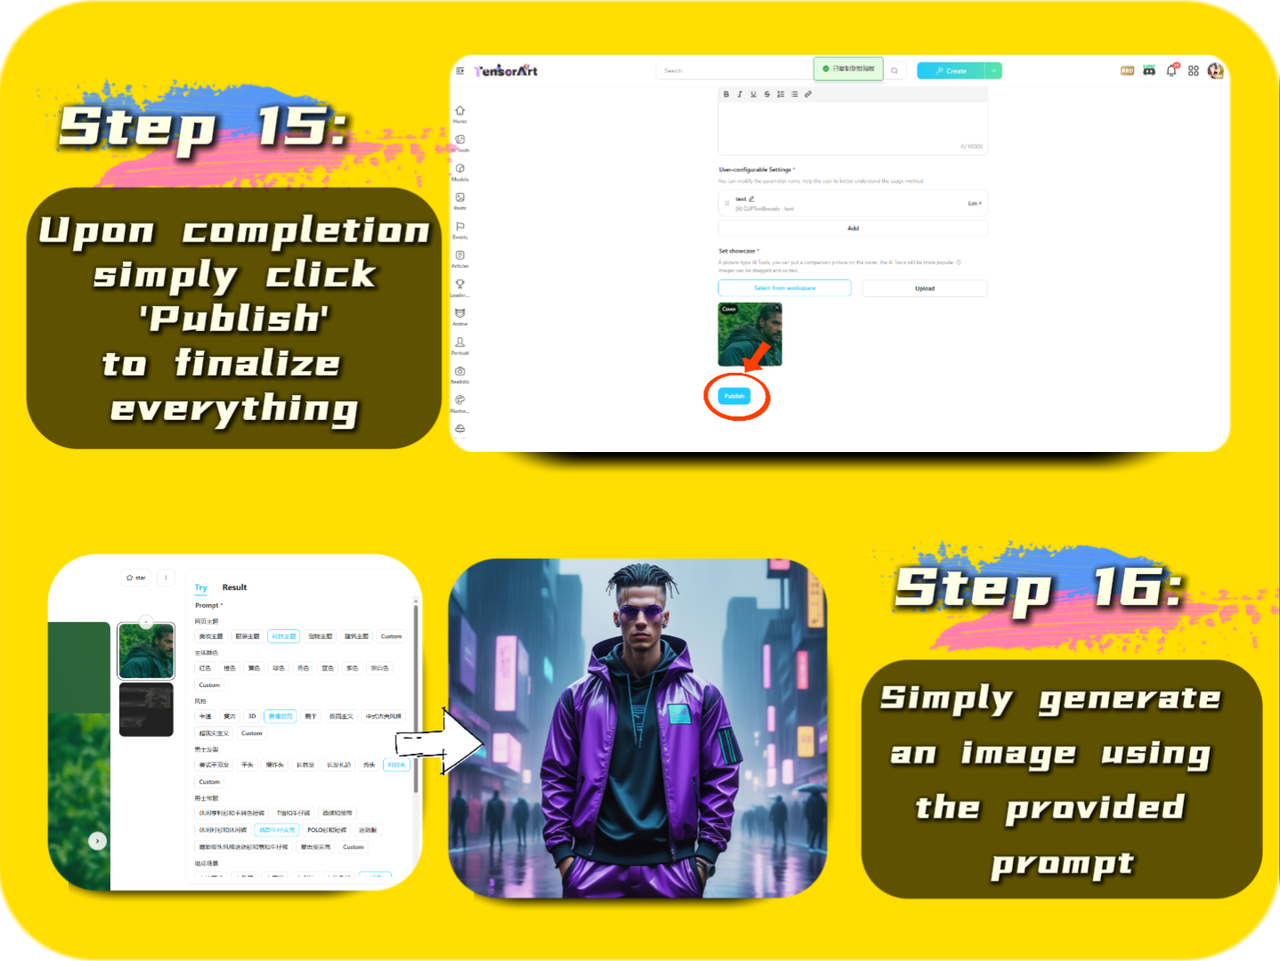
When you have completed all the operations, remember to click the "Publish" button to publish your AI gadget! 🚀✨ Can't wait to see the results? Hurry up and generate a picture yourself to try and experience your results! 🌟🖼️
Well, that's all for today's tutorial! 😊 I hope everyone can complete it successfully and create their own AI gadgets! 👏 If you have any questions, don't hesitate to leave a comment in the comment section at any time! ❤️