AI Tool Creation and Publishing Guide
Help and Consultation
We have pre-updated some AI tools and encourage creators to update AI tools. If you need assistance or encounter any issues, please consult the Comfy chatroom on Discord, our staff will be available to help.
Introduction

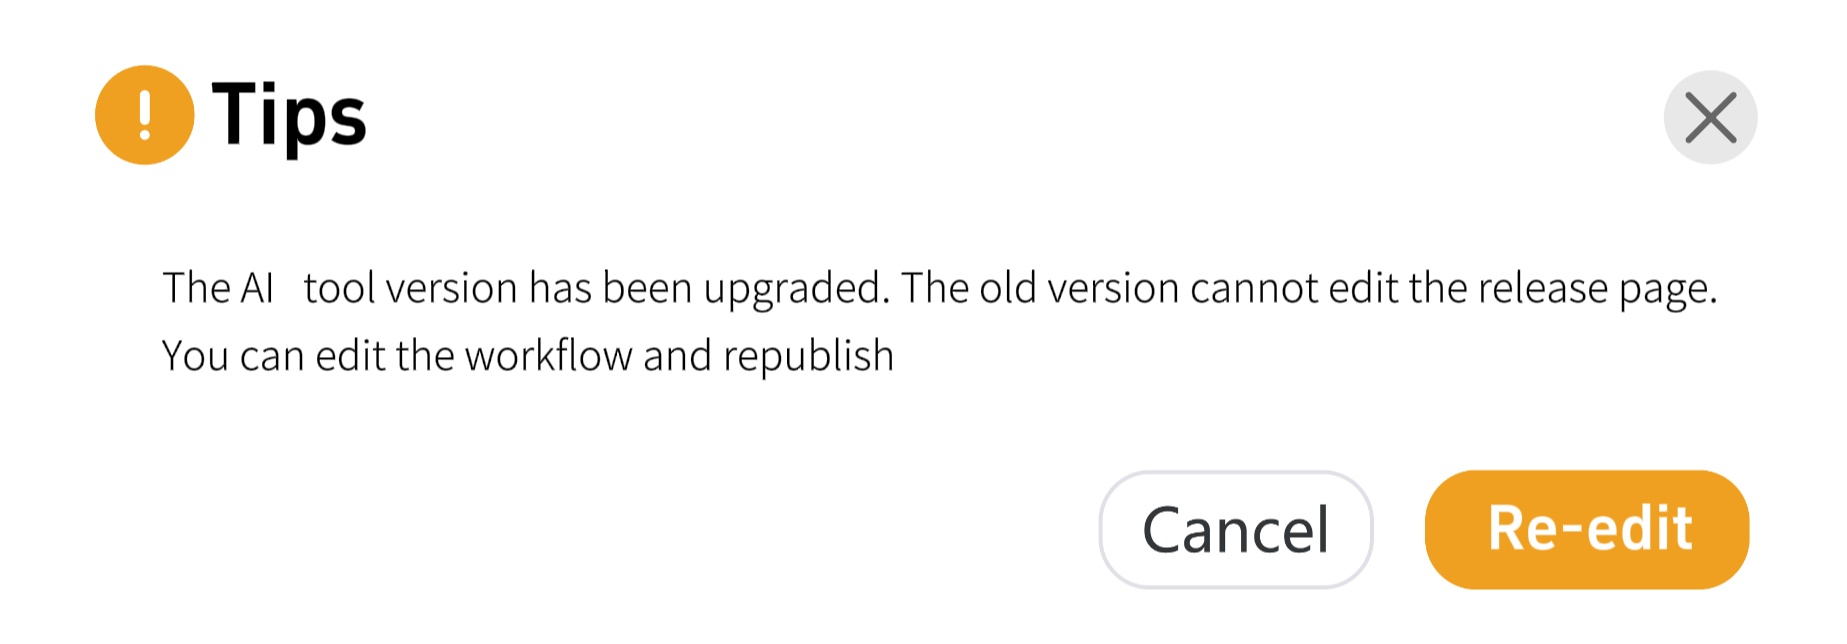
Many users encounter an issue where the toolbar disappears completely when modifying AI Tools. This is due to a comprehensive system upgrade. Today, we'll walk you through the correct process of creating and publishing AI ToolS, ensuring a smooth transition to the new workflow.
We created a video to help you better understand how to create and publish using the new AI Tool. You can watch it here: https://youtu.be/m_7LxSLTrDQ.
Text-to-Image
First, open the ComfyFlow ready to start creating a new workflow.
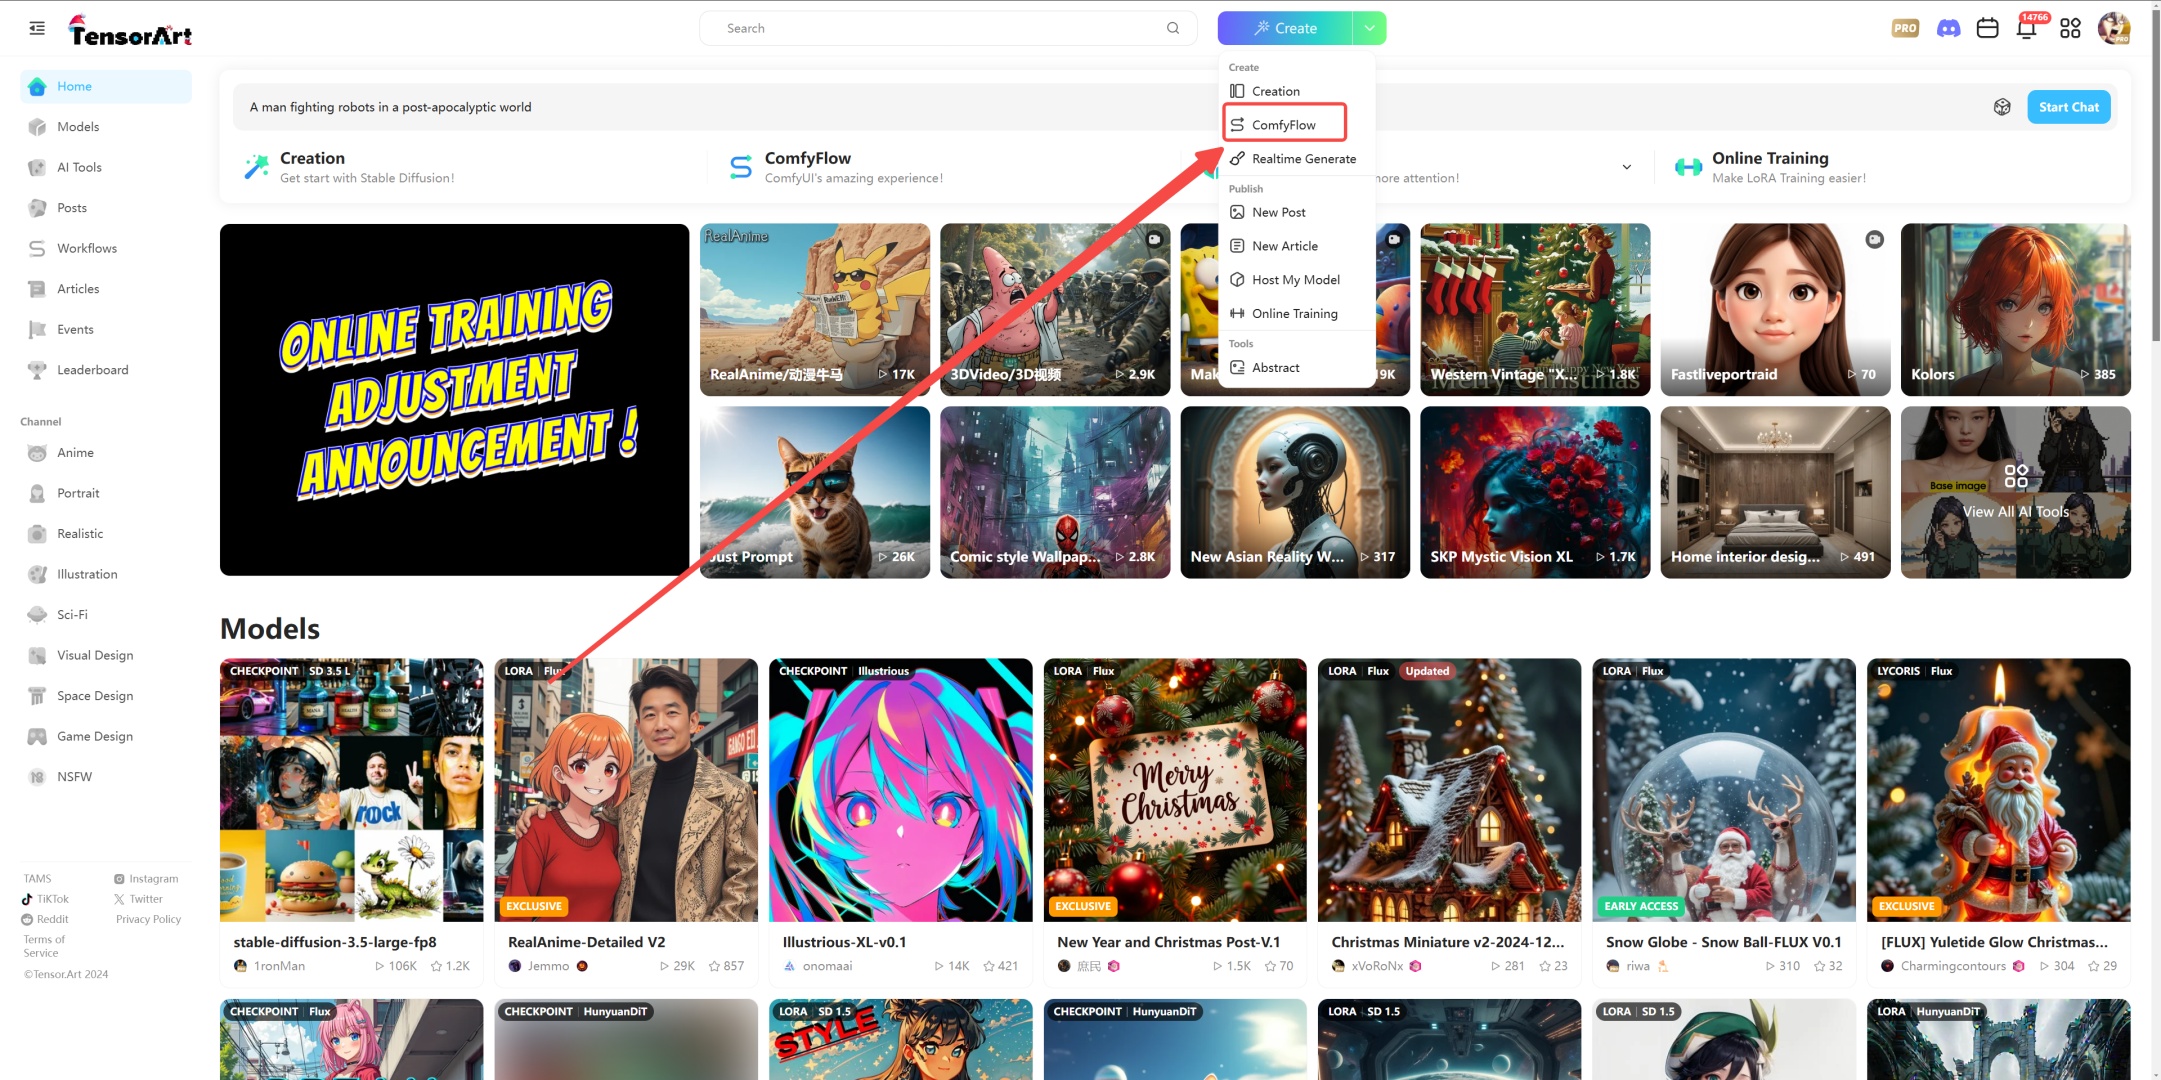
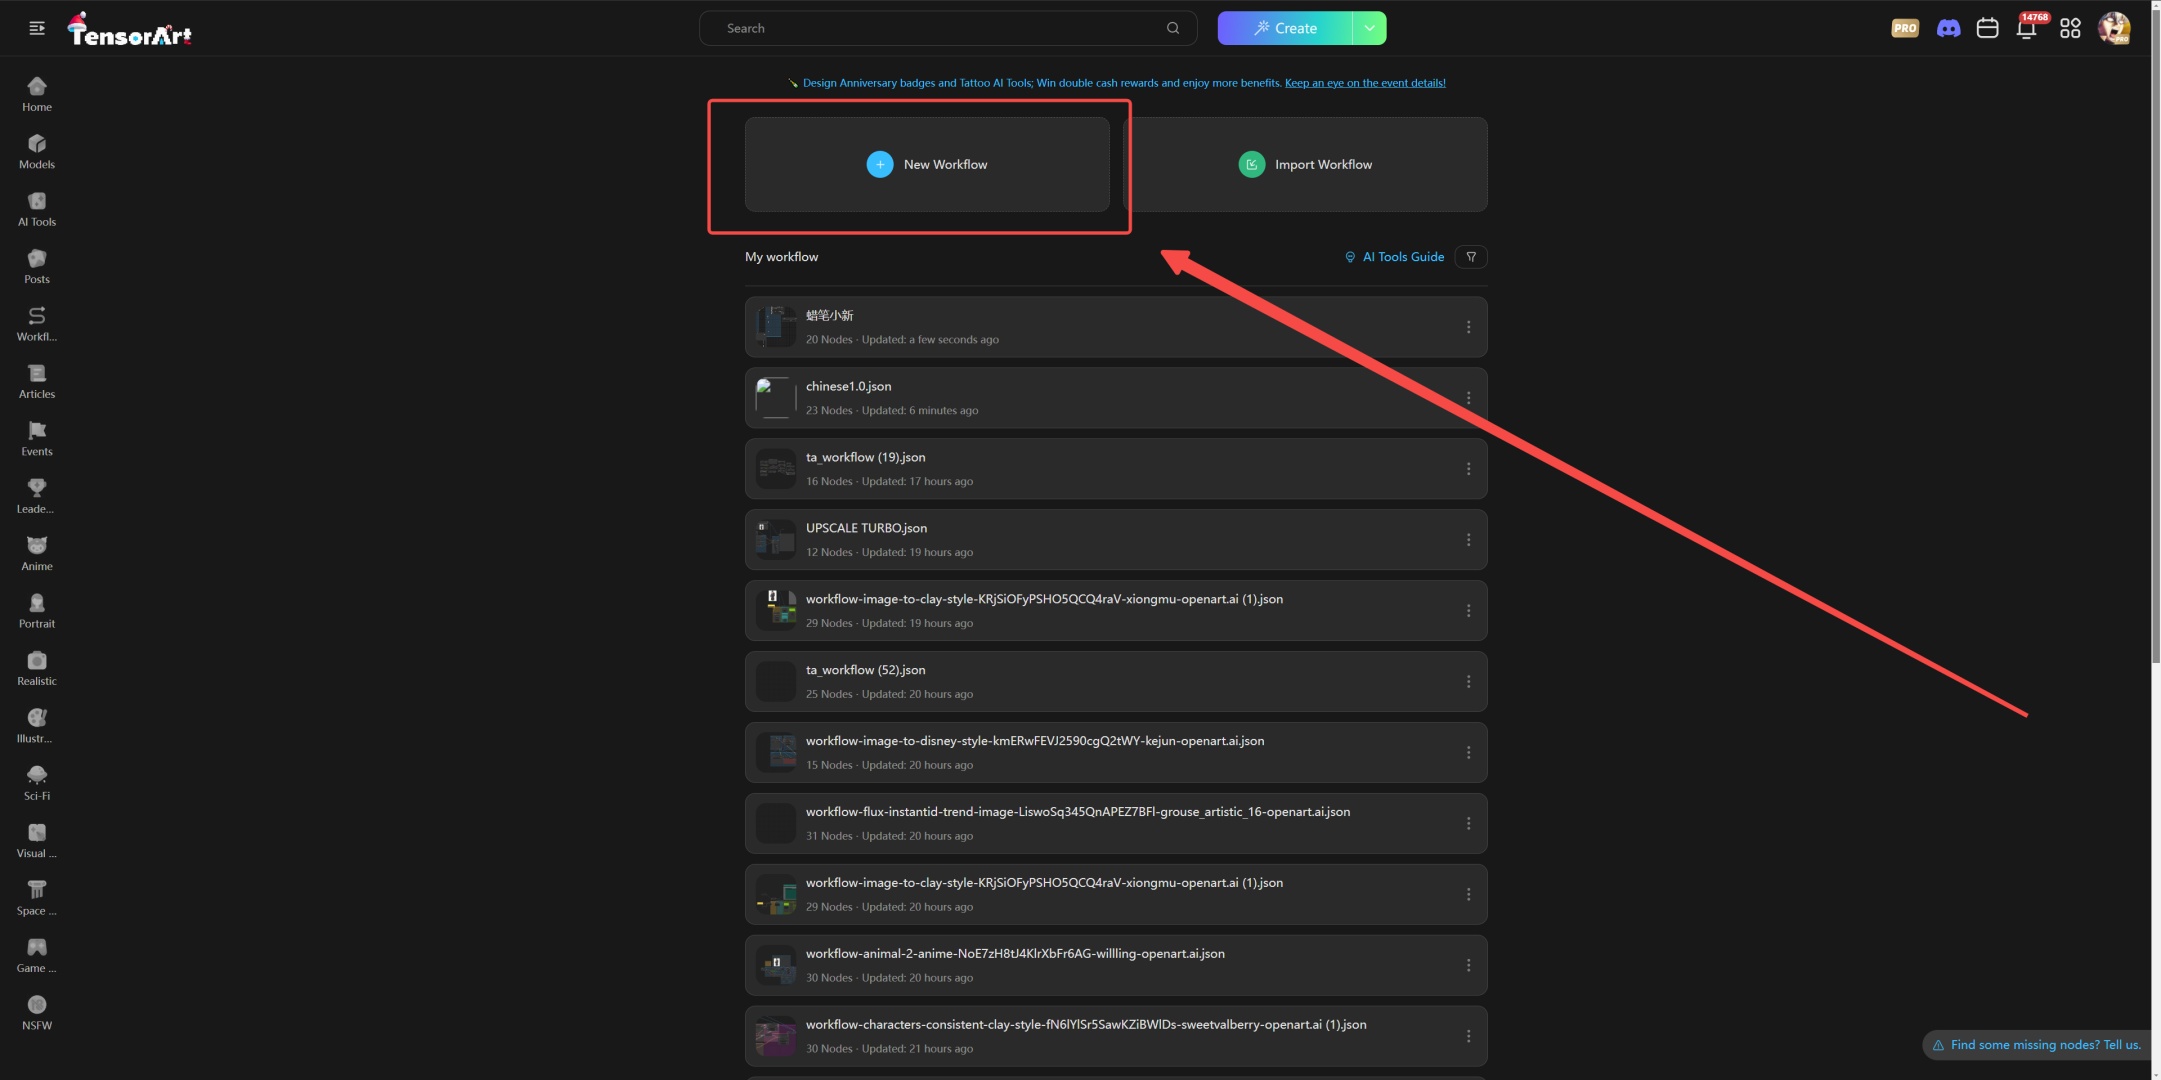
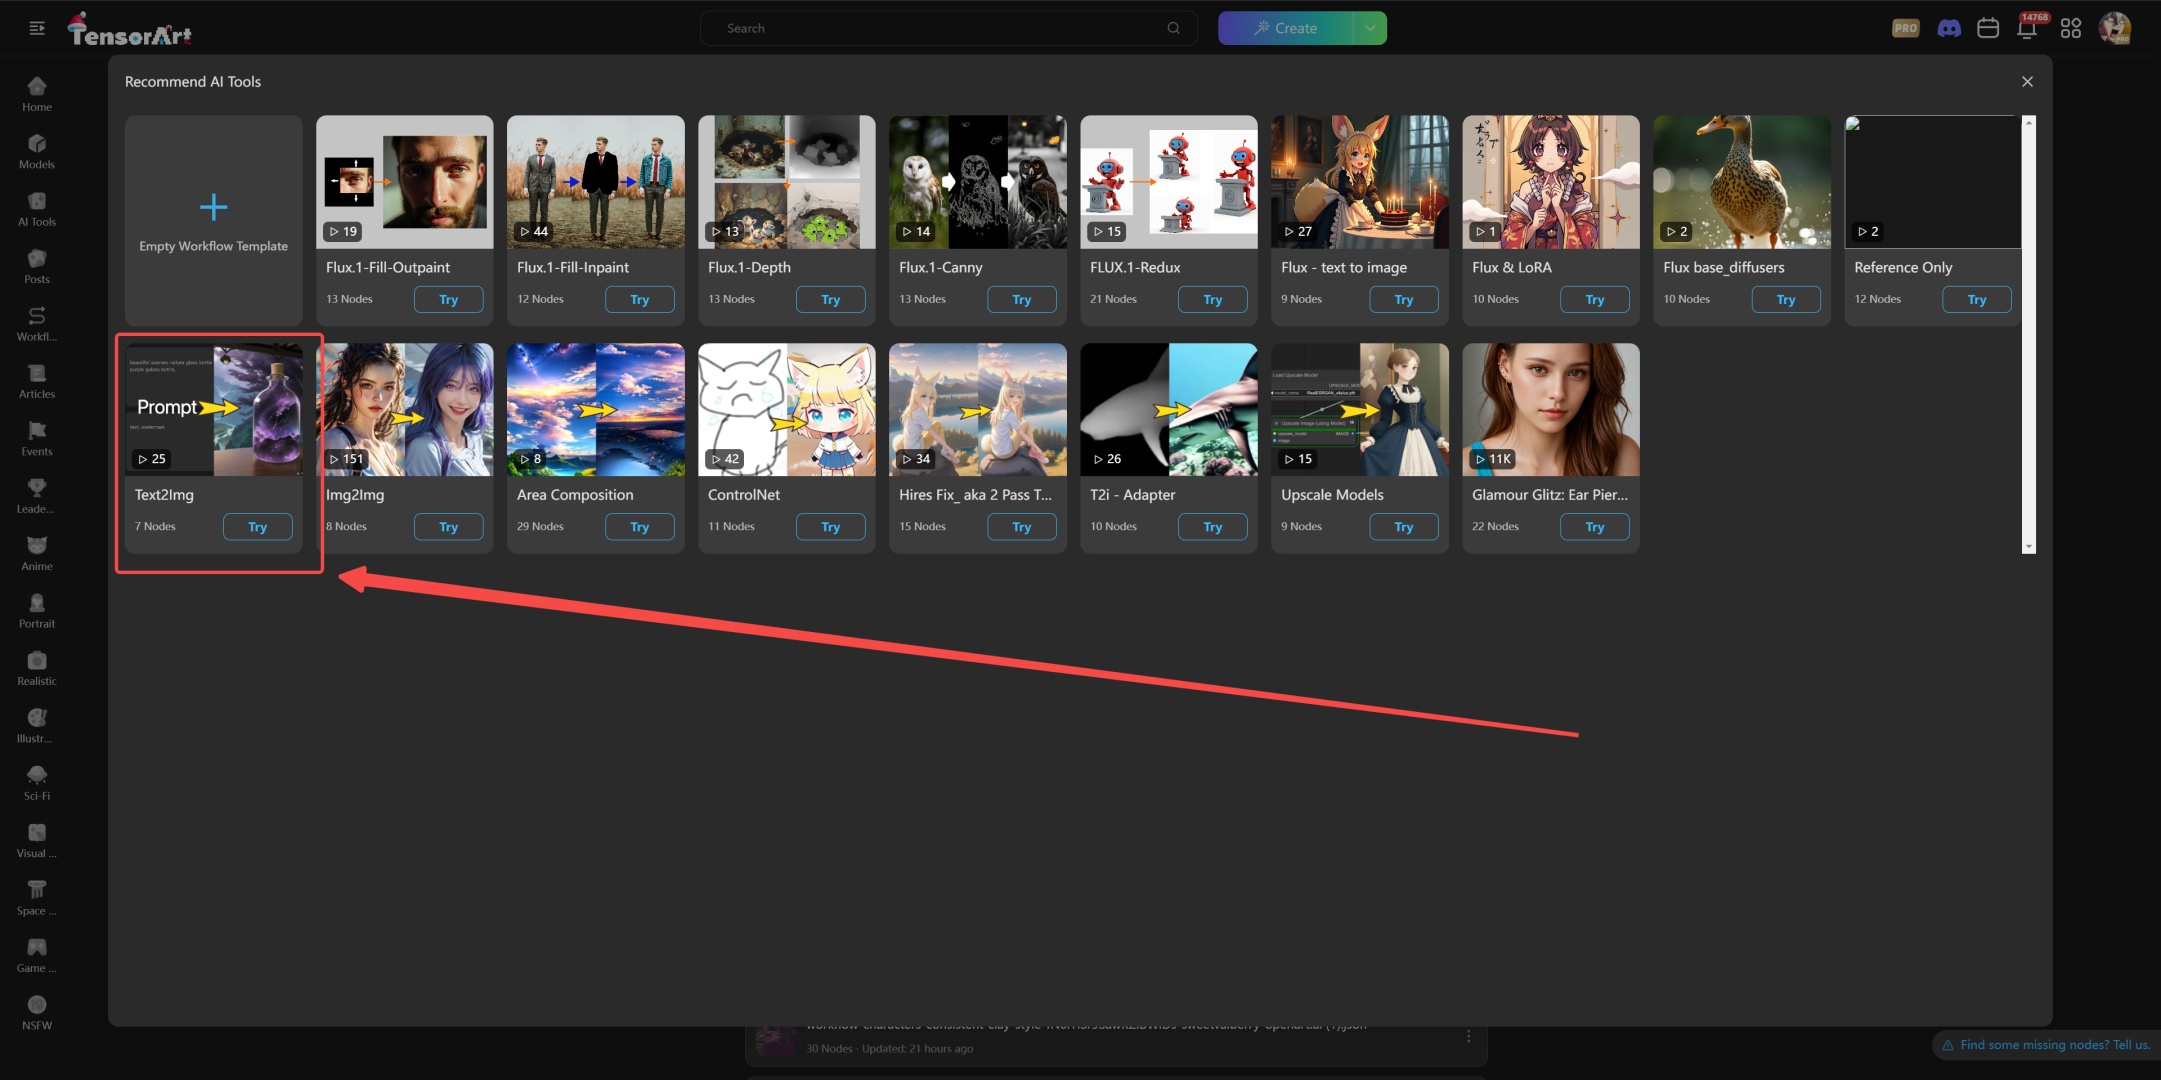
Click the Create Workflow button on the left to enter the new workflow interface. Here we take Text2Image (text to image) as an example to demonstrate the entire operation process.
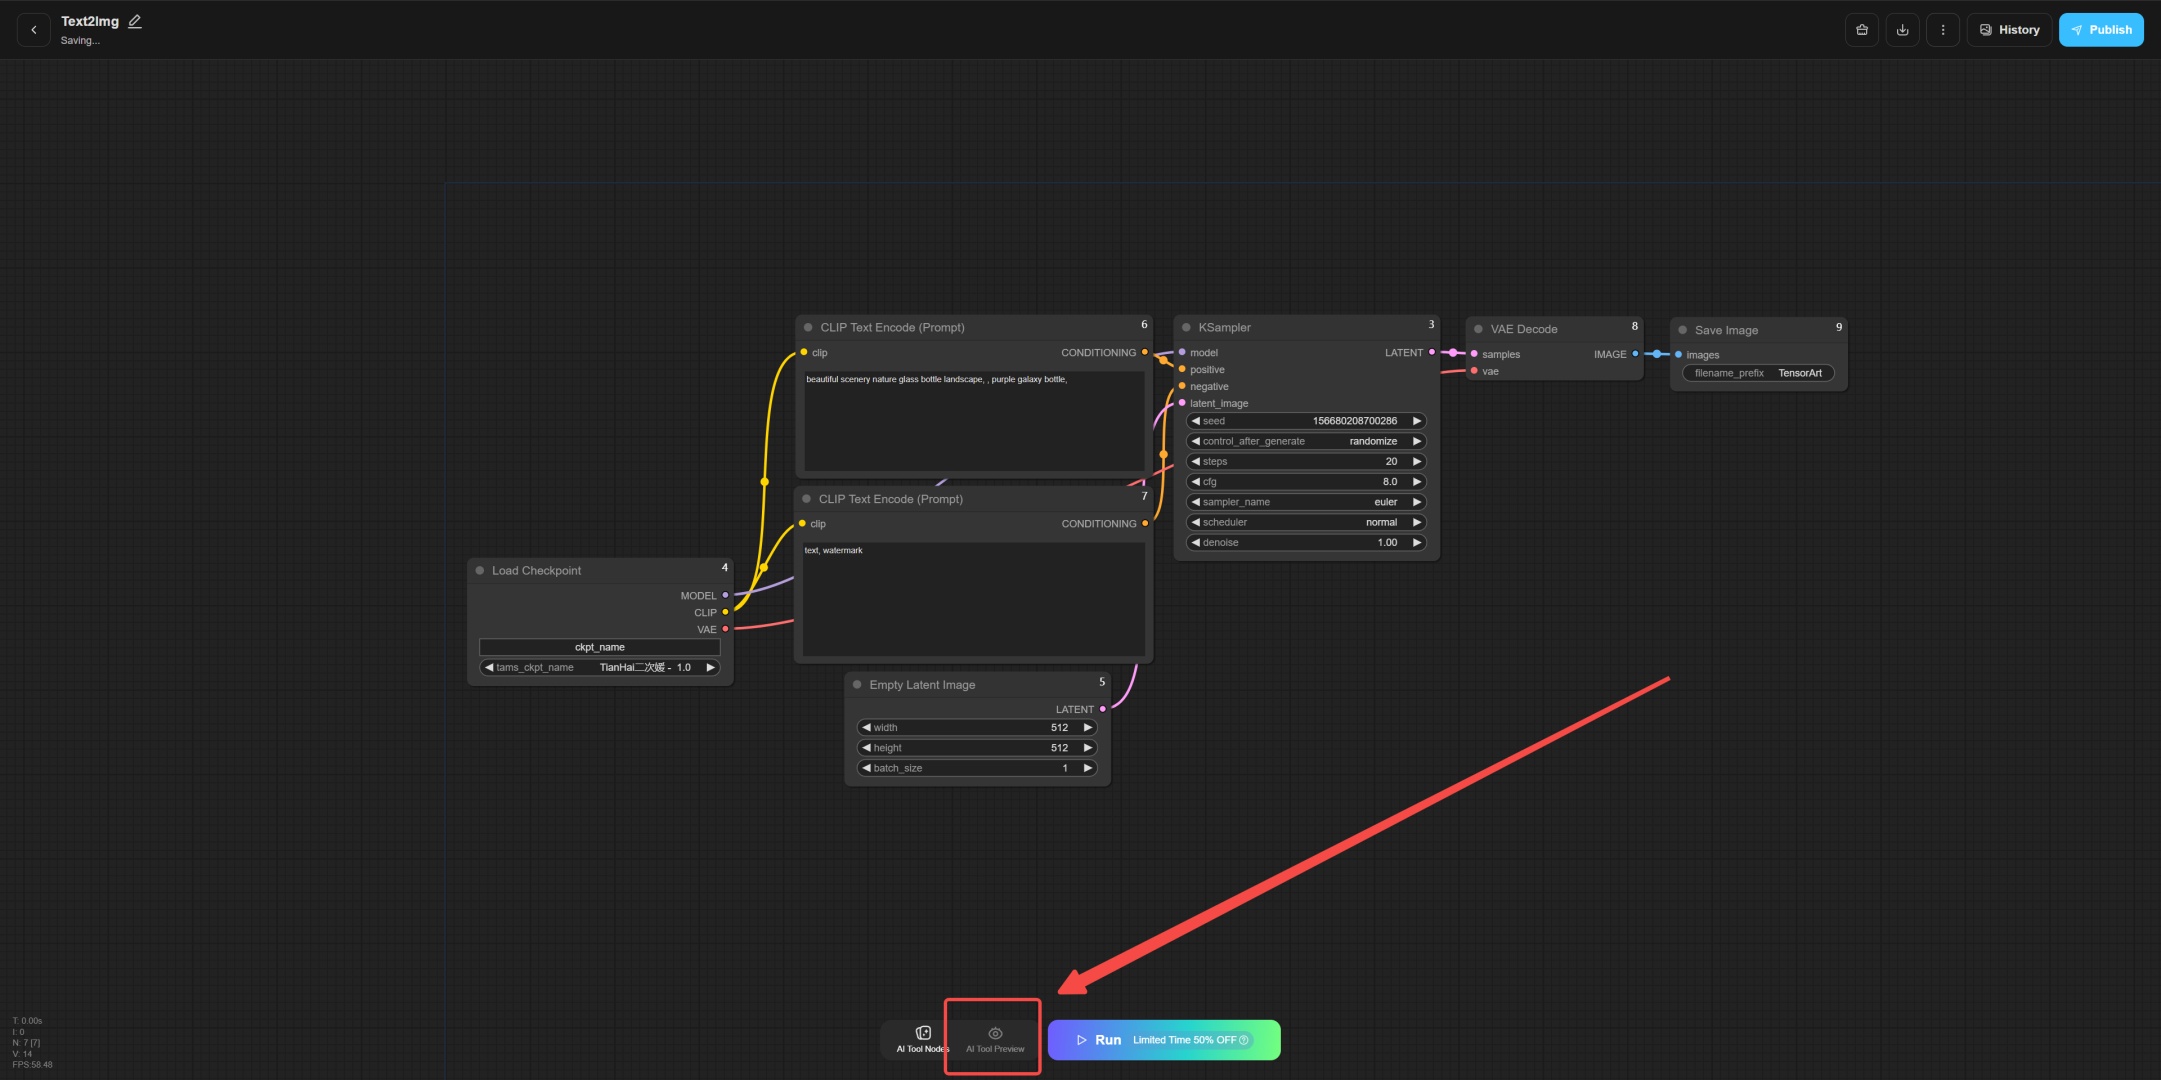
After entering ComfyFlow, you will see a newly designed interface with multiple new buttons and function options at the bottom, bringing a more intuitive operation experience.
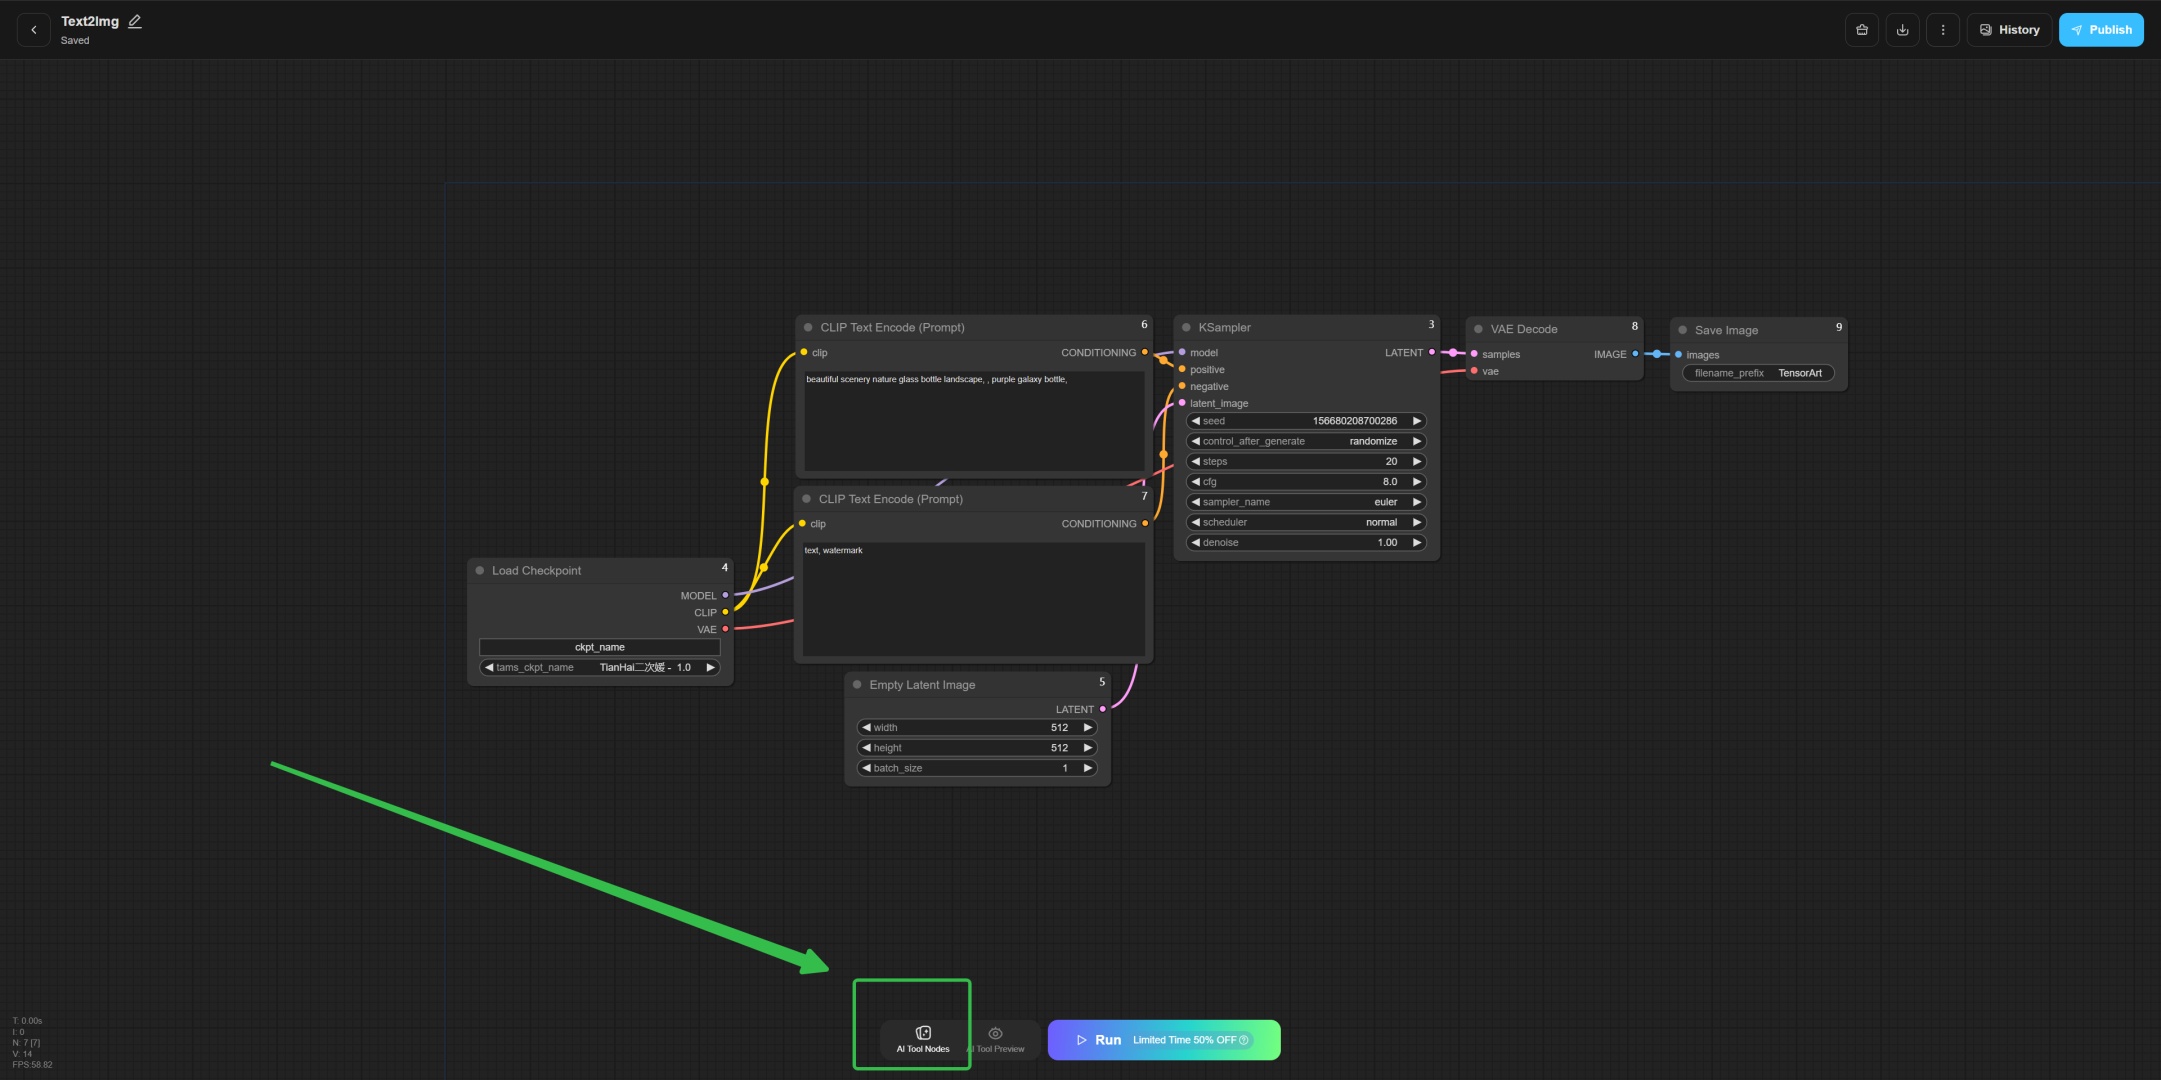
When creating a workflow, first click the AI Tool Node button in the green area.
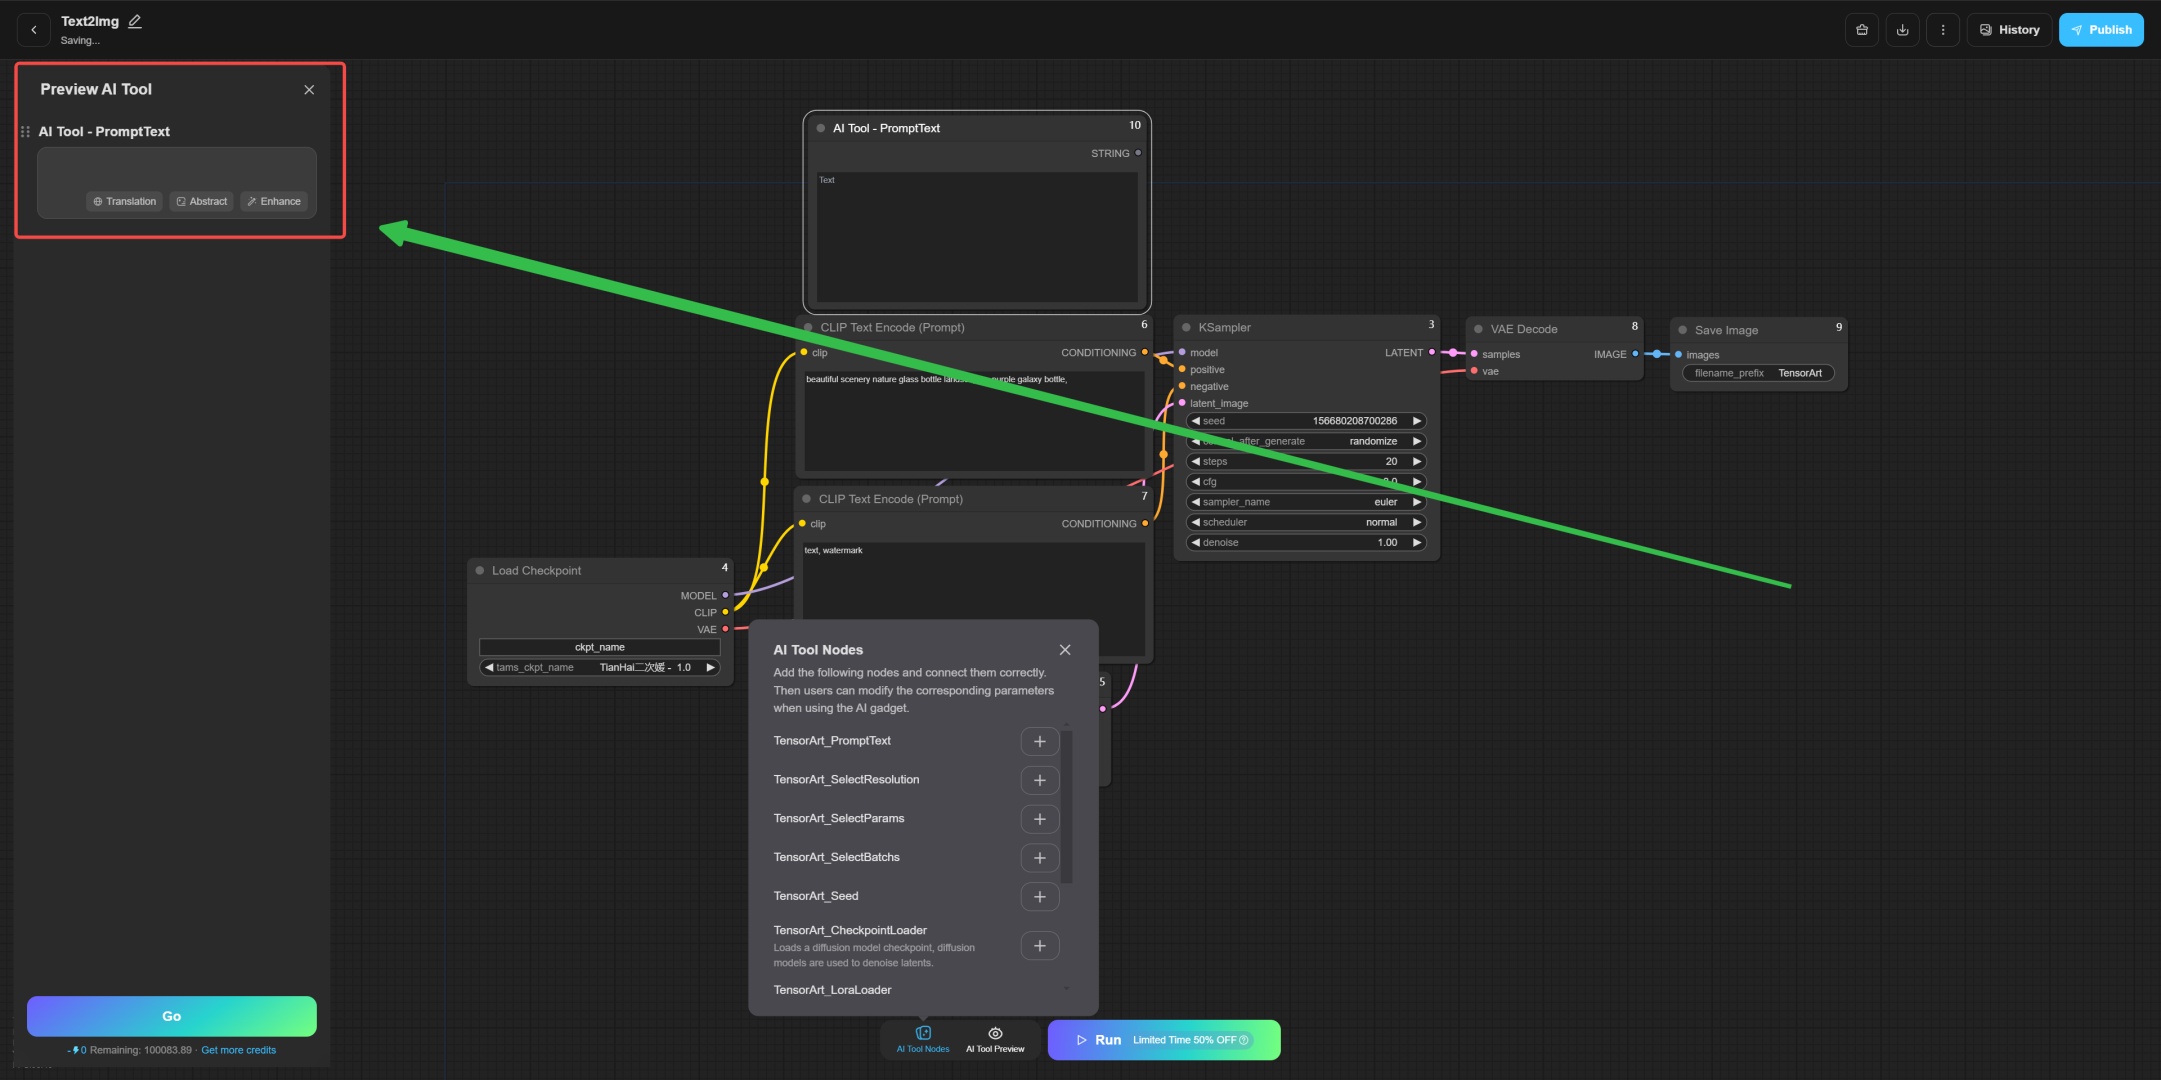
Select TensorArt_PromptText and click the plus sign "+" to add the node.

After the new node is added, a preview area on the left will be displayed.
At this point, transfer the prompts in the original CLIP Text Encode (Prompt) node to the newly added TensorArt_PromptText node.
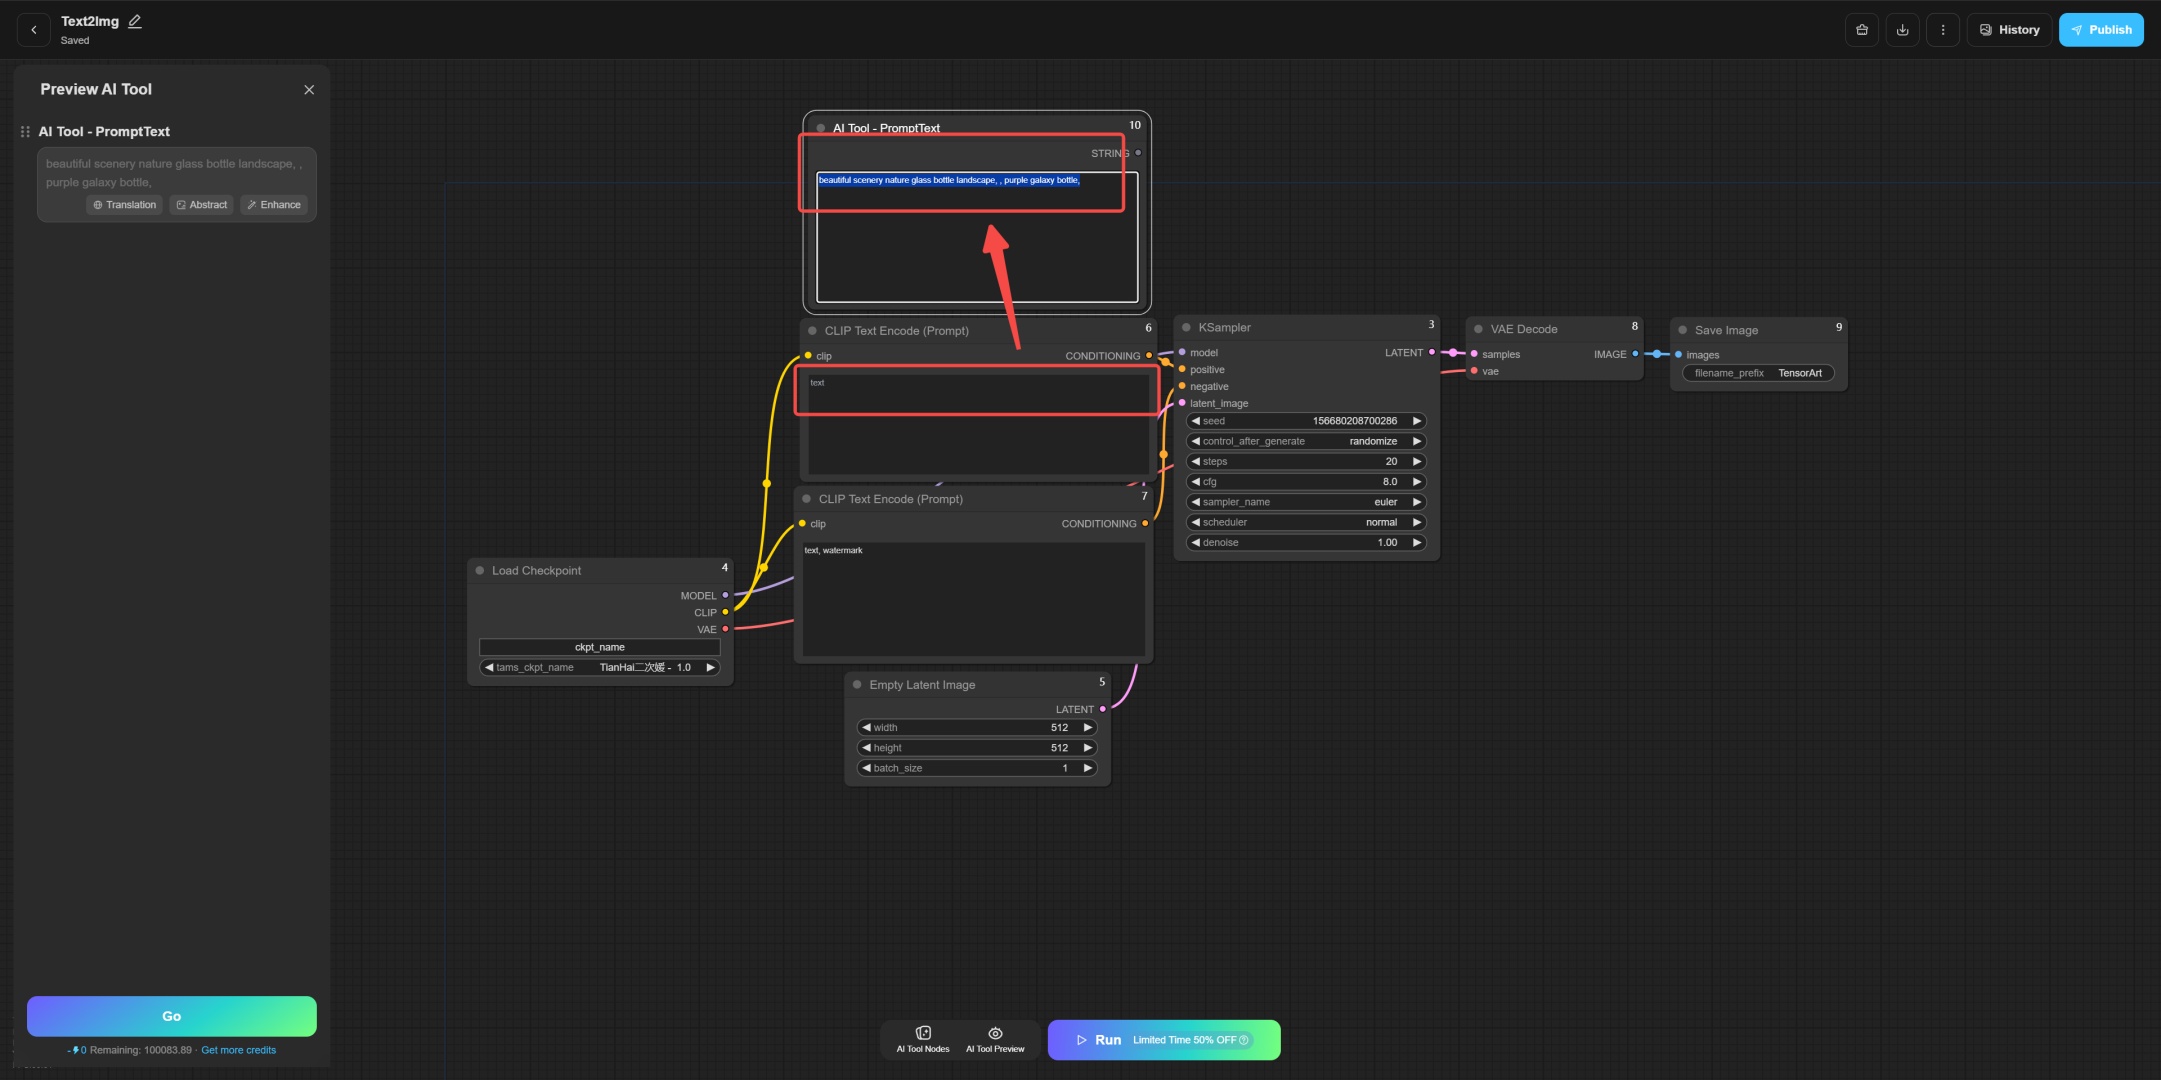
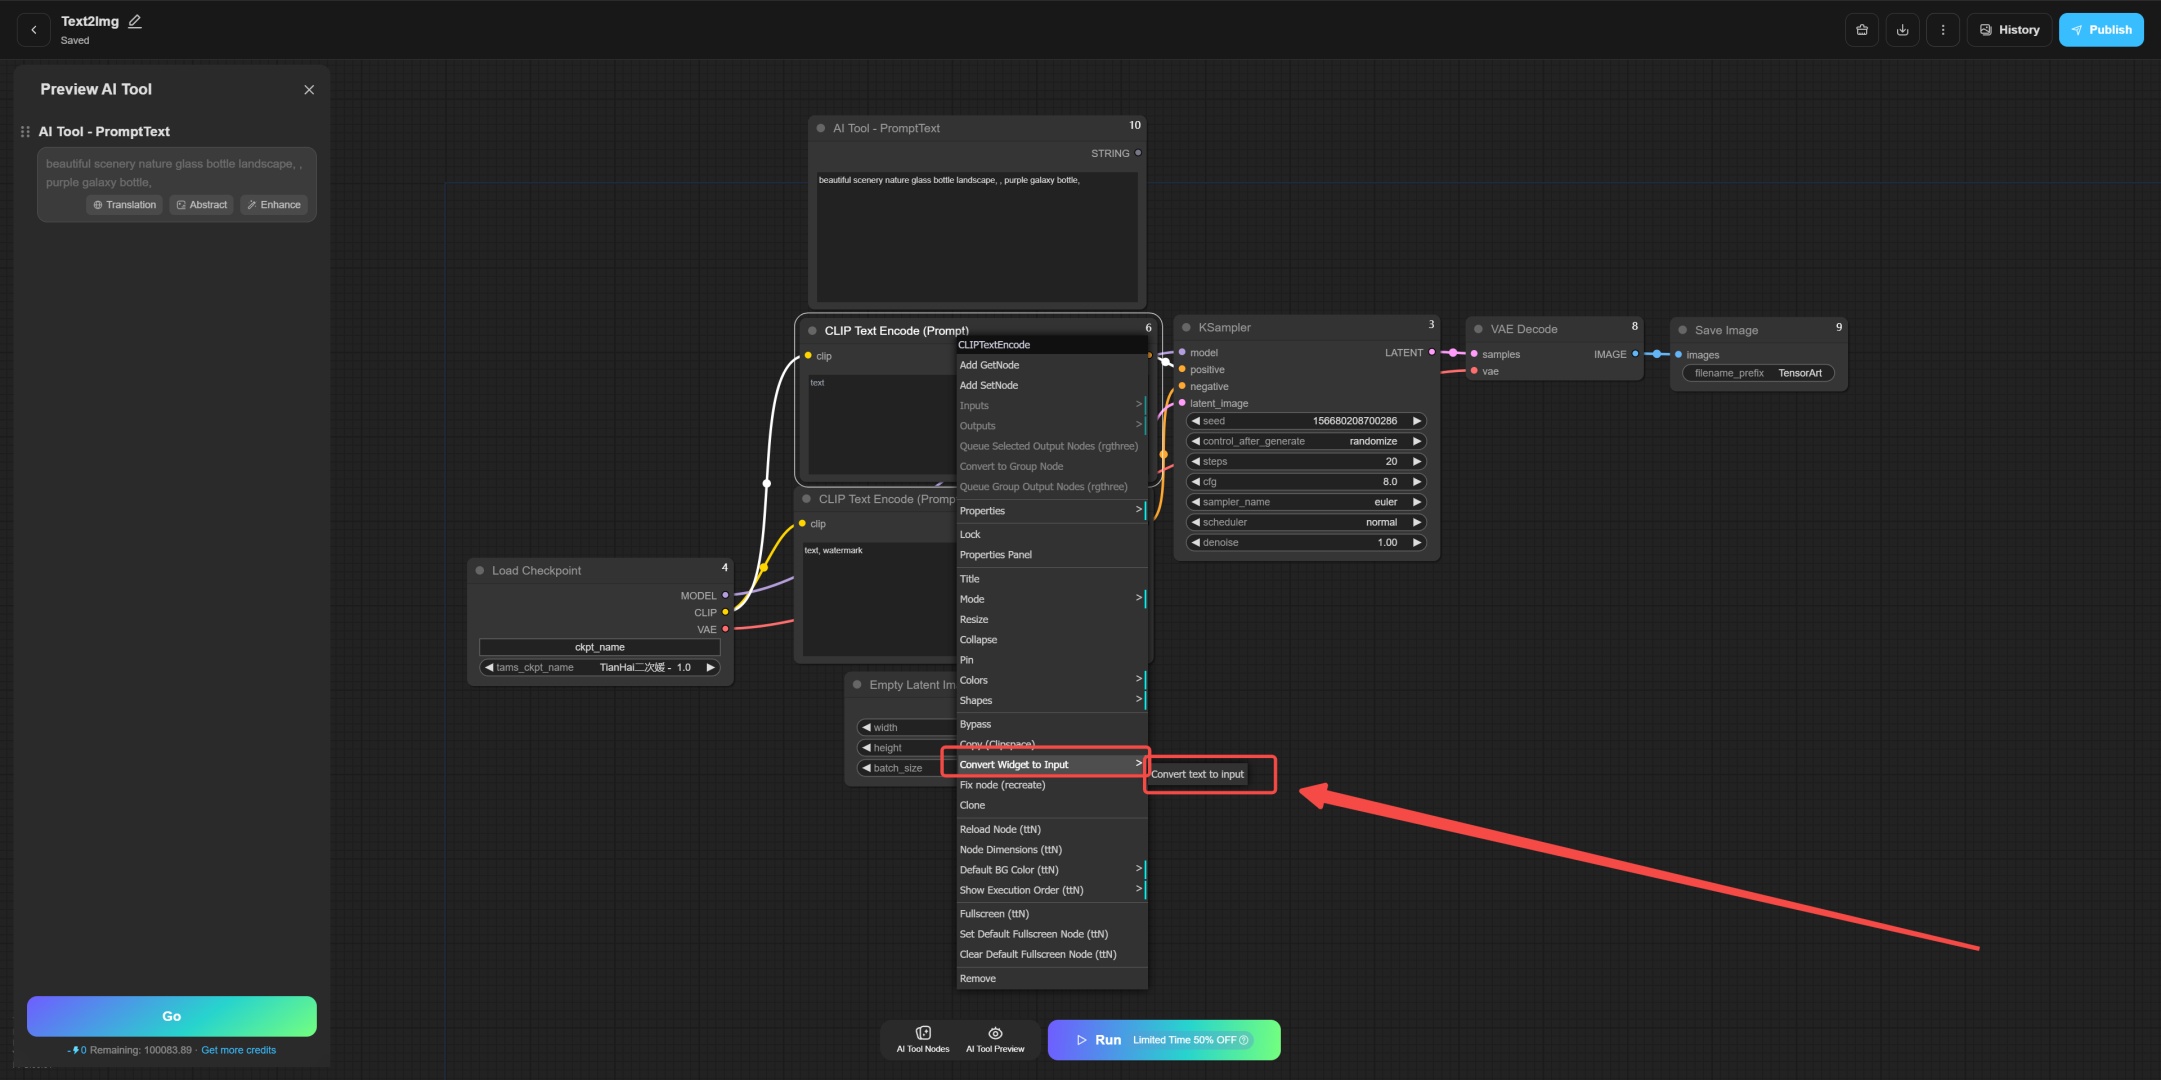
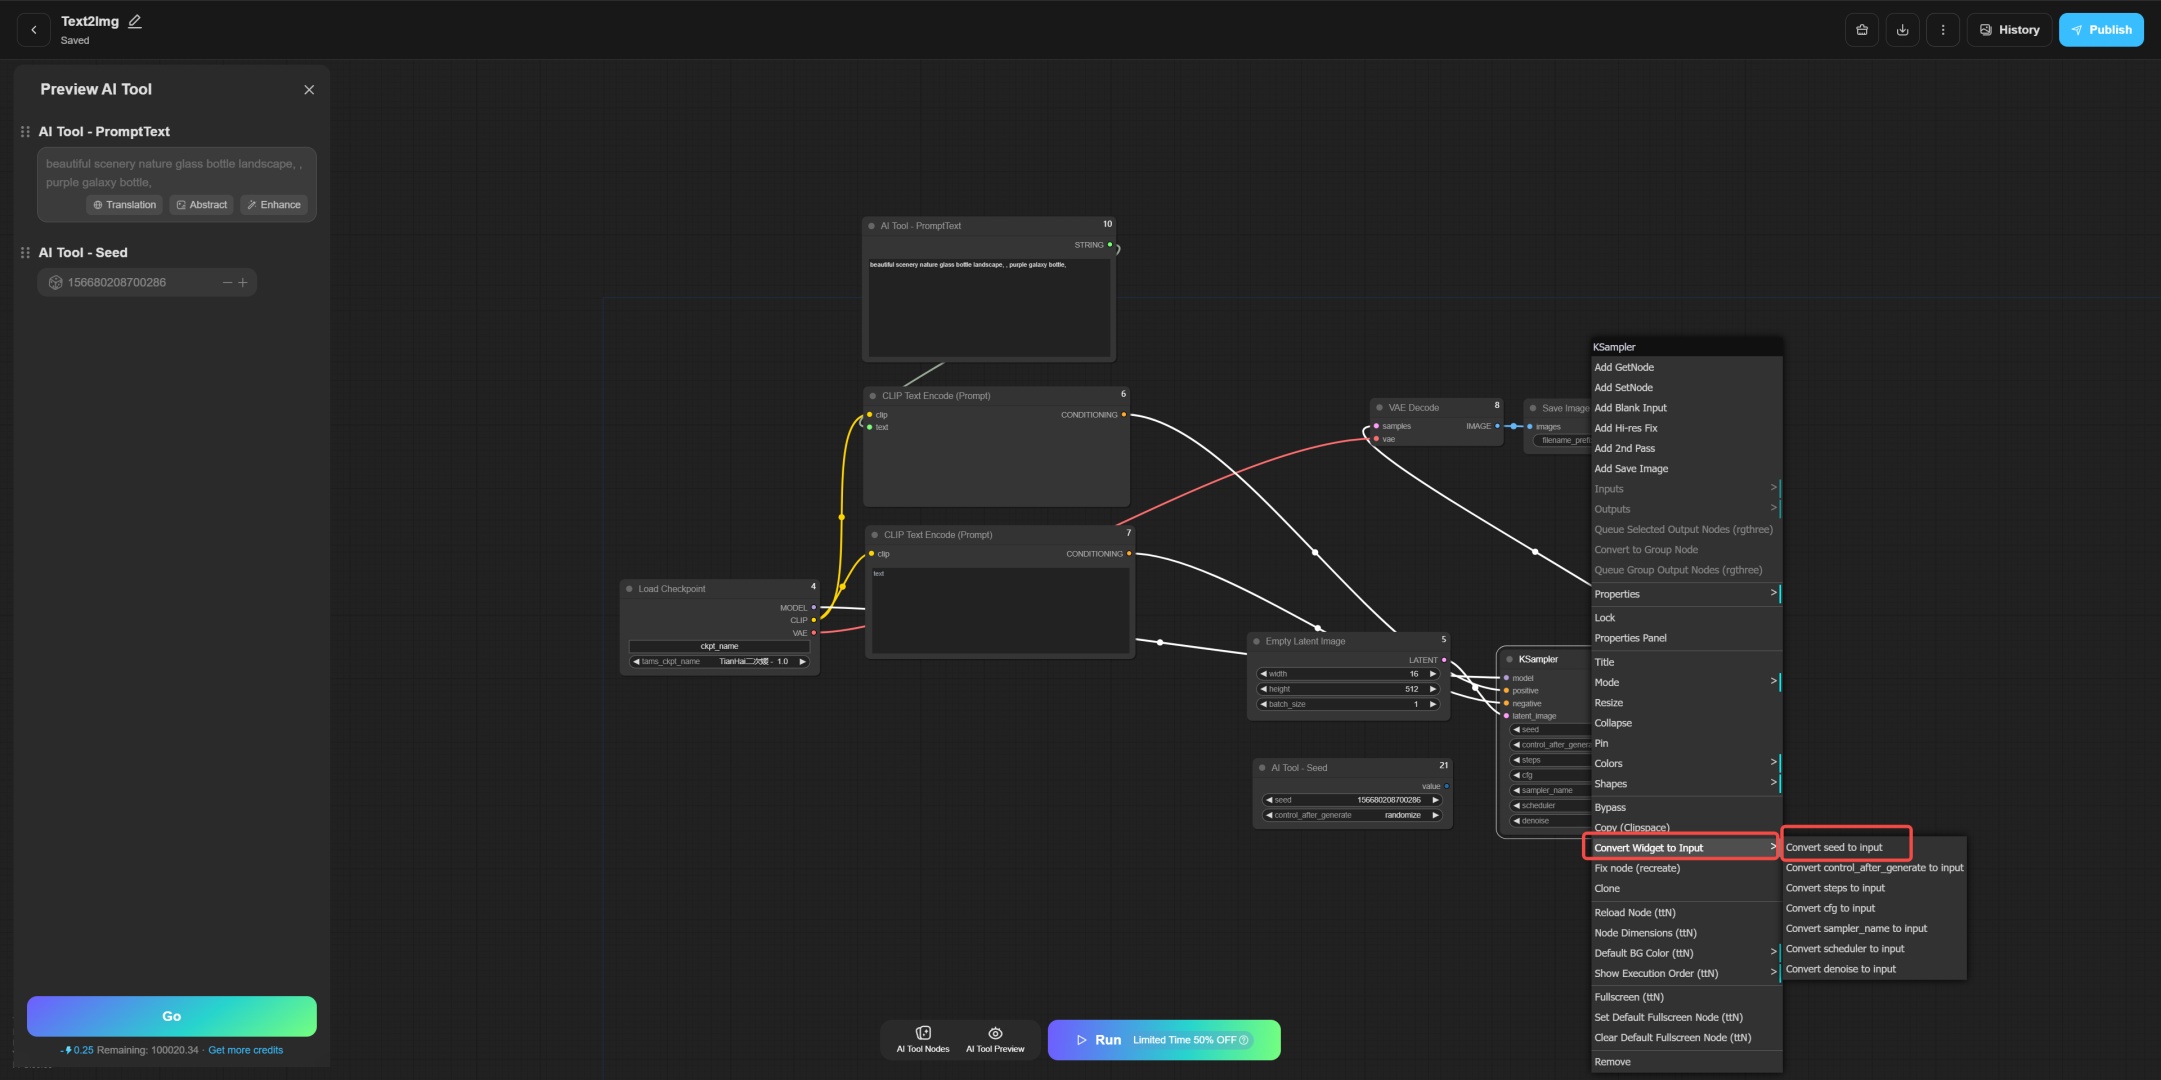
Next, right-click on the old CLIP Text Encode (Prompt) node, select Convert Widget to Input, and then click Convert Text to Input. This will convert the old prompts area into an input field.
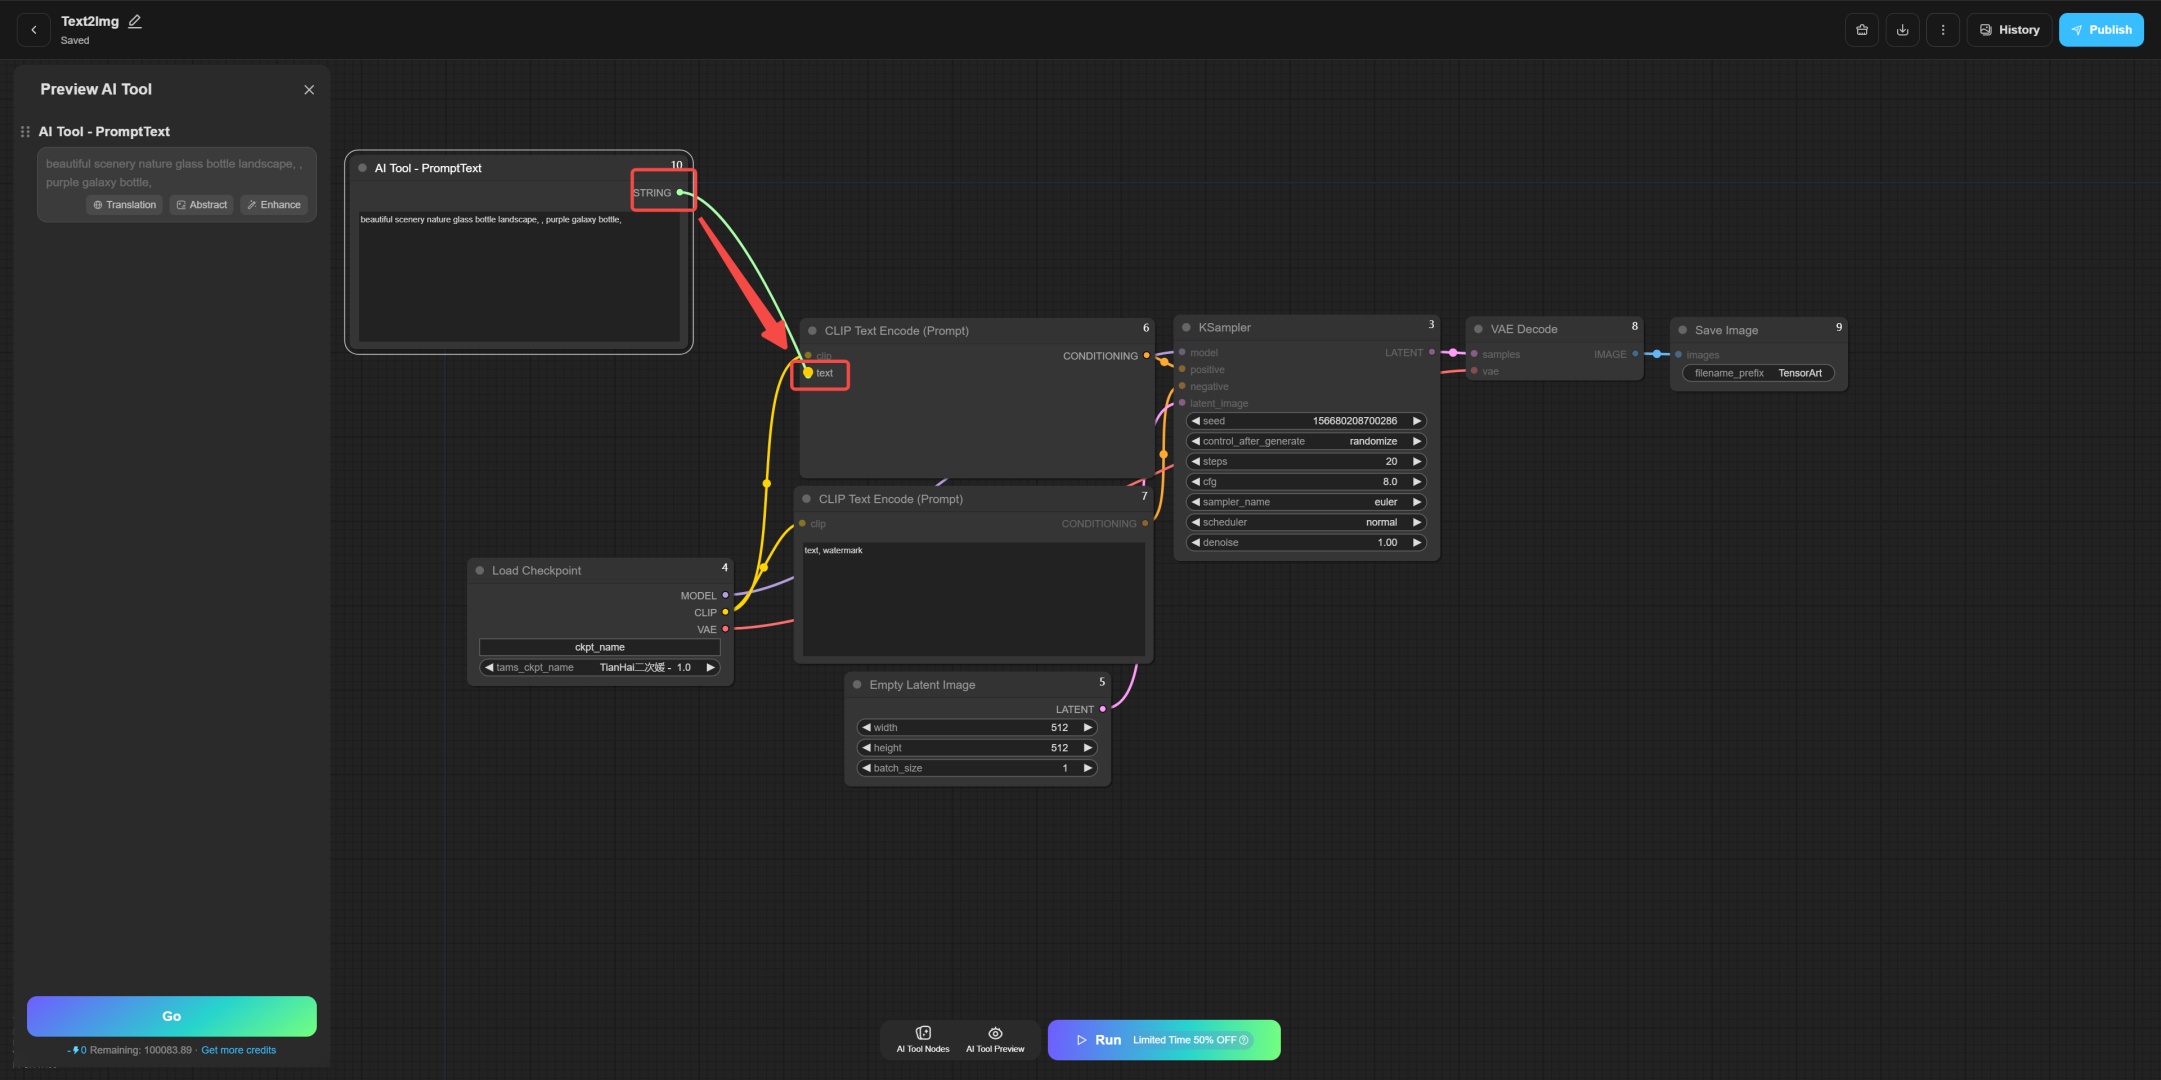
Connect the output of the new node to the input of the old node to complete the node update operation.
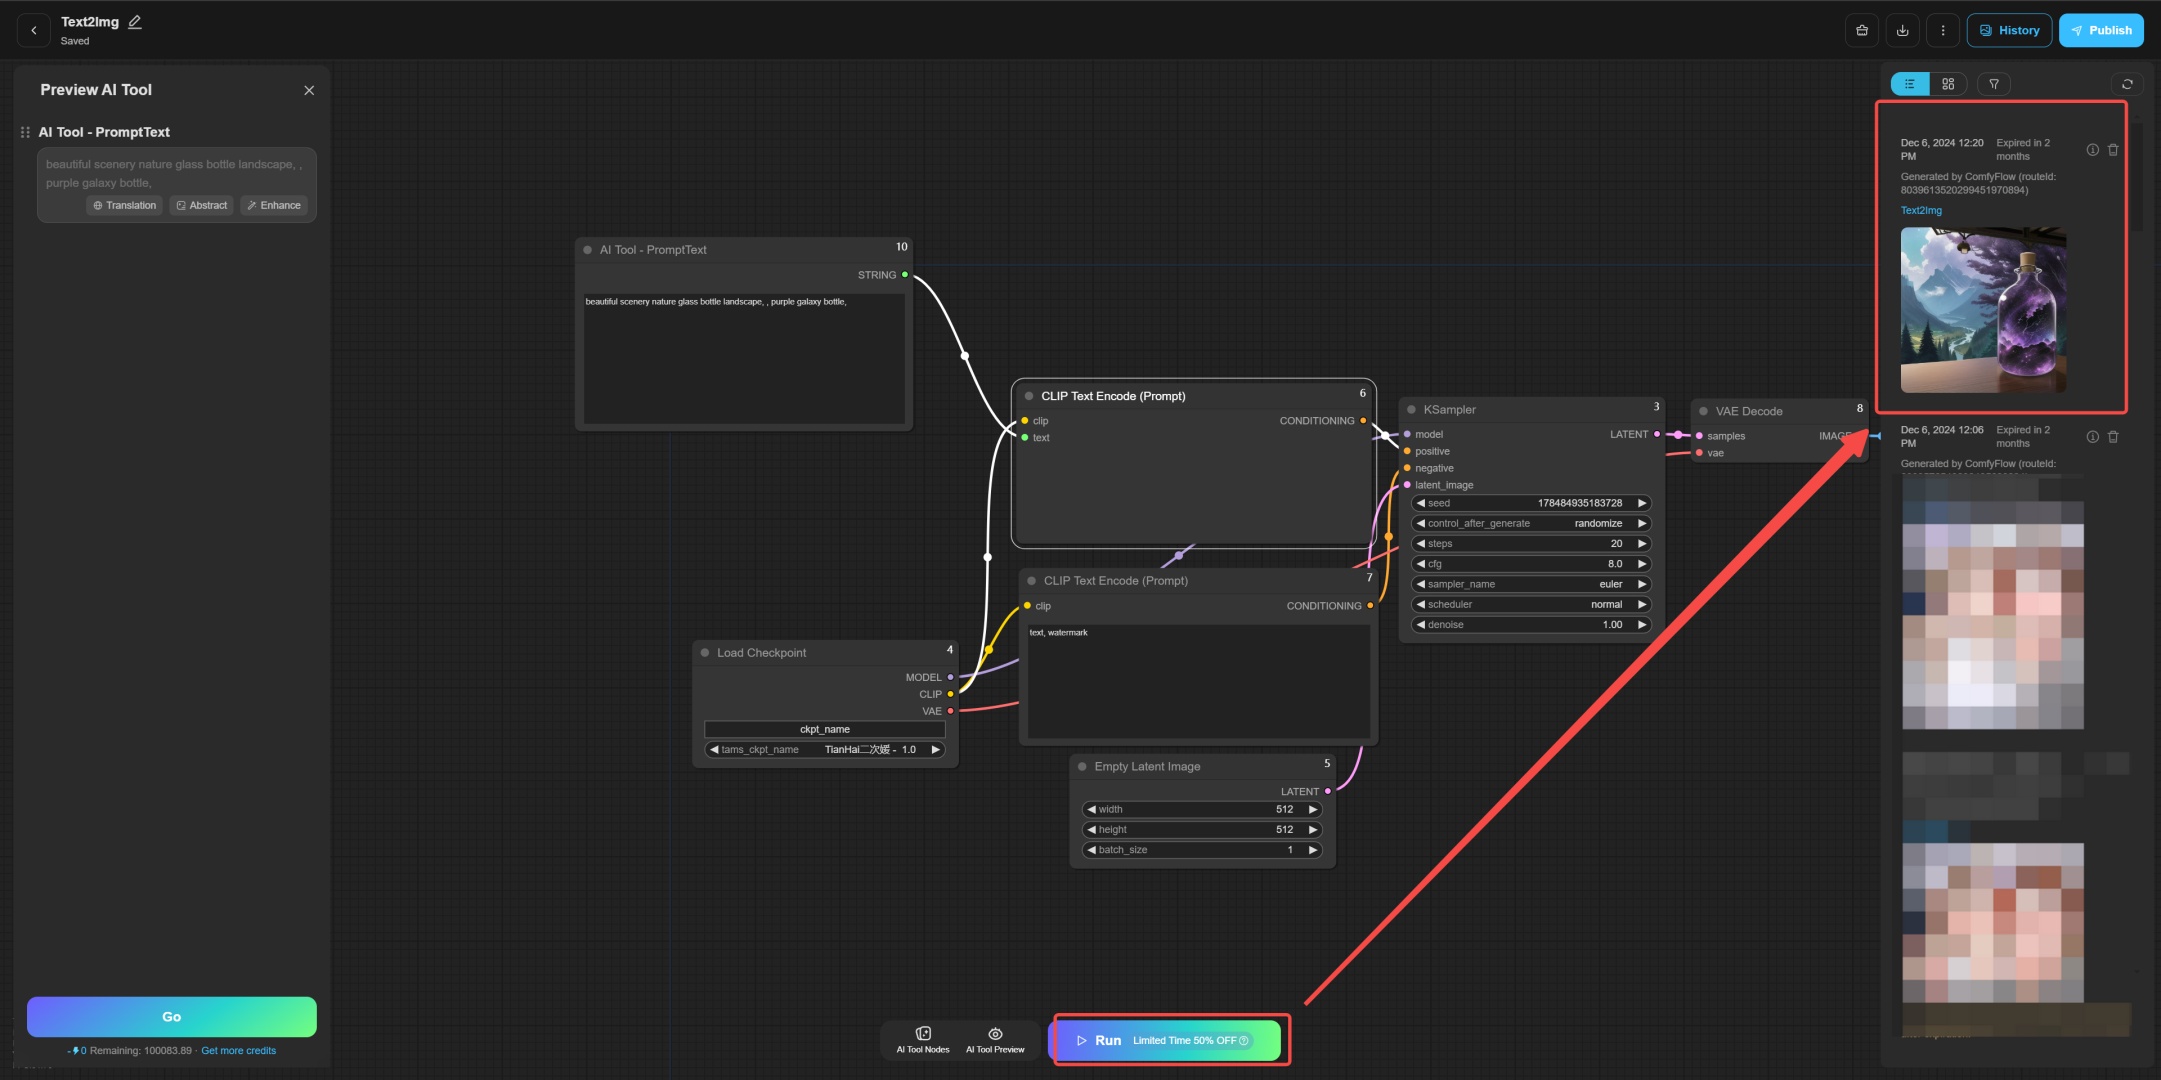
After the update is complete, remember to run the workflow once on the Workflow page to ensure that the operation is correct.
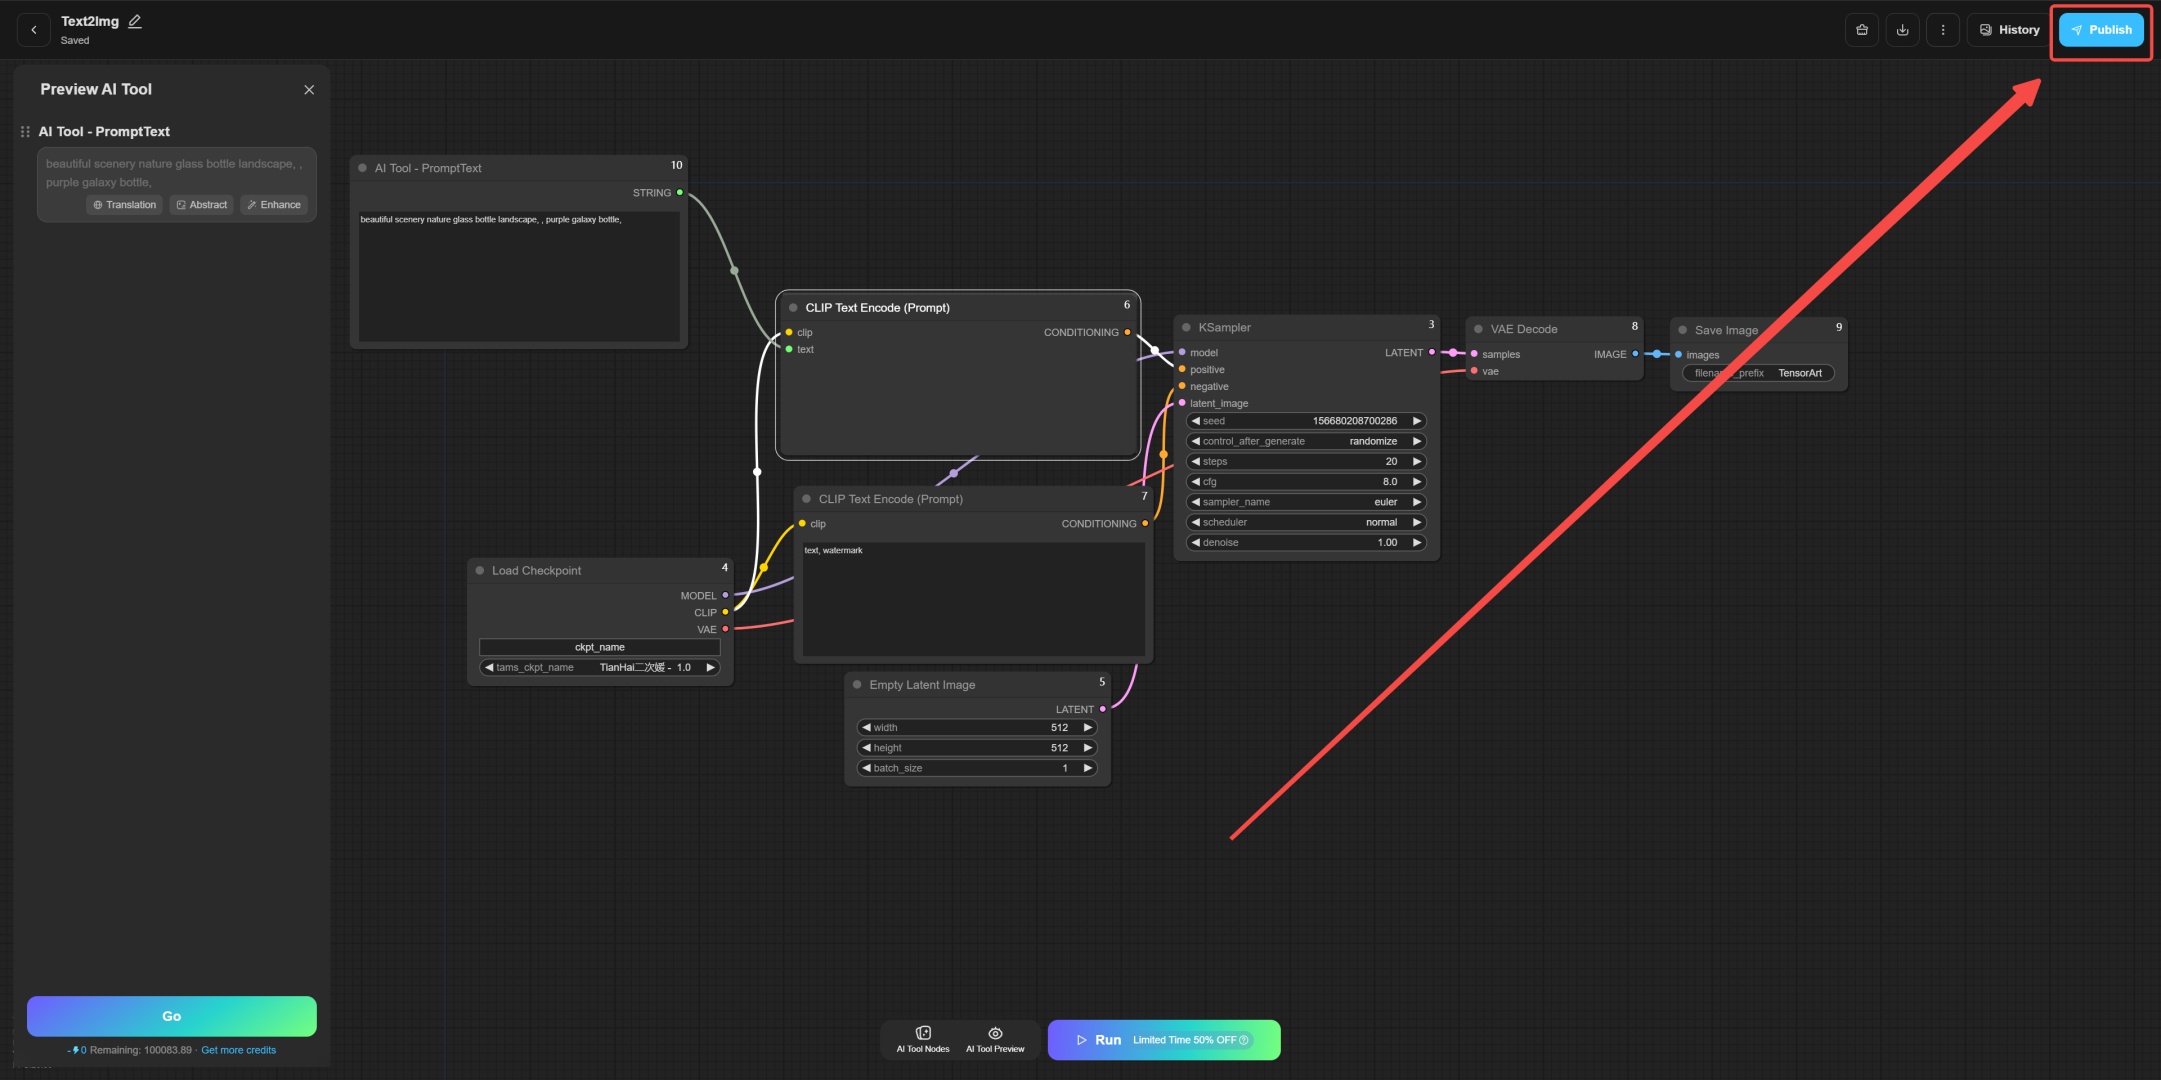
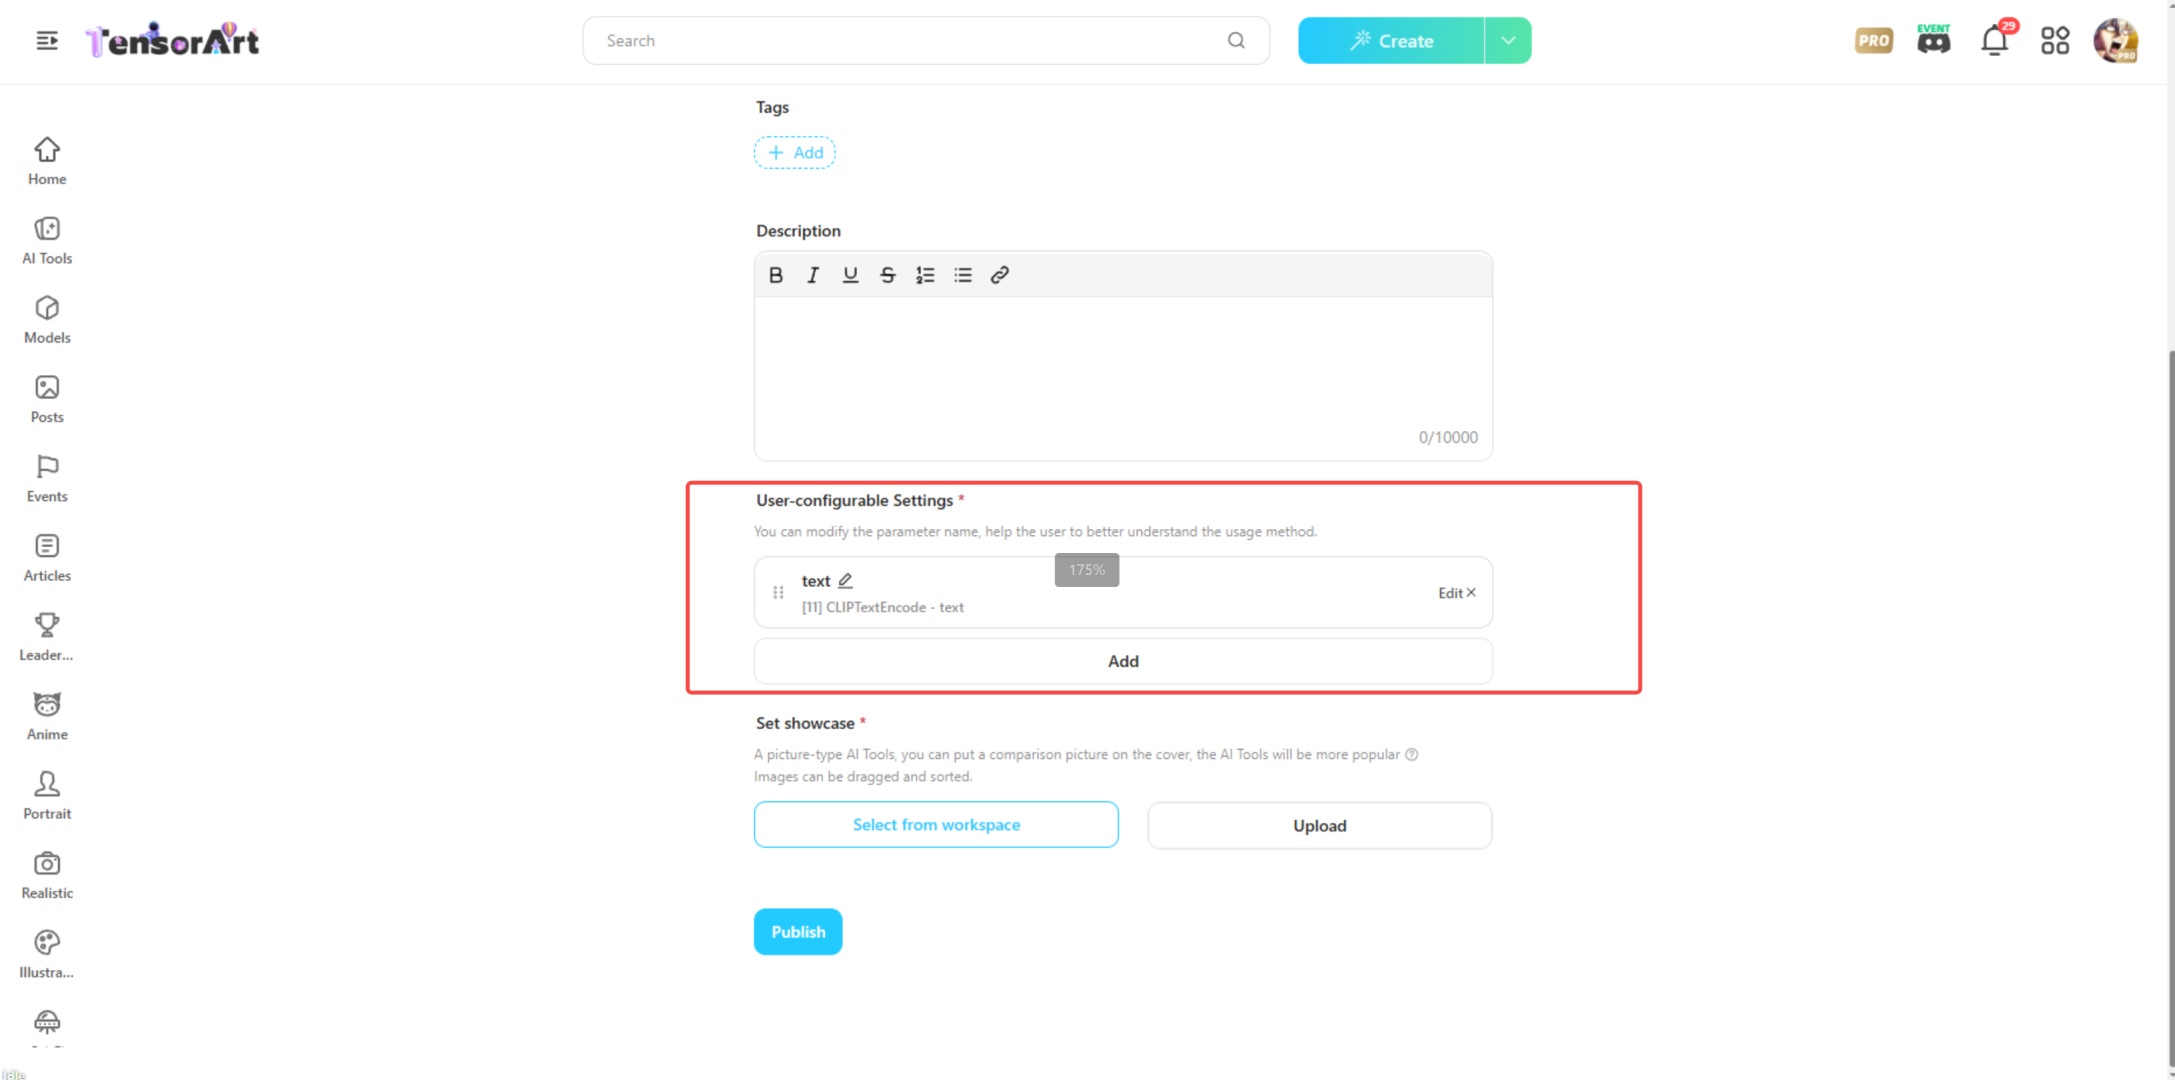
Once everything is set, you can click the Publish button in the upper right corner.
Select Publish as AI Tool.

In the new version, we have optimized the original exposure settings, simplified the user's operation process, and improved the publishing experience.
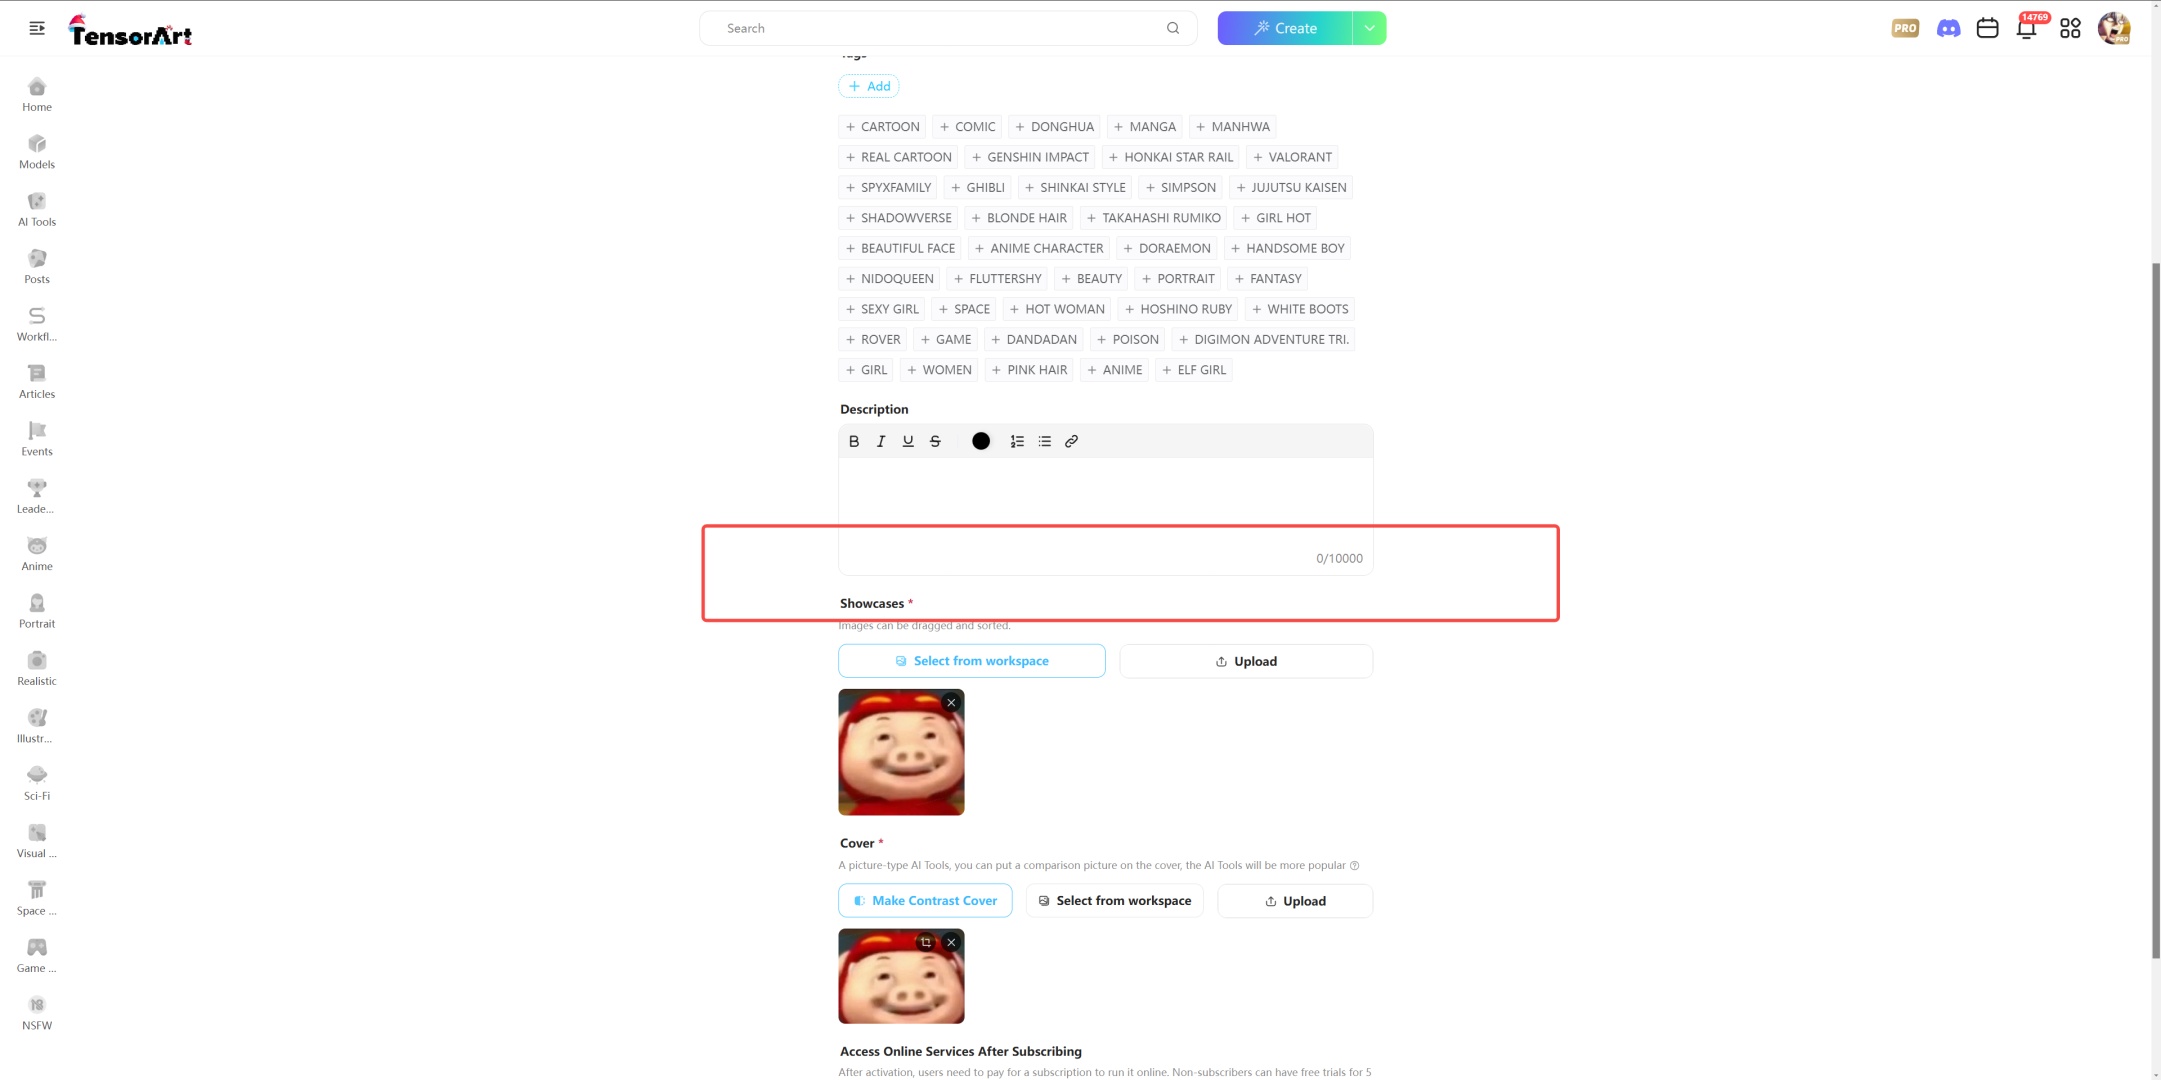
Once everything is done, you can use your AI Tool.
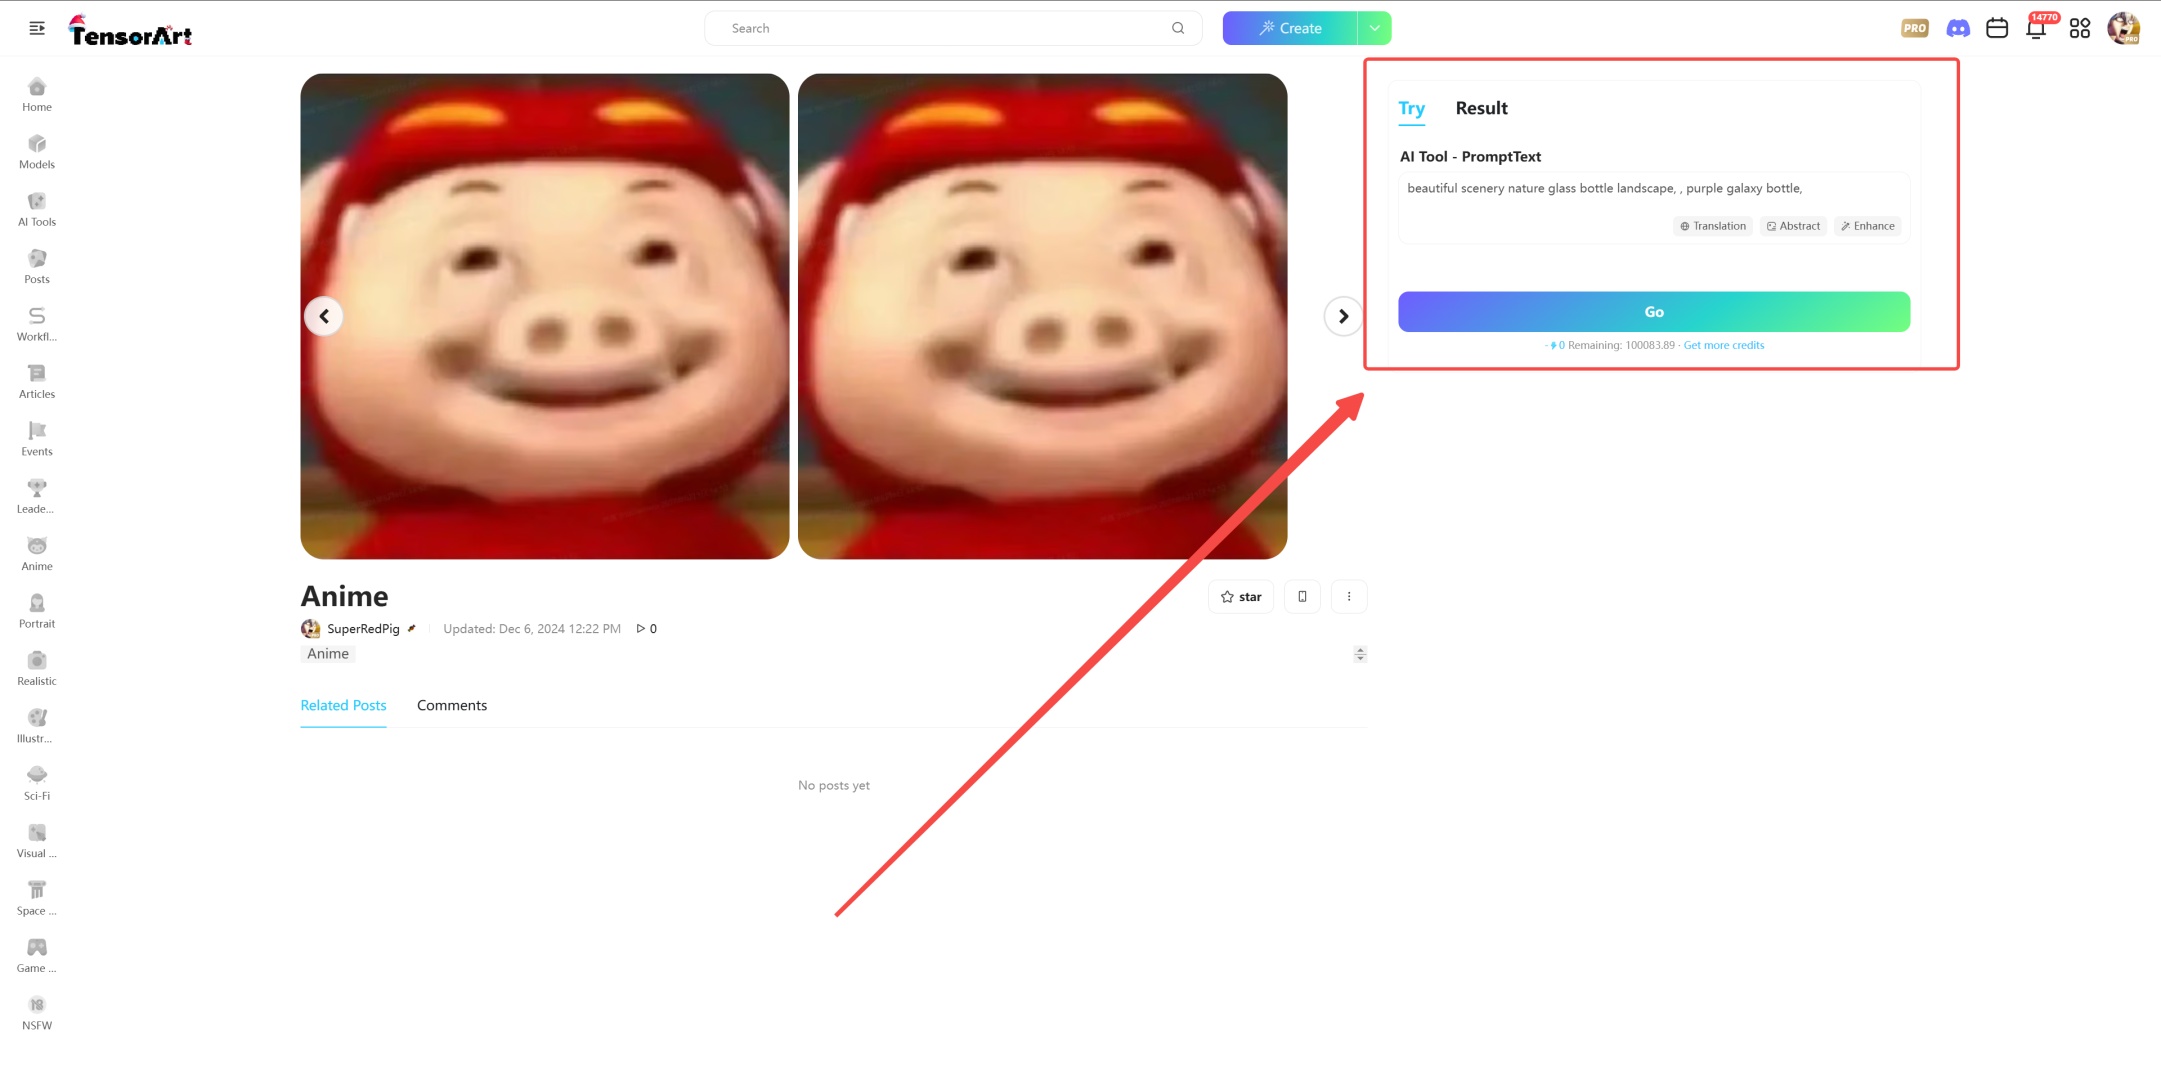
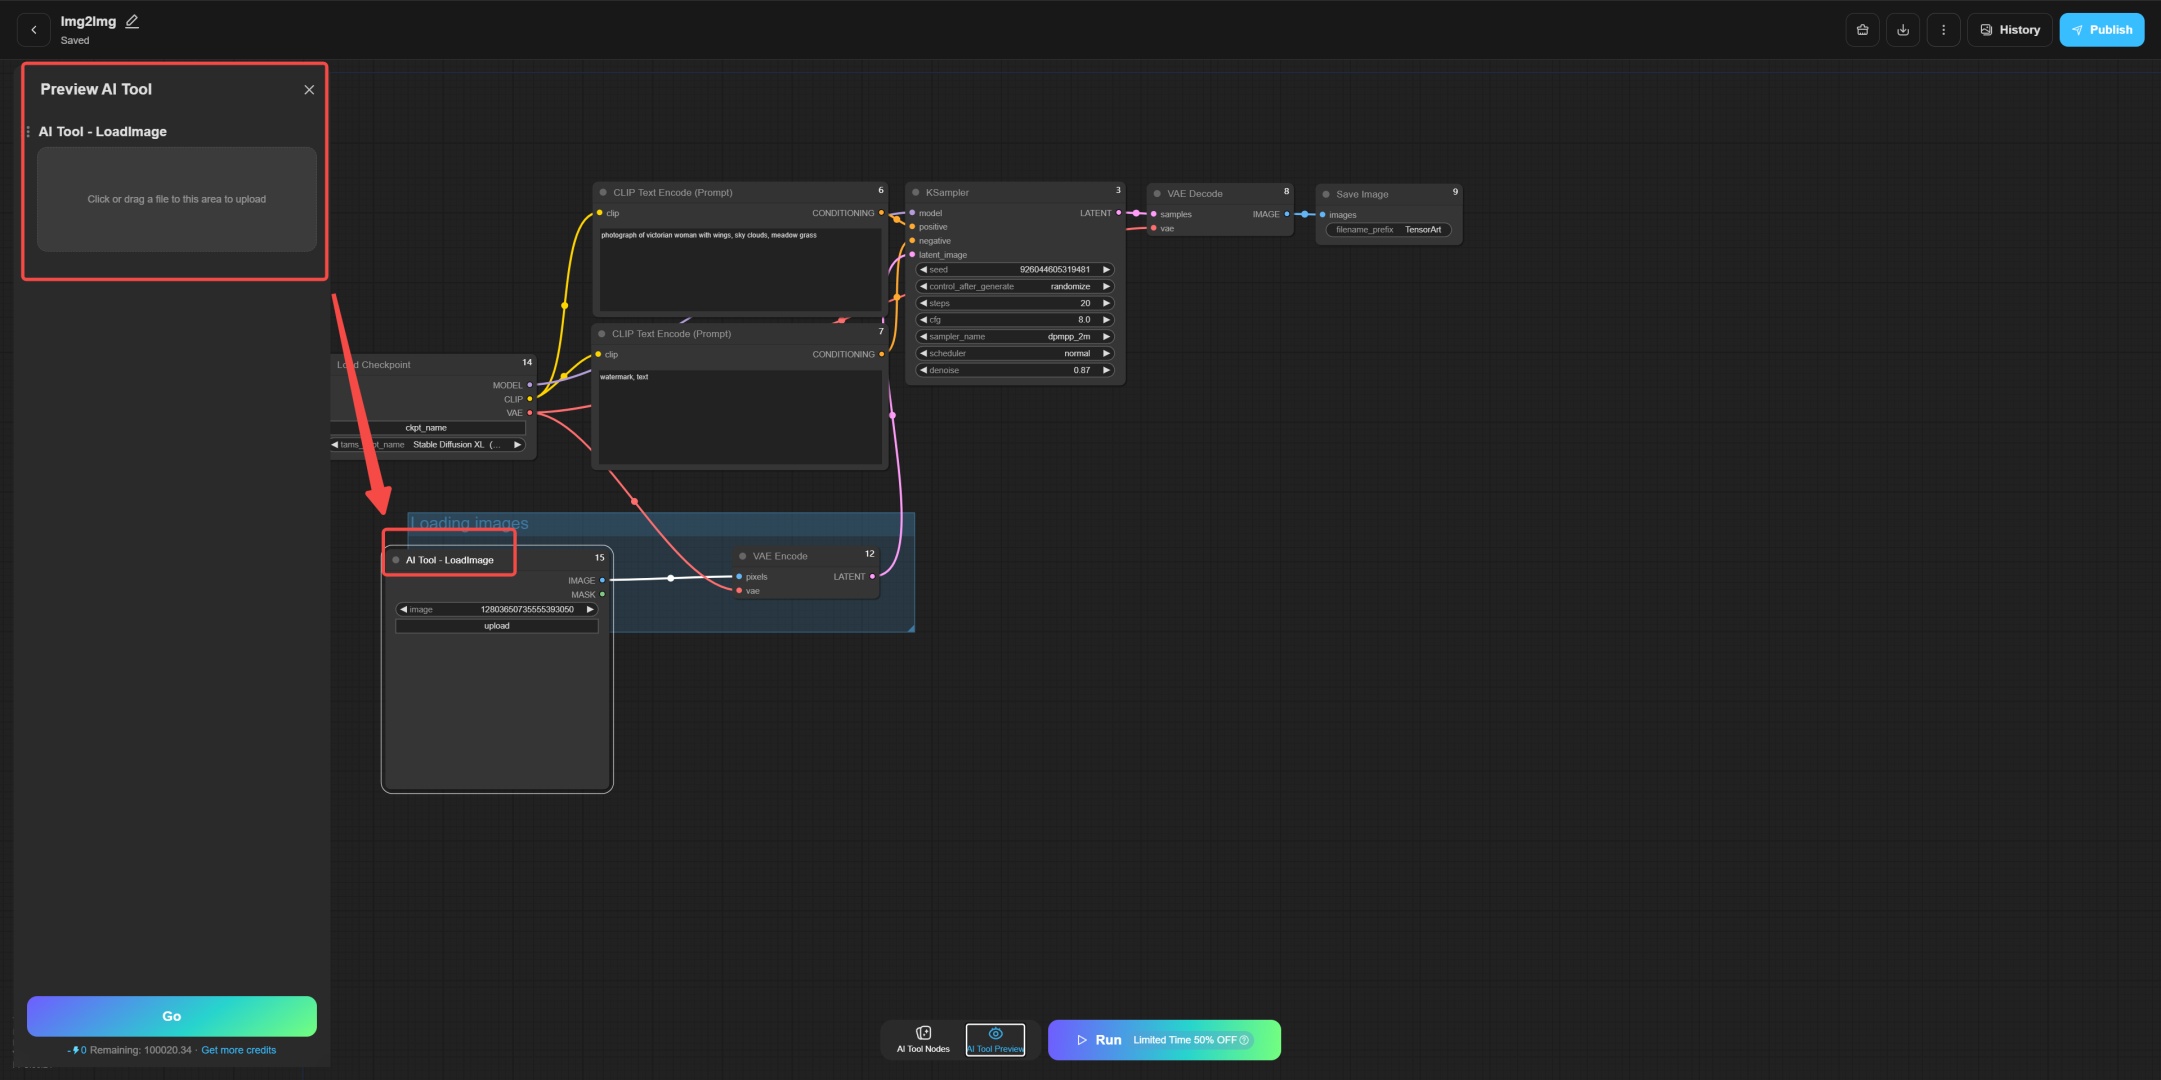
Image to Image
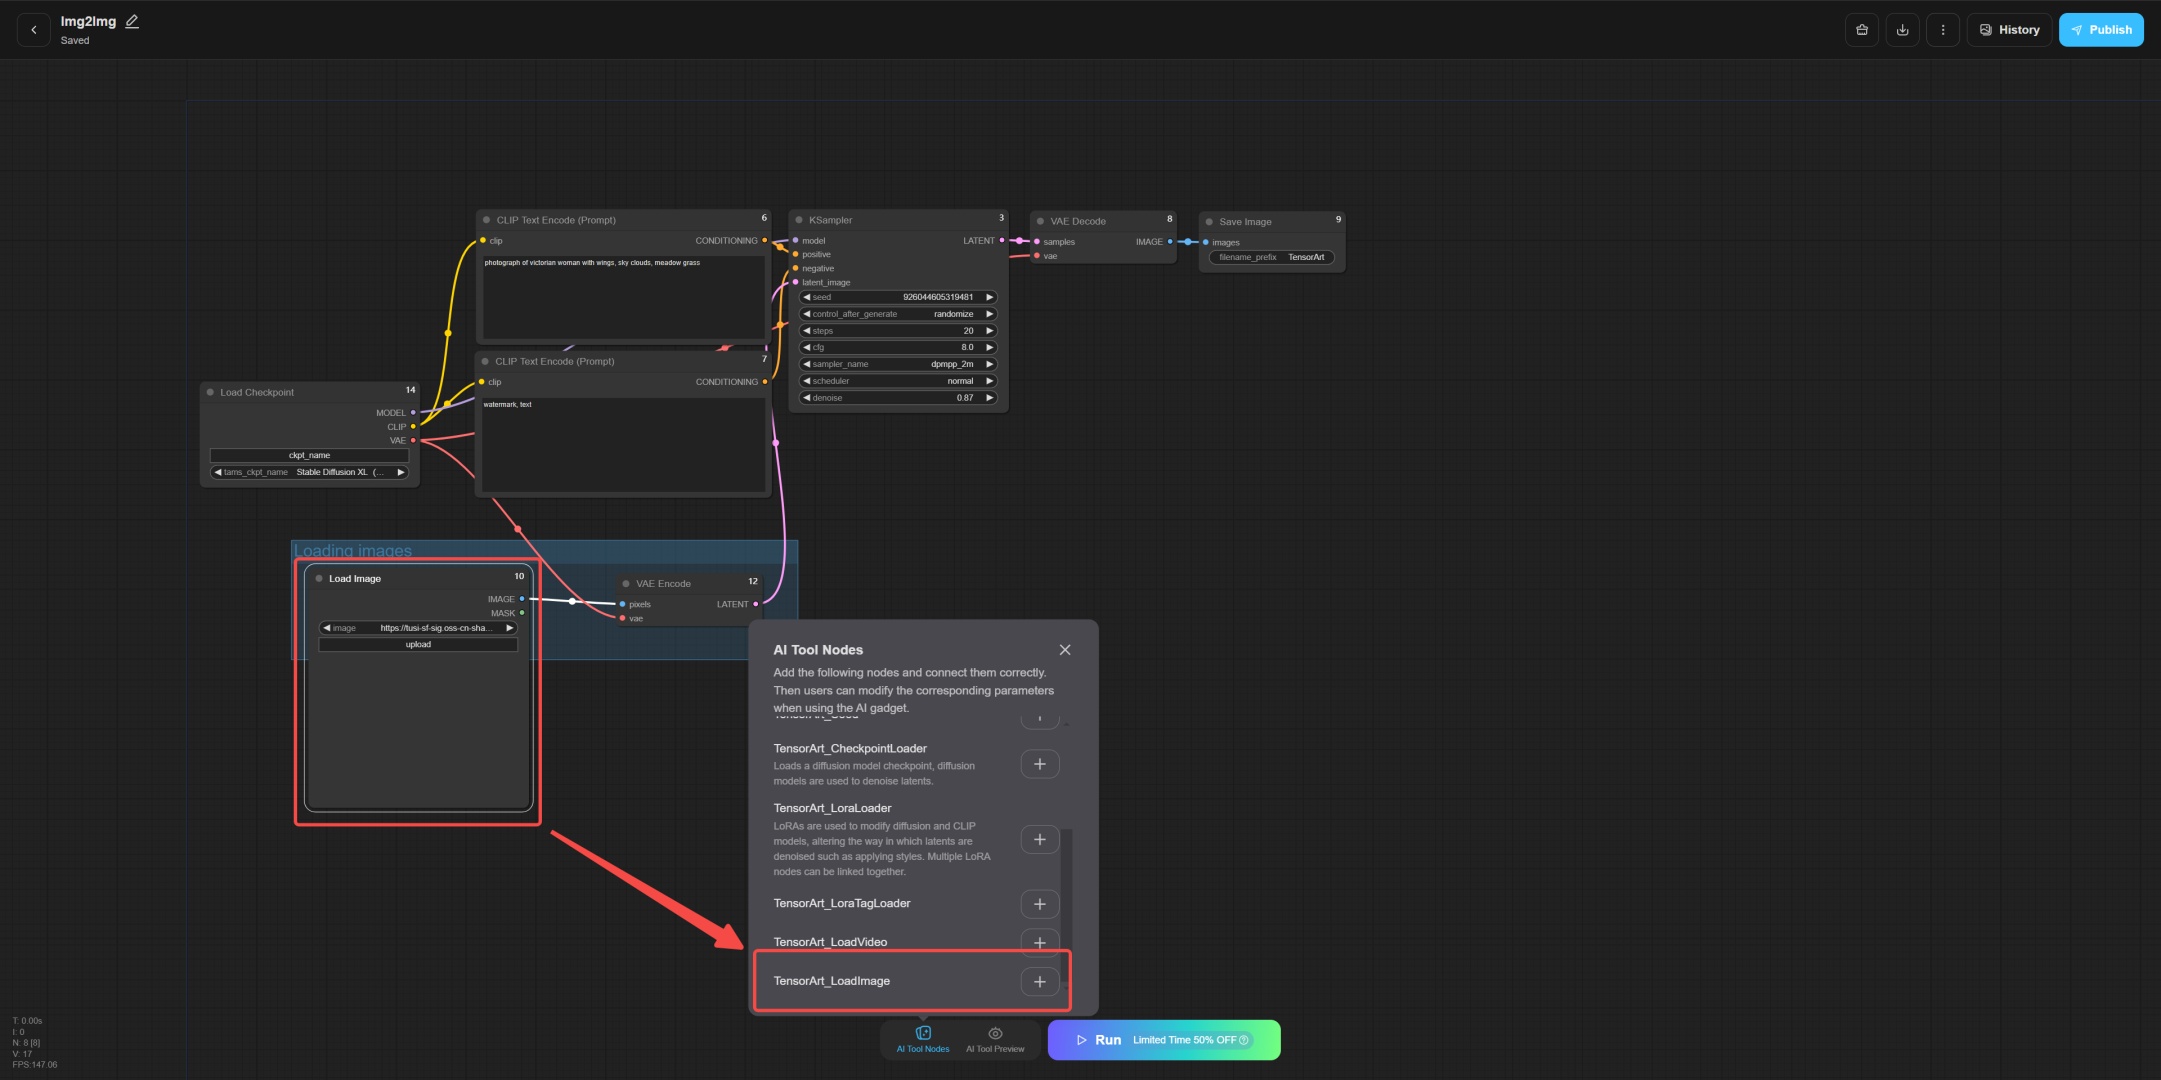
Of course, the same process applies to image generation or other AI Tools.
After replacing, click AI Tool Preview to see the nodes exposed to everyone. Remember to run it once and then click Publish.
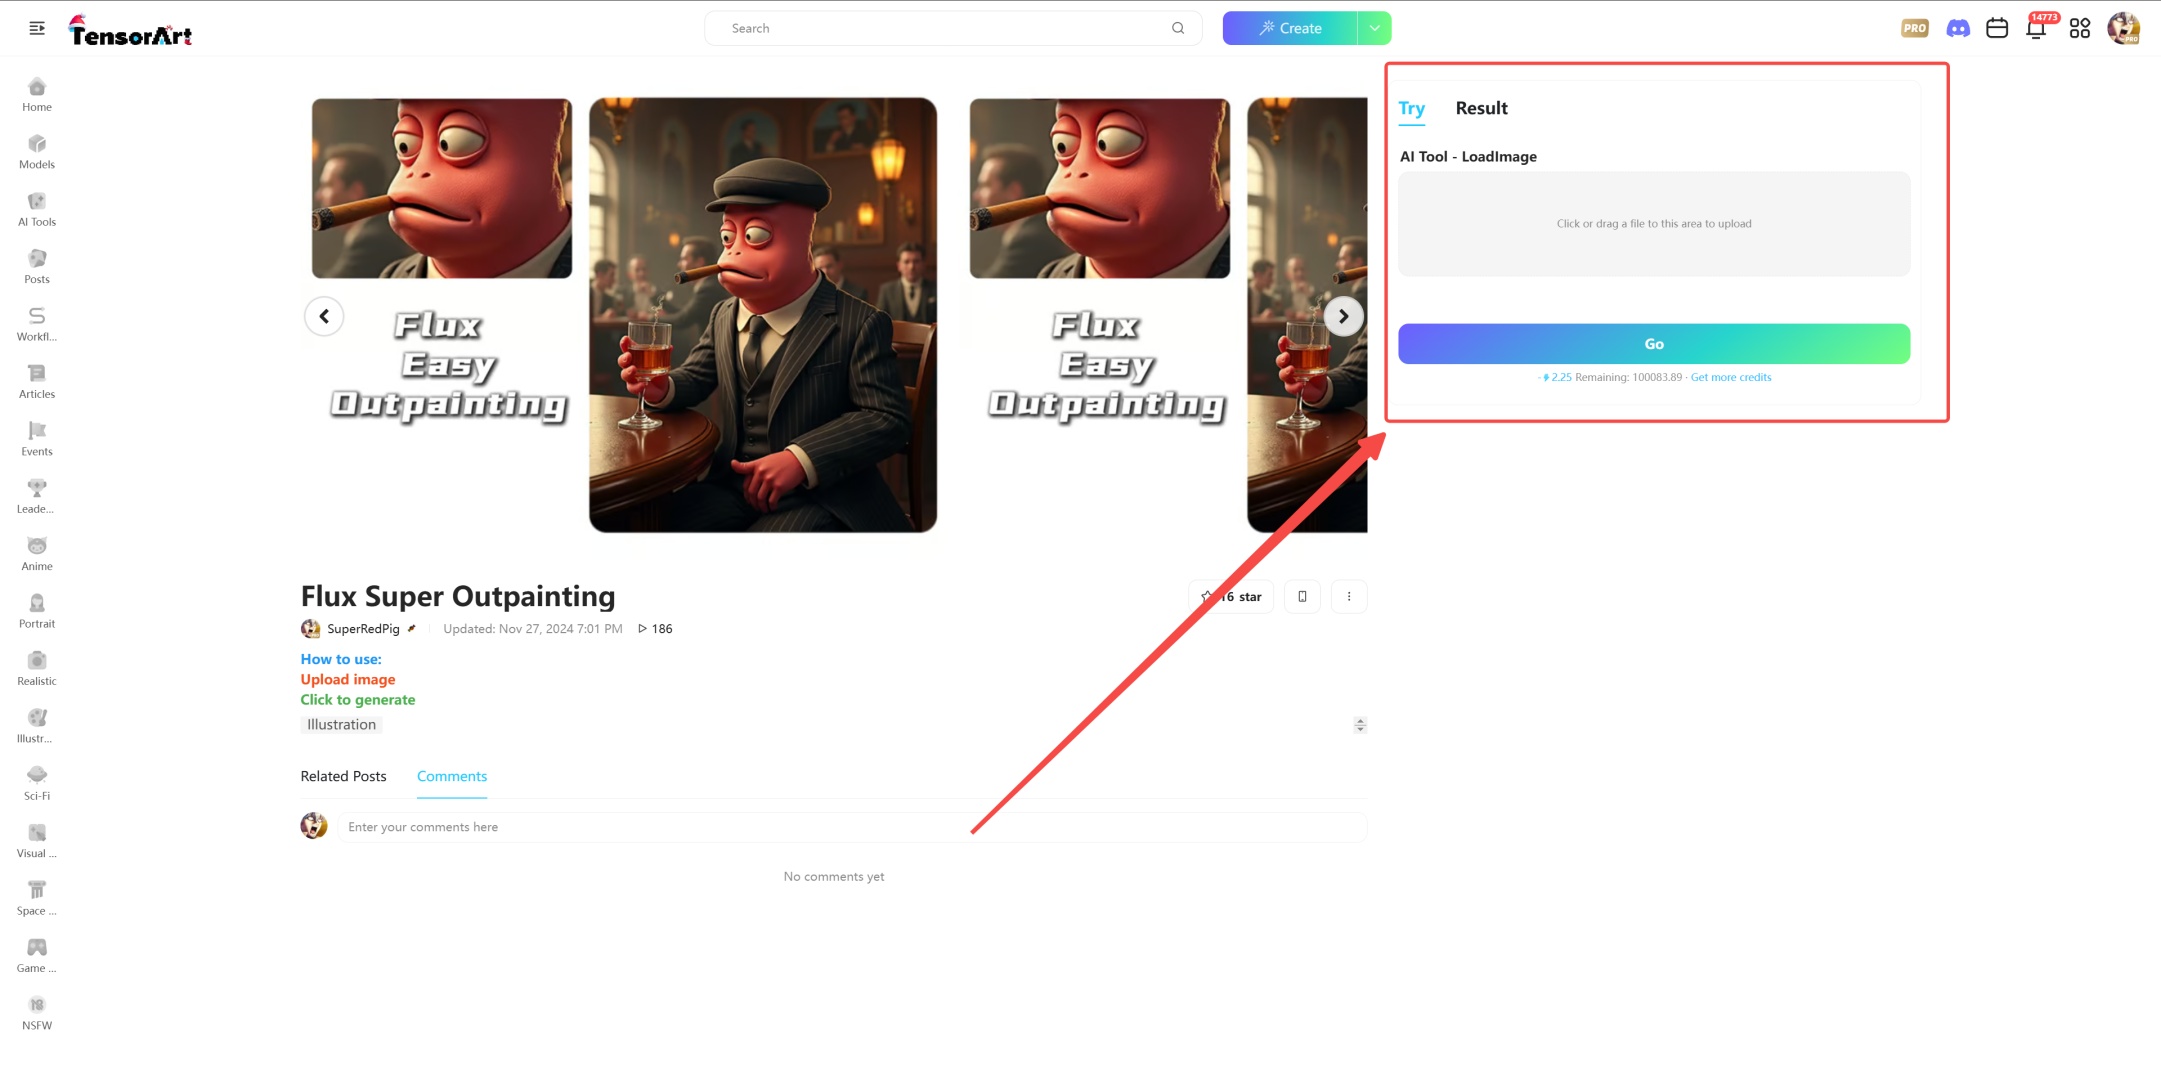
After the release, you can see the new version of the AI Tool interface.
Other Nodes
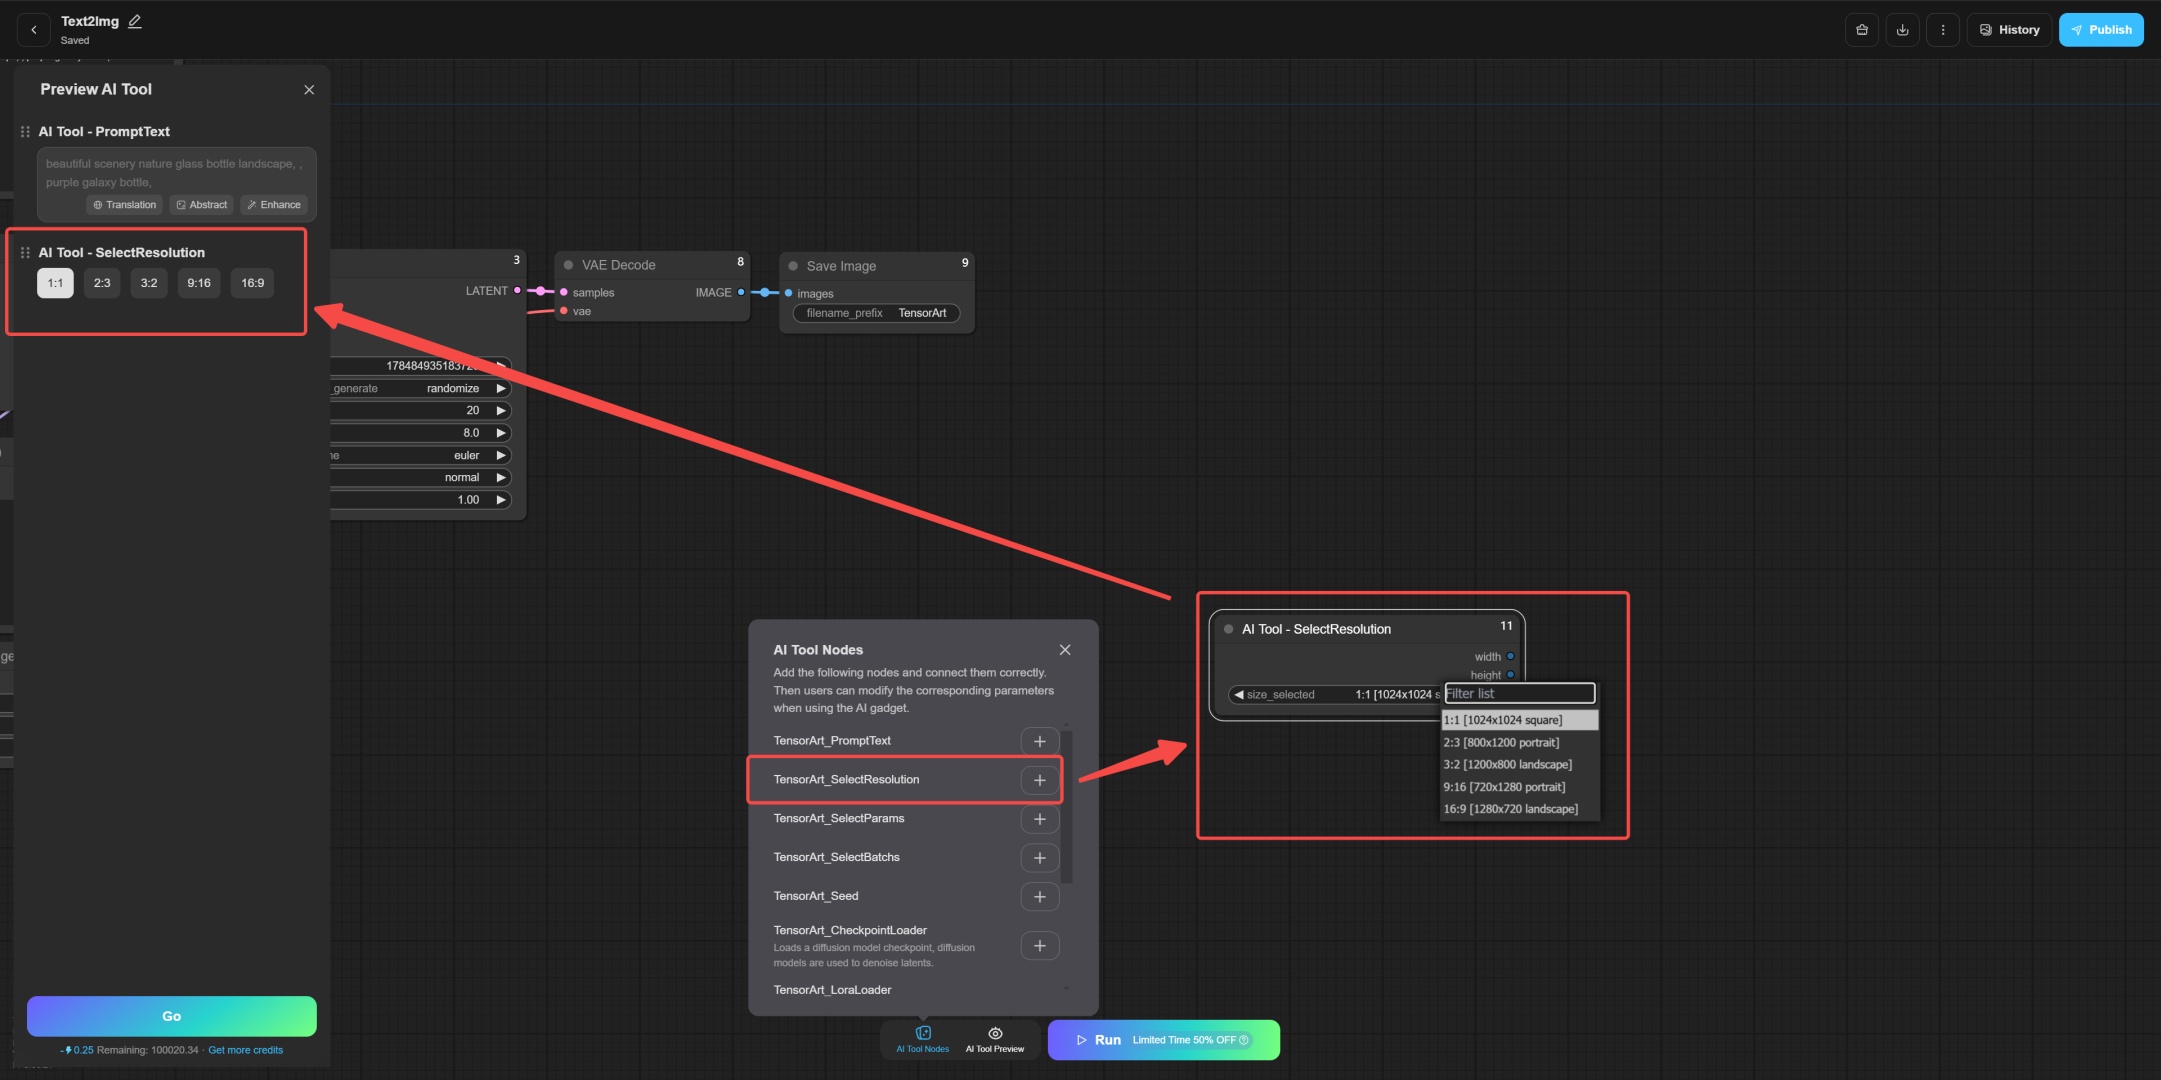
TensorArt_SelectResolution
This node allows the user to select the resolution of the image, eliminating the need to enter the resolution manually.
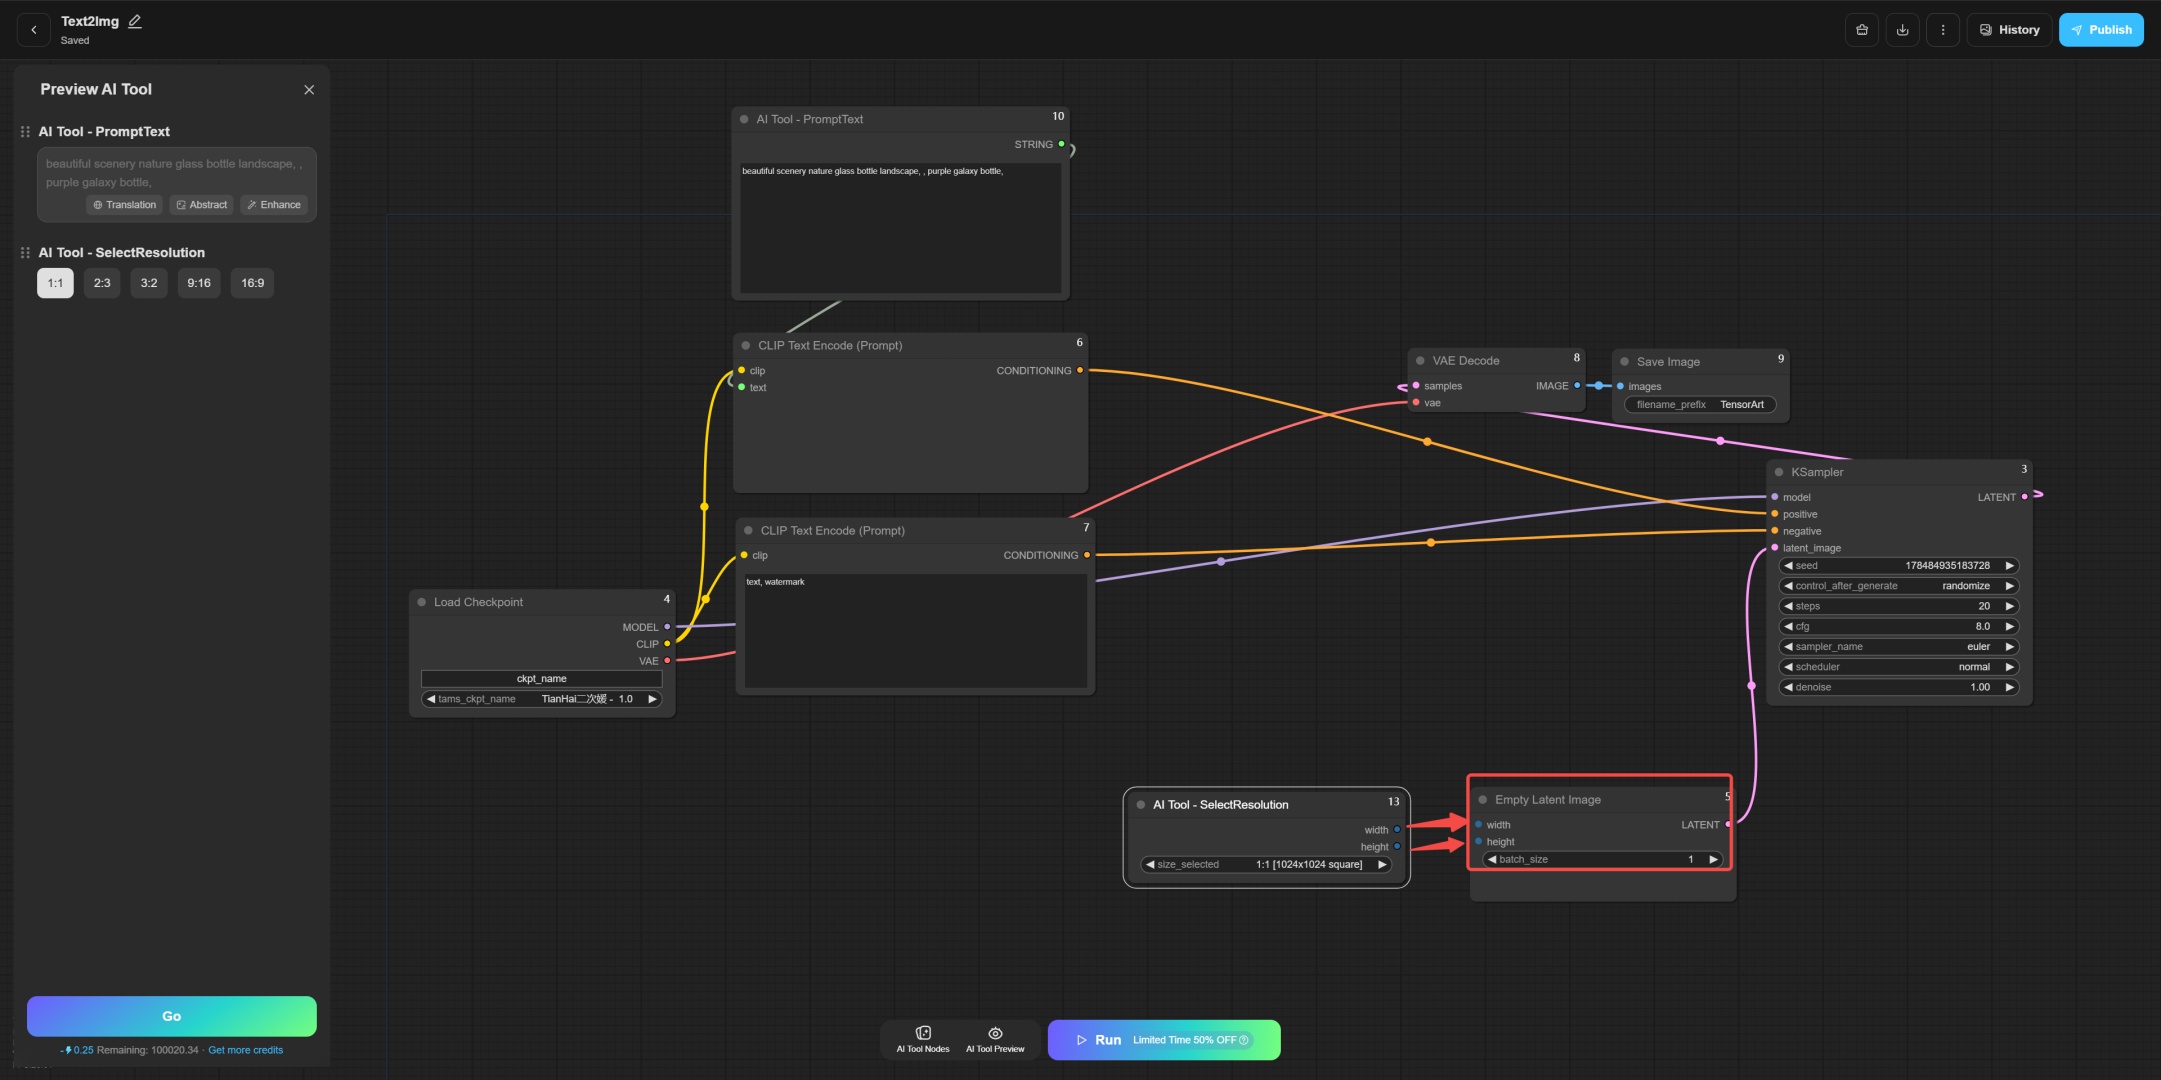
Simply modify the width and height of the Empty Latent Image as input and connect to the output of SelectResolution.
TensorArt_SelectParams
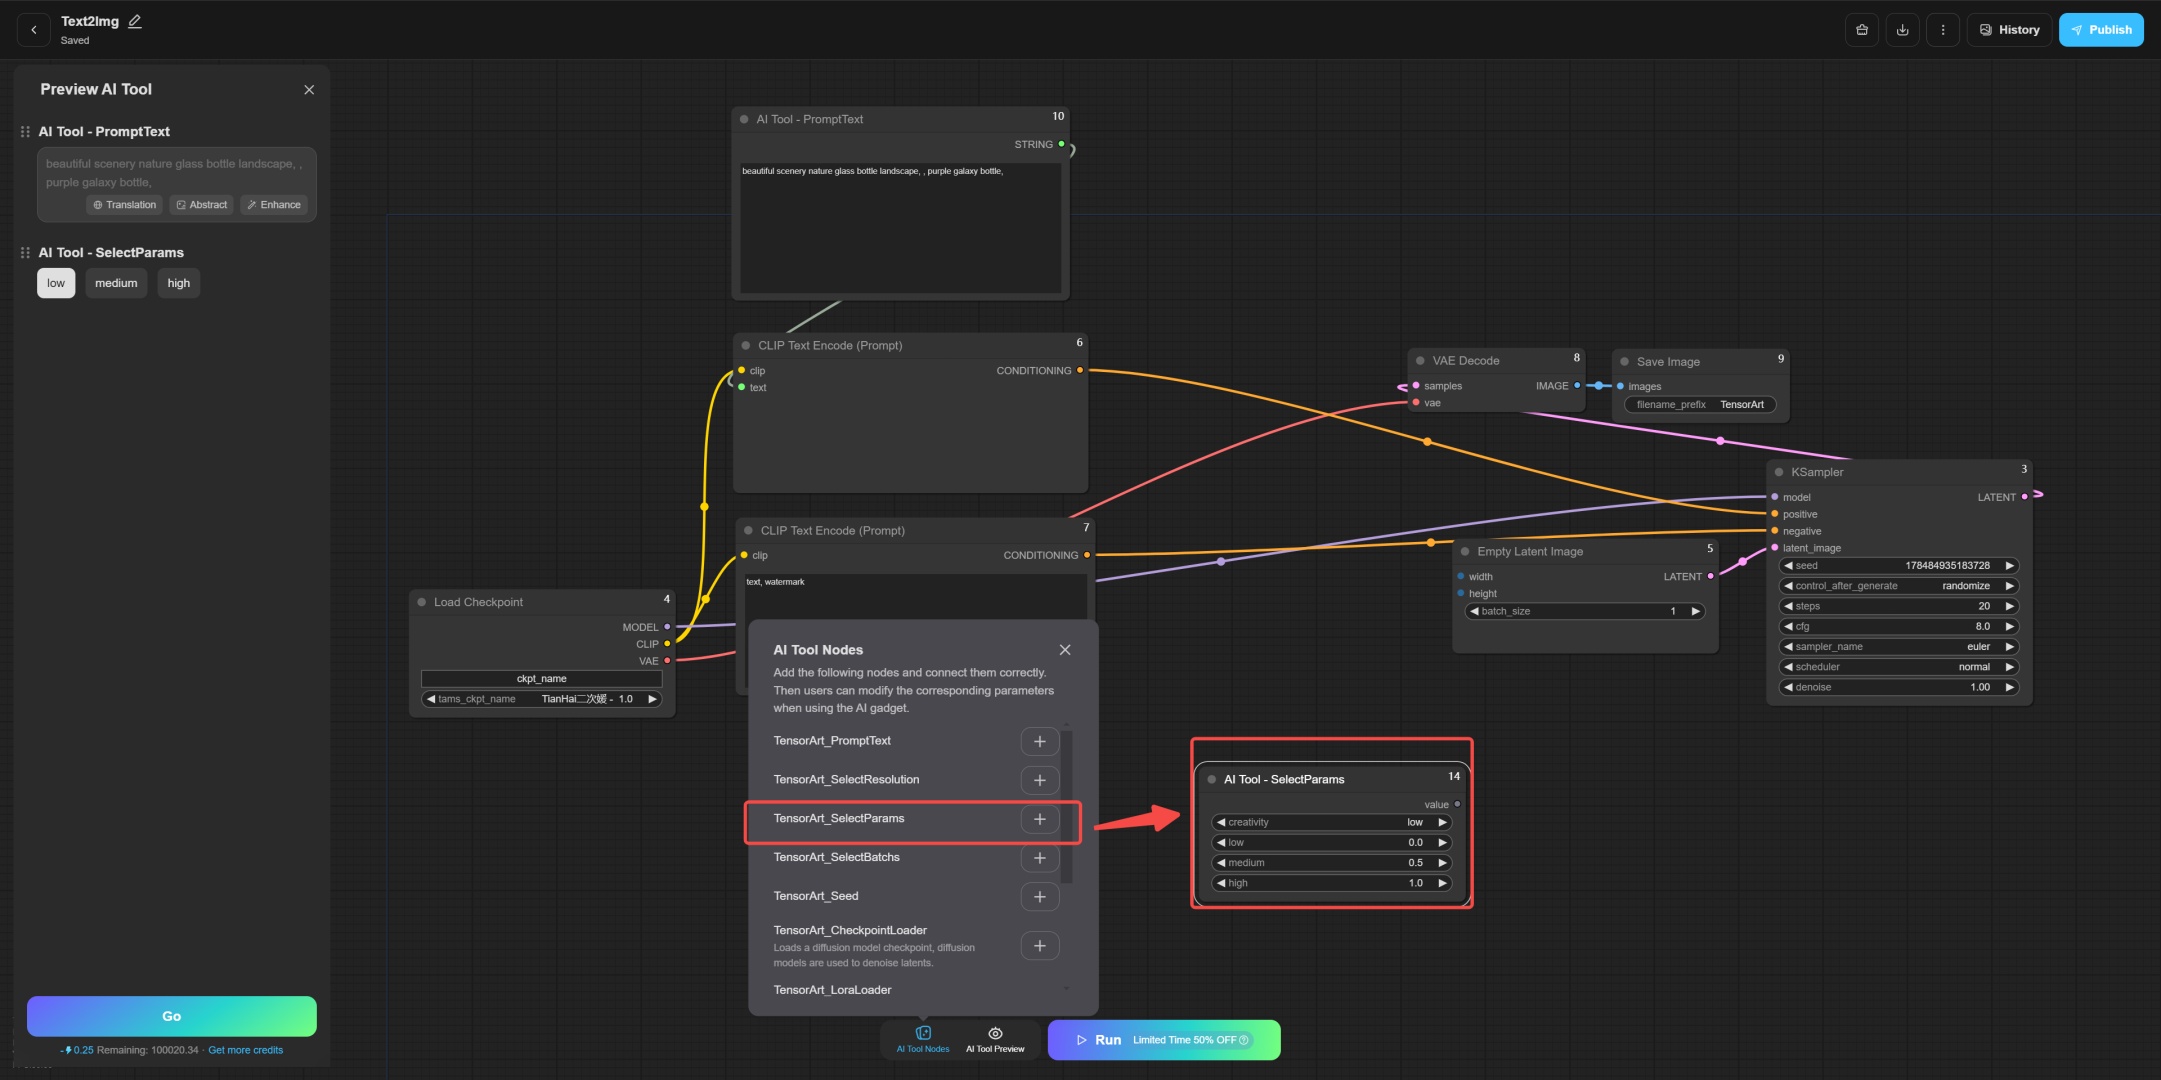
This node provides the function of adjusting parameters and supports setting low, medium, and high options:
- low = 0
- medium = 0.5
- high = 1
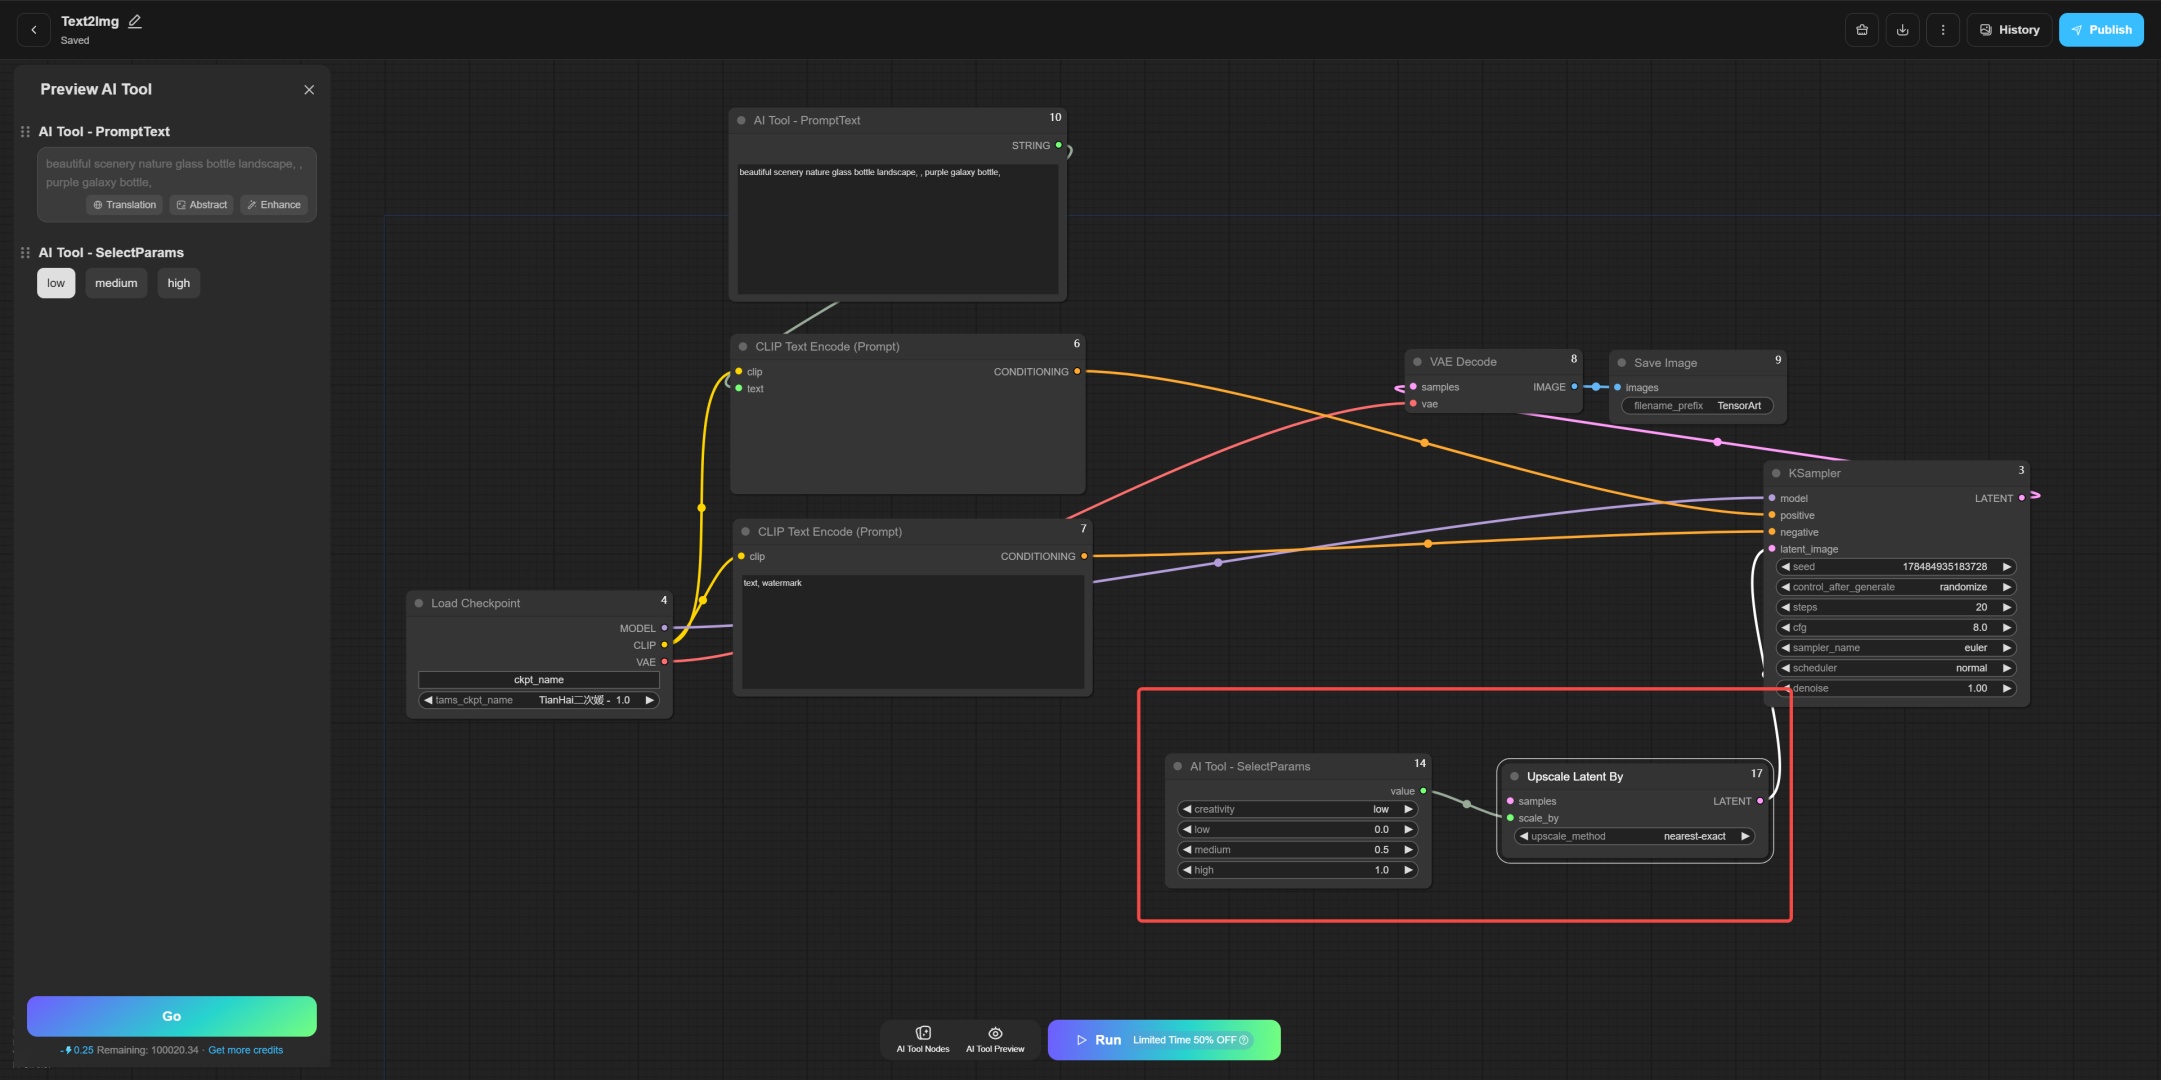
You can connect this node to any parameter input you need to adjust.
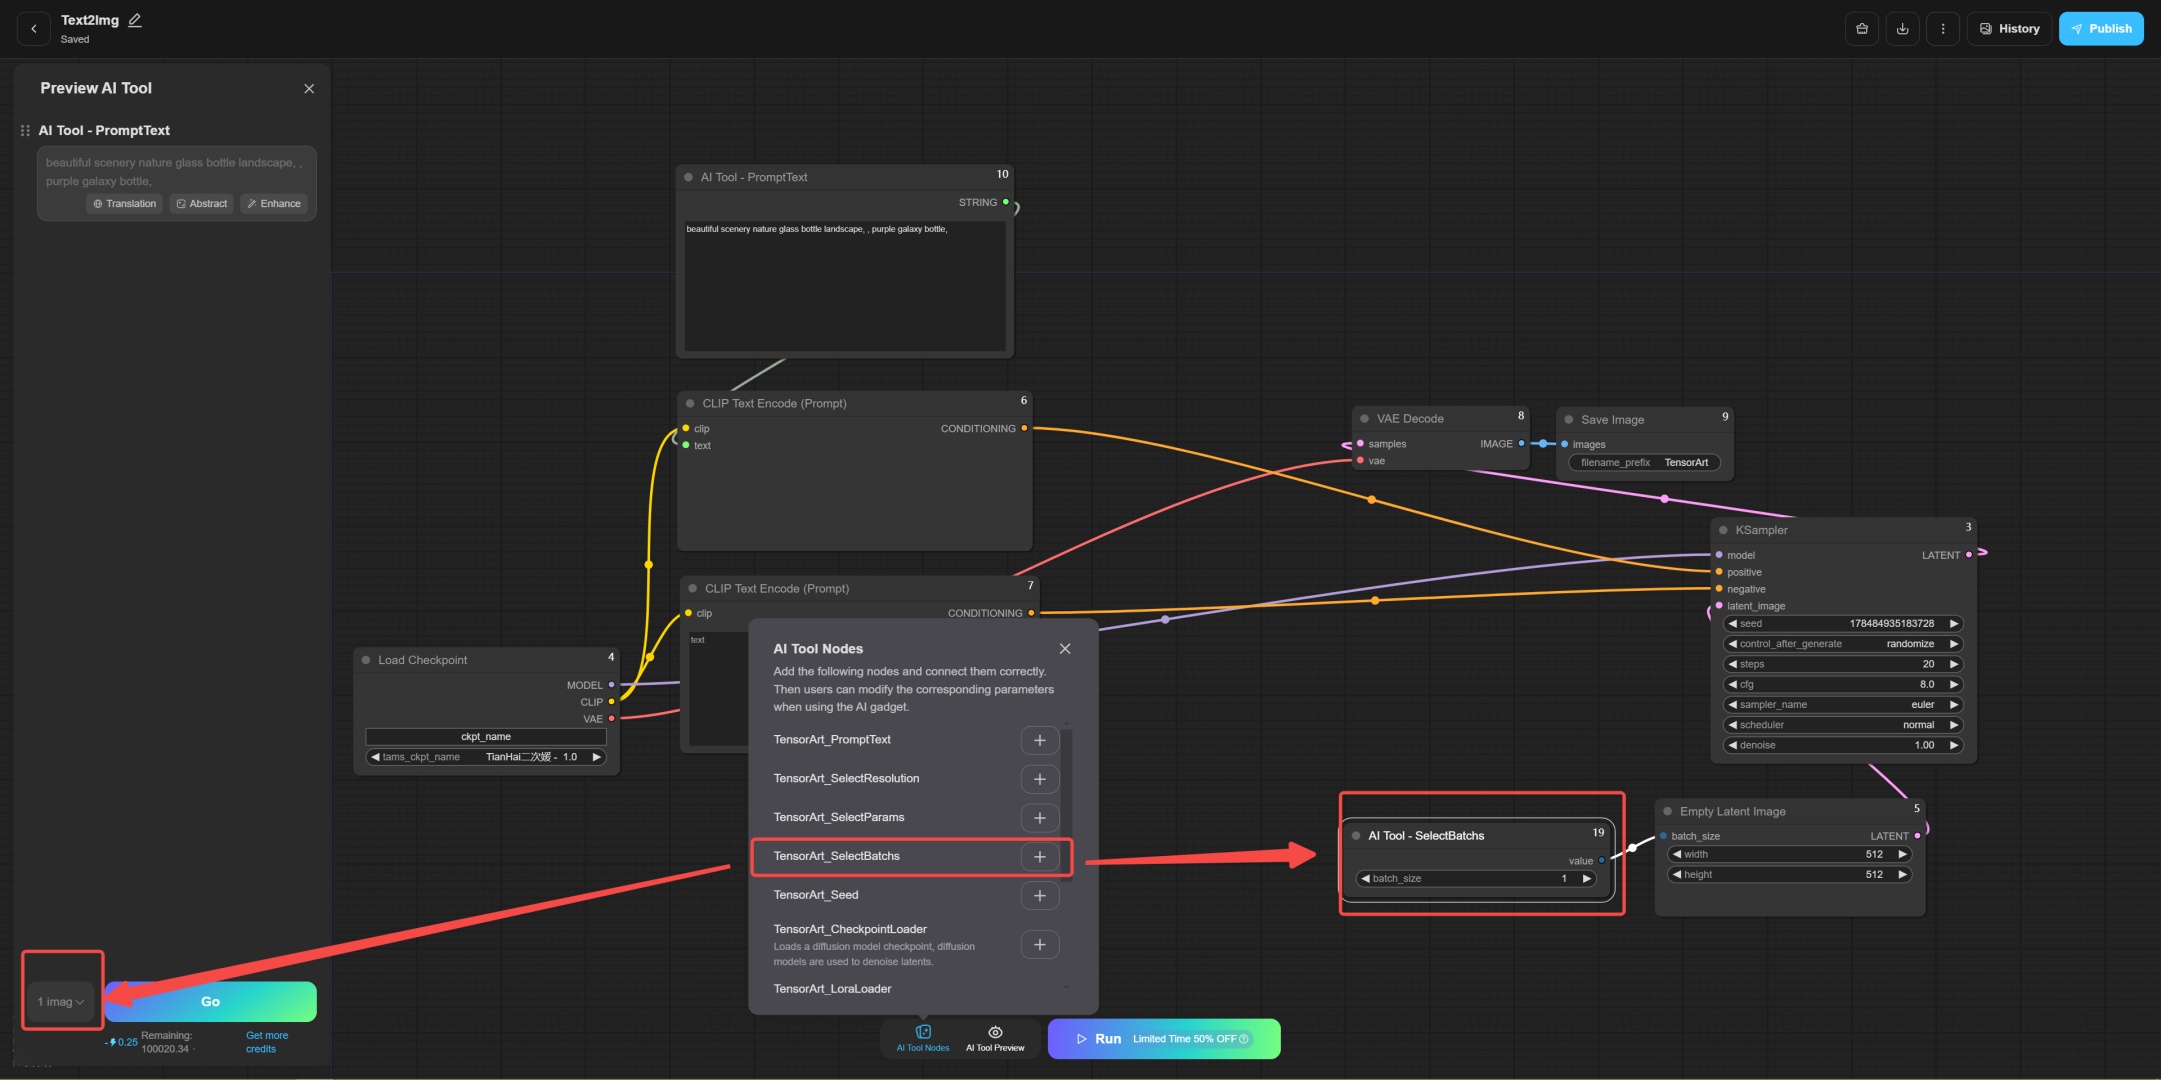
TensorArt_SelectBatchs
This node is used to select the number of batch images, allowing users to flexibly control the number of output images.
TensorArt_Seed
This node is used to control the seed value and affect the randomness of image generation.
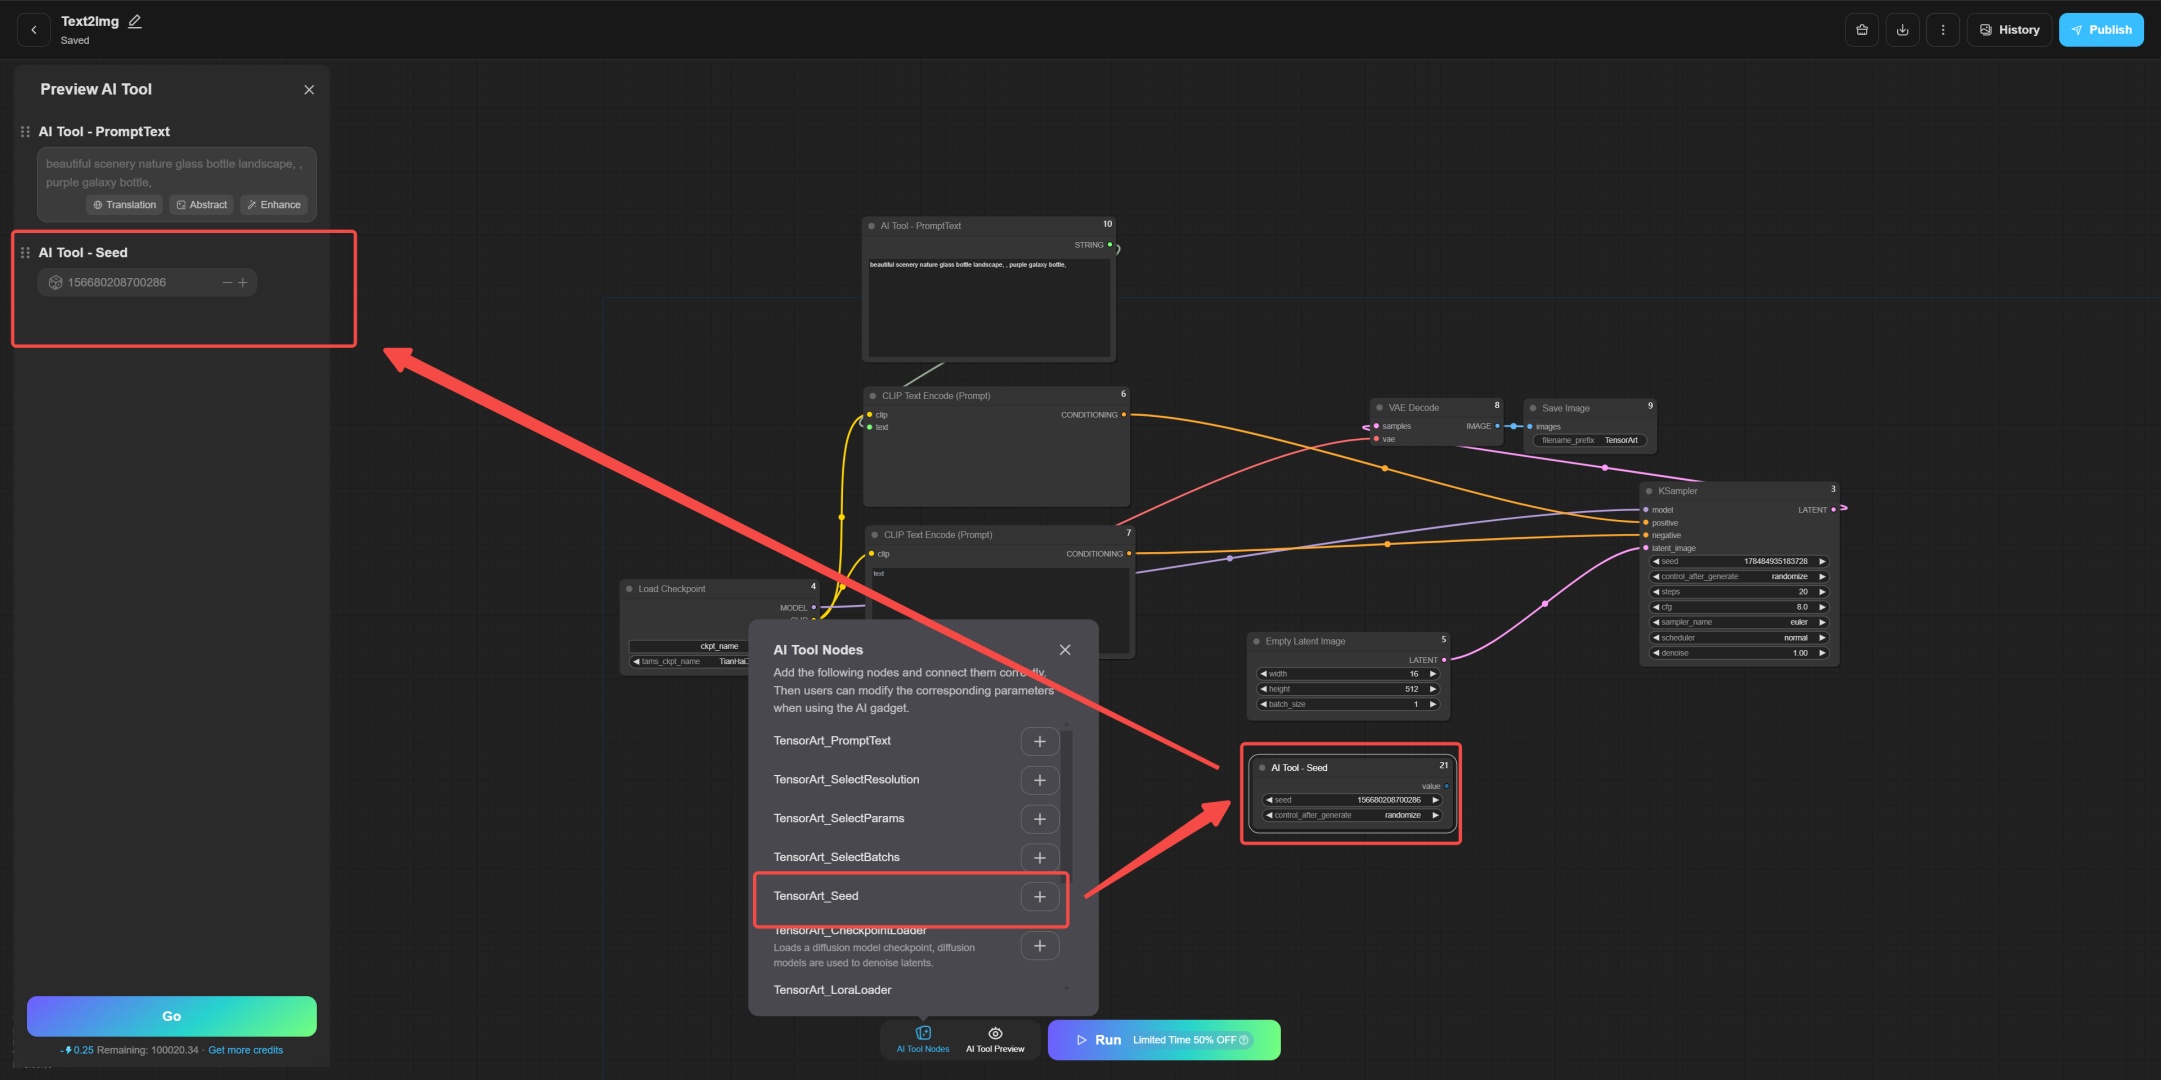
By connecting the seed from the loader to the input of this node, you can directly control the seed of the output.
TensorArt_CheckpointLoader & TensorArt_LoraLoader
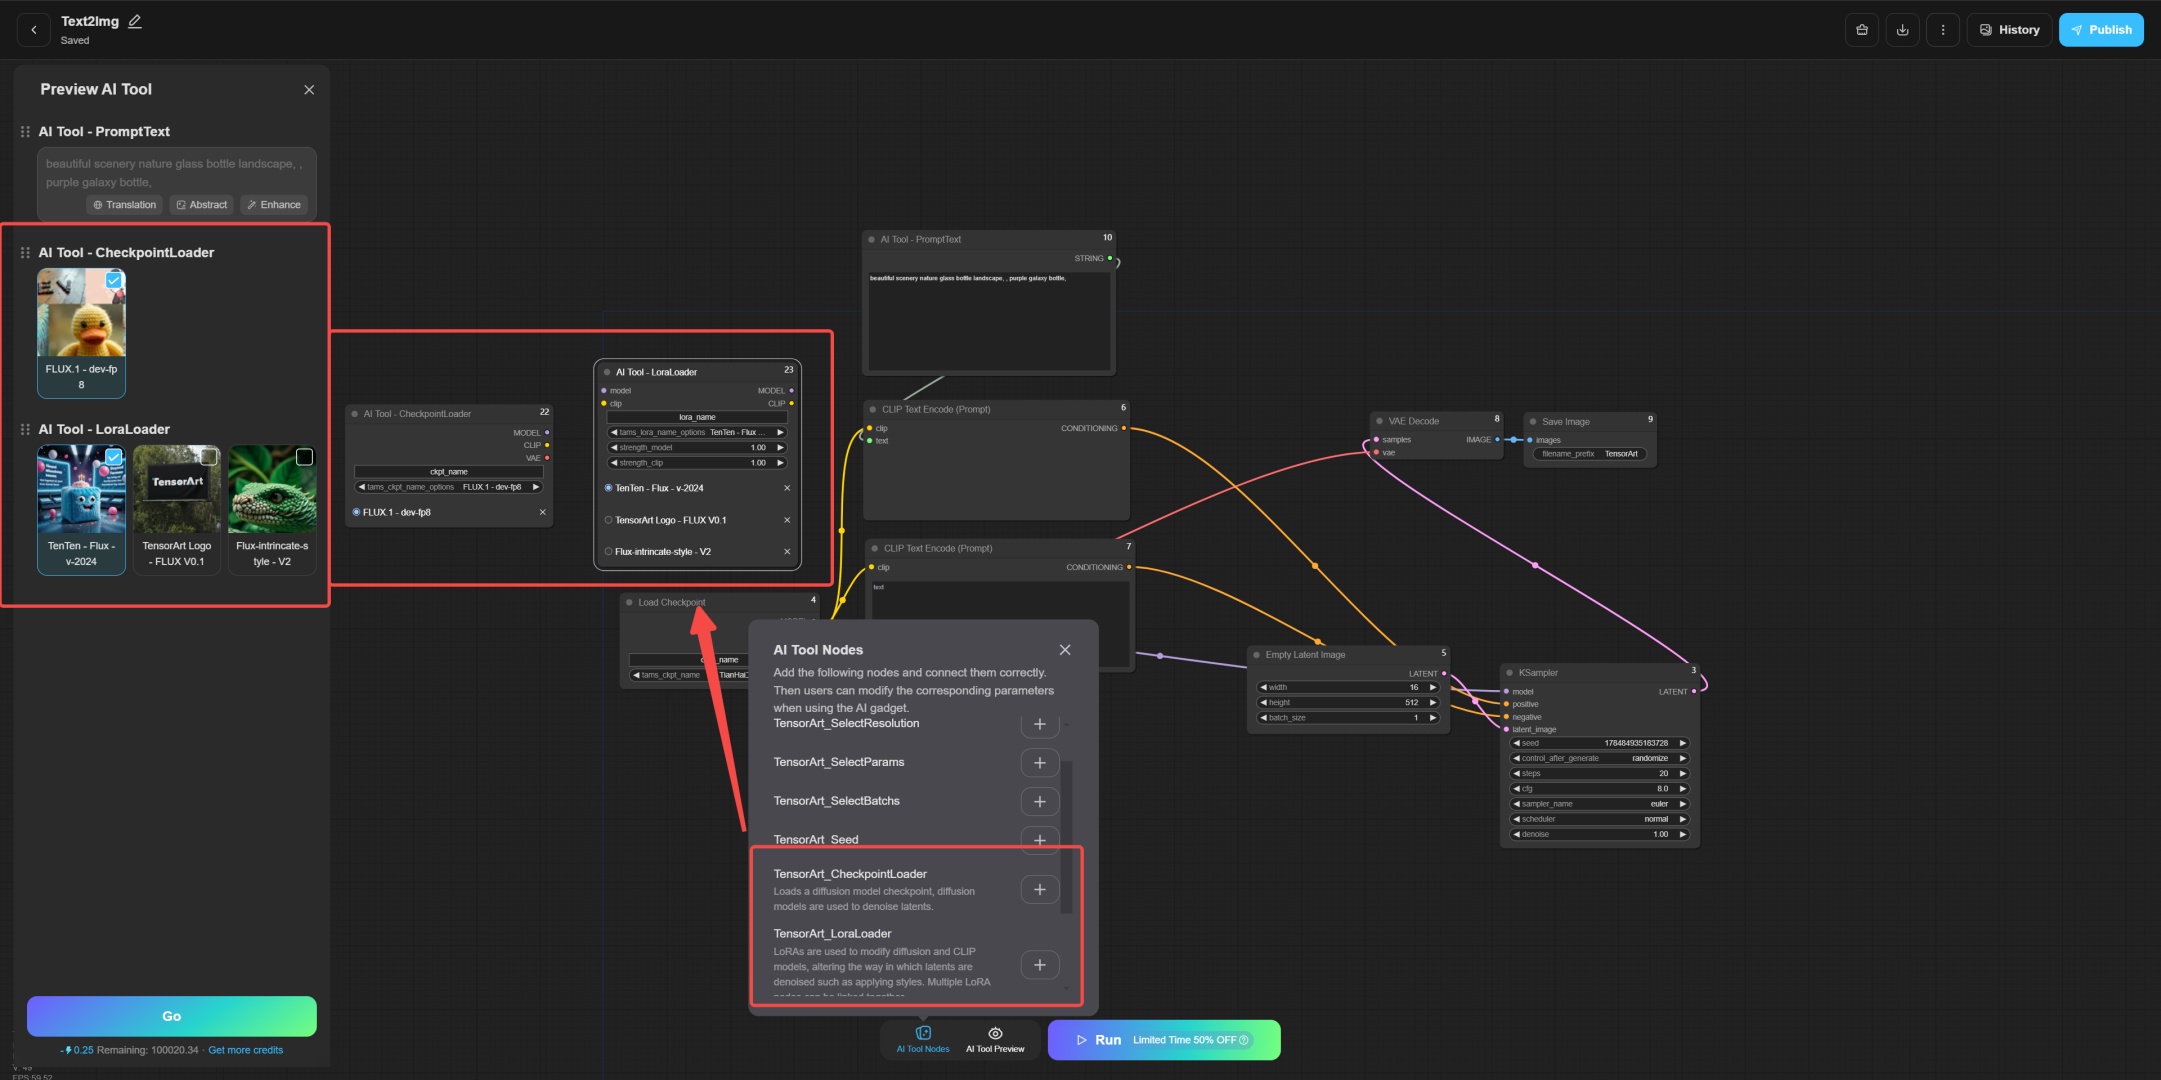
These two nodes are indispensable in the system, which are used to load and manage the checkpoints and LoRA models used in the training process.
The updated version allows users to customize the scope of use of the LoRA model according to their needs, making model selection more flexible.
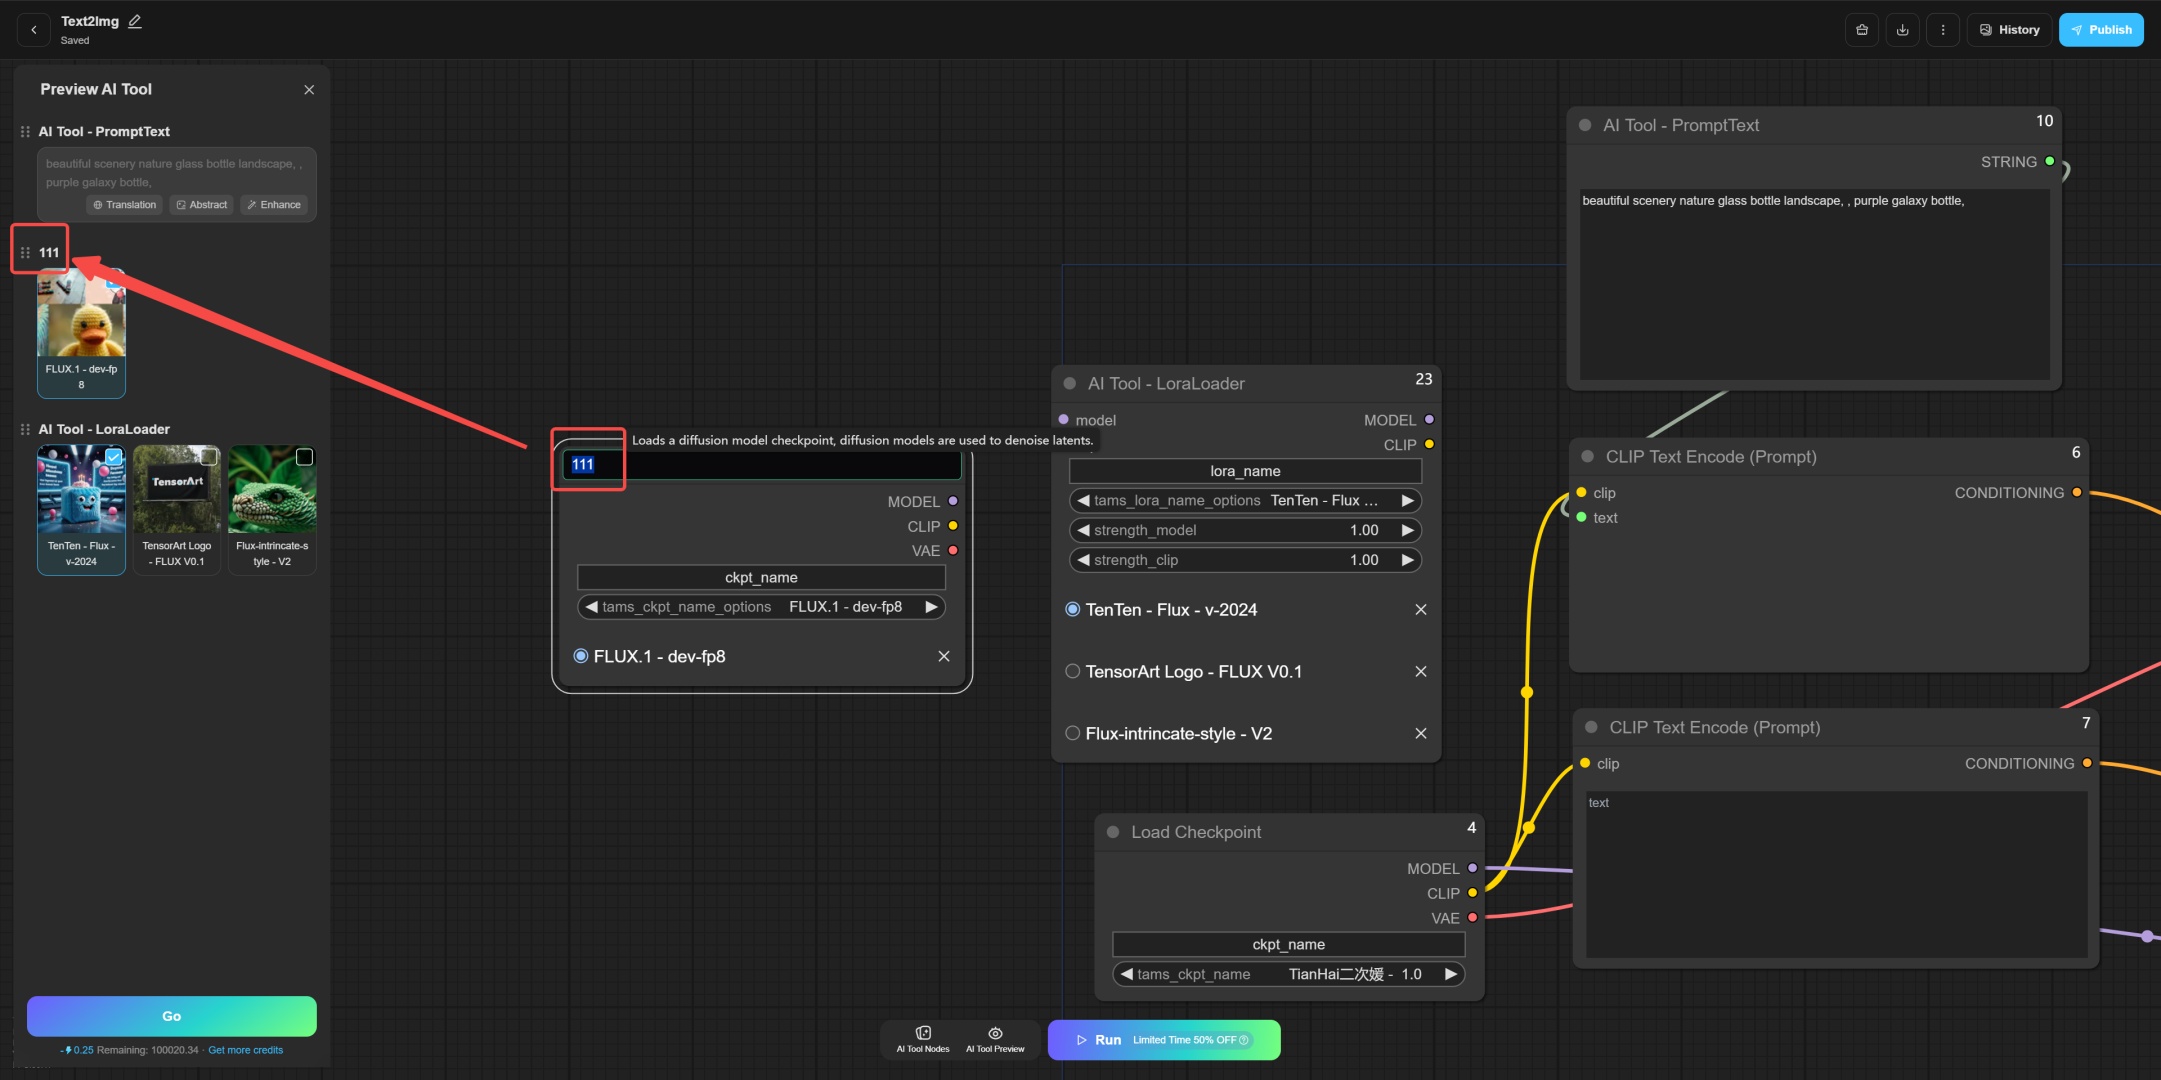
Users can double-click the top of the node to modify the exposure name.
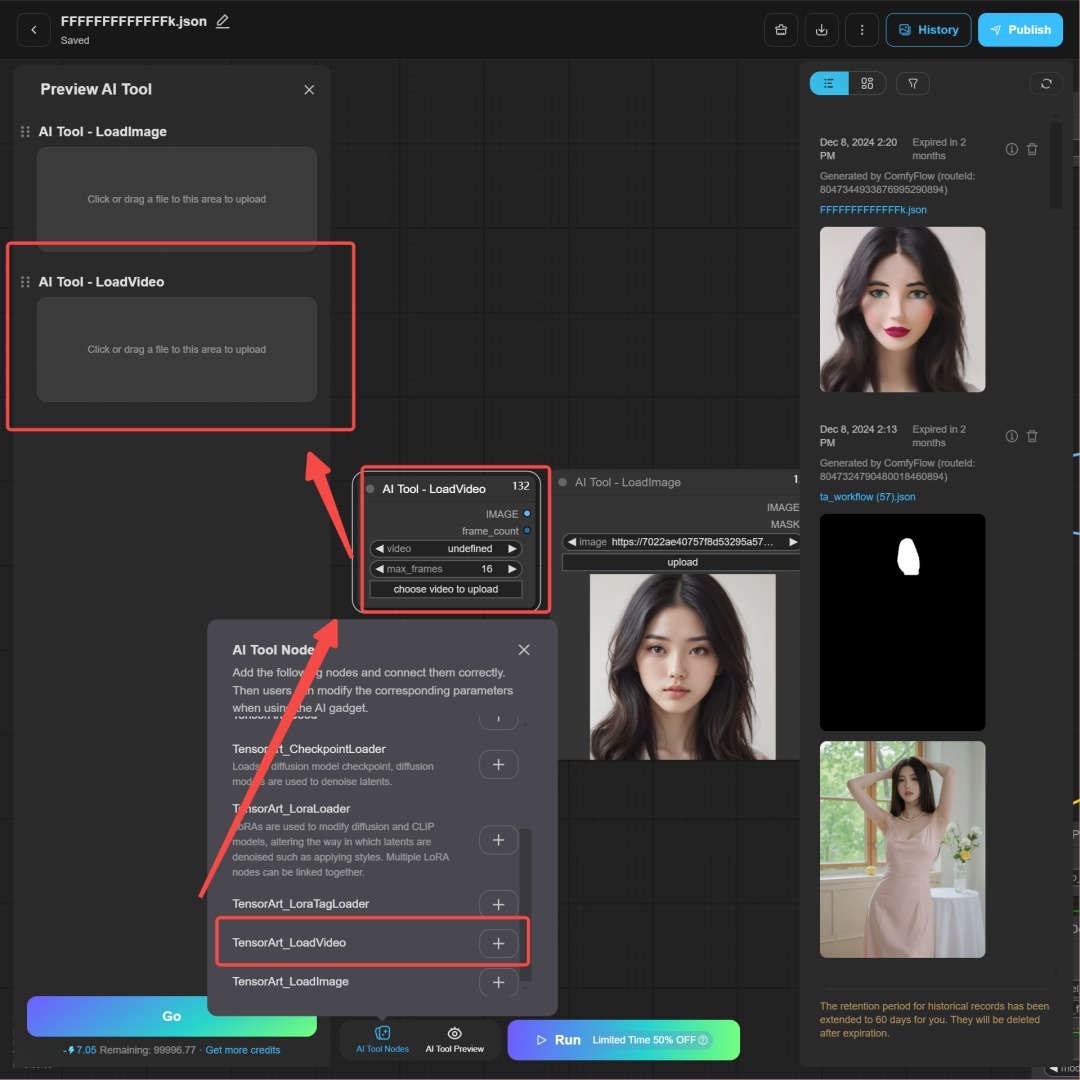
TensorArt_LoadVideo
This node is used to create video workflows. Its usage is the same as LoadImage.
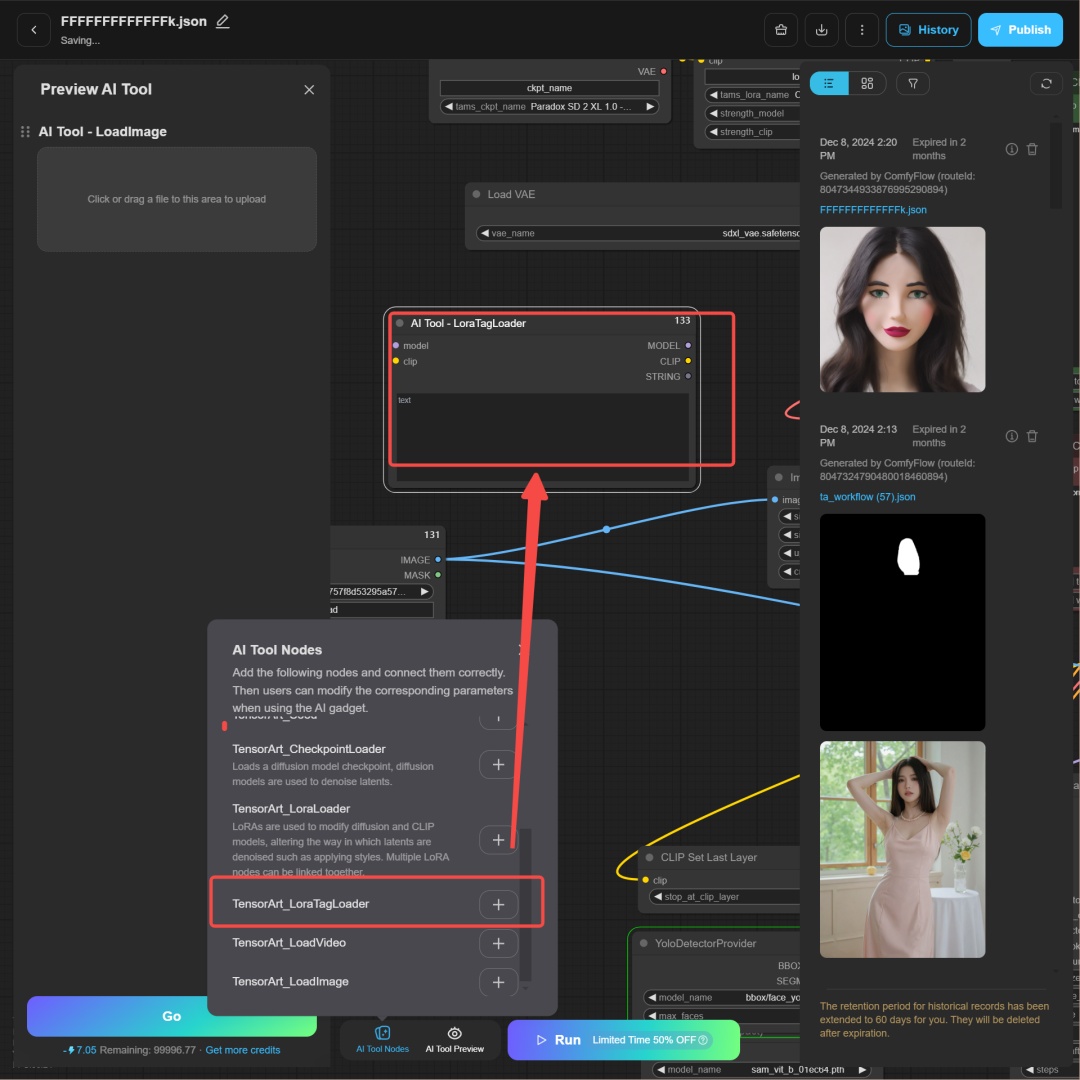
TensorArt_LoraTagLoader
Fill in the trigger word in this node to better use the effect of LoRA.
AI Tool Creation and Publishing Guide
Help and Consultation
We have pre-updated some AI tools and encourage creators to update AI tools. If you need assistance or encounter any issues, please consult the Comfy chatroom on Discord, our staff will be available to help.
Introduction
Many users encounter an issue where the toolbar disappears completely when modifying AI Tools. This is due to a comprehensive system upgrade. Today, we'll walk you through the correct process of creating and publishing AI ToolS, ensuring a smooth transition to the new workflow.
We created a video to help you better understand how to create and publish using the new AI Tool. You can watch it here: https://youtu.be/m_7LxSLTrDQ.
Text-to-Image
First, open the ComfyFlow ready to start creating a new workflow.
Click the Create Workflow button on the left to enter the new workflow interface. Here we take Text2Image (text to image) as an example to demonstrate the entire operation process.
After entering ComfyFlow, you will see a newly designed interface with multiple new buttons and function options at the bottom, bringing a more intuitive operation experience.
When creating a workflow, first click the AI Tool Node button in the green area.
Select TensorArt_PromptText and click the plus sign "+" to add the node.
After the new node is added, a preview area on the left will be displayed.
At this point, transfer the prompts in the original CLIP Text Encode (Prompt) node to the newly added TensorArt_PromptText node.
Next, right-click on the old CLIP Text Encode (Prompt) node, select Convert Widget to Input, and then click Convert Text to Input. This will convert the old prompts area into an input field.
Connect the output of the new node to the input of the old node to complete the node update operation.
After the update is complete, remember to run the workflow once on the Workflow page to ensure that the operation is correct.
Once everything is set, you can click the Publish button in the upper right corner.
Select Publish as AI Tool.
In the new version, we have optimized the original exposure settings, simplified the user's operation process, and improved the publishing experience.
Once everything is done, you can use your AI Tool.
Image to Image
Of course, the same process applies to image generation or other AI Tools.
After replacing, click AI Tool Preview to see the nodes exposed to everyone. Remember to run it once and then click Publish.
After the release, you can see the new version of the AI Tool interface.
Other Nodes
TensorArt_SelectResolution
This node allows the user to select the resolution of the image, eliminating the need to enter the resolution manually.
Simply modify the width and height of the Empty Latent Image as input and connect to the output of SelectResolution.
TensorArt_SelectParams
This node provides the function of adjusting parameters and supports setting low, medium, and high options:
- low = 0
- medium = 0.5
- high = 1
You can connect this node to any parameter input you need to adjust.
TensorArt_SelectBatchs
This node is used to select the number of batch images, allowing users to flexibly control the number of output images.
TensorArt_Seed
This node is used to control the seed value and affect the randomness of image generation.
By connecting the seed from the loader to the input of this node, you can directly control the seed of the output.
TensorArt_CheckpointLoader & TensorArt_LoraLoader
These two nodes are indispensable in the system, which are used to load and manage the checkpoints and LoRA models used in the training process.
The updated version allows users to customize the scope of use of the LoRA model according to their needs, making model selection more flexible.
Users can double-click the top of the node to modify the exposure name.
TensorArt_LoadVideo
This node is used to create video workflows. Its usage is the same as LoadImage.
TensorArt_LoraTagLoader
Fill in the trigger word in this node to better use the effect of LoRA.